Arc Raiders Boost
ARC Raiders Dolabra Shotgun & Canto SMG Guide
Everybody dismissed the Hullcracker after the nerf. They were wrong. This guide covers every ARC enemy matchup, crafting costs, blueprint quests.
 Admin
AdminThe Hullcracker ARC Raiders weapon is a pump-action 40mm grenade launcher with one very deliberate design choice: its explosive rounds only detonate on contact with ARC machines. Not on walls, not on the ground, and certainly not on that guy who keeps stealing your kills at the Bastion. Only on ARC. Which means you are carrying, aesthetically speaking, the most passive-aggressive weapon in the game: a gun that will happily ignore every human threat in the lobby while it patiently waits for a robot to walk into its feelings.
It weighs 7kg unmodded, which is the sort of number that should make you pause. However, equip the Loaded Arms perk and that drops to roughly 4kg: about the same as a Burletta. So the "it's too heavy" complaint is really just a complaint about not reading your skill tree. Welcome to the category of problems that are, in fact, user error.
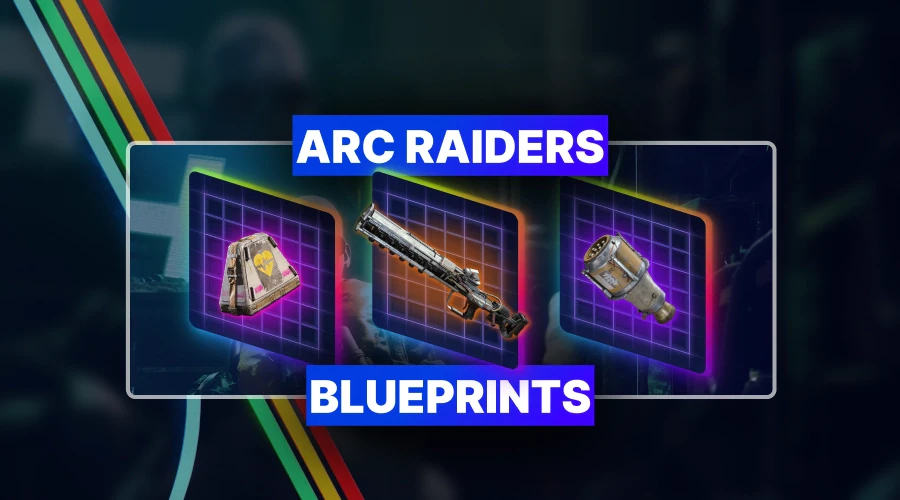
There are two ways to get your hands on the Hullcracker blueprint ARC Raiders. The first option is buying it from Tian Wen's gun shop for a cool 30,000 in-game currency: once per day, assuming you haven't already had it deleted from your existence by a fellow raider who spotted you running in the open against a Bombarder. The second, and significantly smarter, option is completing the quest "The Major's Footlocker" in the Tian Wen questline.
This quest rewards you with both the Hullcracker weapon blueprint AND the Launcher Ammo recipe in a single go: which is about as generous as this game gets, so appreciate it. The quest involves heading to the Ruby Apartments (northwest entrance), climbing to the second floor, and looting the marked item. Store it in a safe pocket unless you enjoy explaining to yourself why you're doing the whole thing again.
After extraction, go to your Storage and hit "Learn and Consume" on the blueprint. Not doing this is a special kind of frustration that nobody warned you about and everybody experiences exactly once.
Once learned, you'll craft it at Gunsmith Level 3. The recipe won't even appear in your workbench at lower levels: not as a greyed-out locked entry, not as a teaser, nothing. Just absence. The game doesn't explain this. Now you know. You need three Heavy Gun Parts, one Magnetic Accelerator, and one Exodus Module. The Exodus Module tends to be the limiting factor for early players. The Heavy Gun Parts you can strip off any weapon you're never going to use, which is most of them.
As an added insult-to-injury note: if you send your raider on Expedition, you lose your blueprints and repeat the whole process. The game is very consistent about this kind of thing.
One of the most common reasons people dismiss the best anti-ARC weapon ARC Raiders argument for the Hullcracker is cost. Let's put that to rest permanently with the kind of table that exists specifically to win arguments.
|
Resource |
Hullcracker Setup |
Deadline Setup |
Winner |
|
Gun Crafting Cost |
3× Heavy Gun Parts, 1× Magnetic Accelerator, 1× Exodus Module |
Higher material cost overall |
Hullcracker |
|
Ammo per Craft Batch |
6 rounds per batch |
Smaller batches |
Hullcracker |
|
Ammo Materials (avg kill) |
~4 Crude Explosives + 2 ARC Motion Cores |
More expensive per kill |
Hullcracker |
|
Shots to Kill Bastion/Bombarder |
~10 shots |
Comparable |
Tie |
|
Required Upgrade Level |
Level 1 is fine |
Benefits heavily from upgrades |
Hullcracker |
|
Resources Lost on Death |
Only if you lose the gun |
Ammo also lost |
Hullcracker |
|
PvP Utility |
Zero |
Some |
Deadline |
The Hullcracker at Level 1, with zero attachments, is already competitive. That is the kind of efficiency that the meta usually charges you a legendary blueprint to access. Farming Fireflies and Comets: which are one-shot or two-shot kills: means you will be recycling launcher ammo crafting ARC Raiders materials from the very things you are murdering. It is a closed loop of destruction that genuinely makes you feel competent, which is rare.
Let's walk through every ARC type with the clinical detachment of someone who has died to all of them multiple times and no longer finds it funny.
|
ARC Enemy |
Approx. Shots |
One-Shot Possible? |
Difficulty |
Notes |
|
Wasp |
1 |
Yes |
Trivial |
Just hit it anywhere. Congratulations. |
|
Snitch |
1 |
Yes (rotor) |
Easy |
Hit a rotor. Dying to a Snitch is embarrassing even with good gear. |
|
Sentinel |
1 |
Yes (avoid canister) |
Easy |
Hit anywhere except its canister. The canister counts as armored. Don't ask why. |
|
Fireball |
1 |
Yes (anywhere) |
Easy |
Completely fragile. The name is the only dangerous thing about it. |
|
Comet |
1–2 |
Yes (center shot) |
Easy |
Hit center mass. Side hits require a follow-up. Aim better. |
|
Firefly |
2 |
No |
Easy |
Weak to explosives. Hit the same spot twice. It will die. Repeatedly farm it for materials. |
|
Hornet |
1–2 |
Yes (thruster/side) |
Moderate |
One-shot via thruster hit. Otherwise two shots. It moves. This is not the game's fault. |
|
Bastion |
~10 |
No |
Moderate |
Aim top-center. Front sides and machine gun area are armored. Get high ground. Take cover. Be an adult. |
|
Bombarder |
~10 |
No |
Moderate |
Do NOT shoot straight down its middle: takes more shots. Aim off-center. Stay close or stay far; cover gets you killed here. |
|
Rocketeer |
8–10 (center) / 6 (thrusters) |
No |
Moderate |
Thruster shots are efficient but it moves erratically. Shoot center mass unless you are an optimist. |
|
Leaper |
6–7+ (effectively more) |
No |
Painful |
Worst matchup. Legs absorb shots. Lure to a doorframe to stop its movement. Or use a heavy ammo weapon and stop being a tourist. |
|
Shredder |
2–3 (face) |
Yes (face) |
Easy |
Hit the face. Finish it with any gun after one shot. Efficient. |
|
Vaporizer (new) |
~10–12 |
No |
Moderate |
Roughly Bastion-tier consumption. Moving targets inflate the count. Welcome to new content. |
|
Matriarch / Queen |
~4 (legs) |
Per phase |
Hard |
Viable. Four hits observed per engagement. Legs are a weak point. Stay calm, which is easier said than done when you are fighting the Queen. |
|
Surveyor |
Many |
No |
Don't bother |
Tanks nearly as much as a Bastion. Do not use the Hullcracker for this one. Use it and lose ammo you could have spent on something that matters. |
This trick is criminally undermentioned. After landing a shot on a Bastion ARC Raiders, glance left to see your XP gain. Getting 400–600 XP per shot means you are hitting unarmored sections. Anything less and you are tickling plating that will laugh at you until you run out of ammo. Adjust your aim. Try again. Avoid sulking.
Taking out a leg on a Bastion or Bombarder allows you to reposition to its backside: a significantly less armored zone. This can cut both your shot count and time to kill substantially. The catch: if you miss its canister during the follow-up, you have given it a reason to be annoyed at you specifically. Practice the clip before committing to it in a lobby where other people are watching.
When fighting a Bombarder, staying very close baits out its shockwave attack rather than its rocket volley. This is safer than it sounds. A wall breaking line of sight will block the shockwave regardless of distance. However, a wall behind you will turn the rocket splash into your personal problem. This is a spatial awareness test and the game is grading you.
The Hullcracker has a surprisingly usable hip fire. If getting elevation for a clean shot is not viable, jumping before firing still lands hits. This is not elegant. It works.
The most efficient use of the Hullcracker is also its most underrated: building a Hullcracker ammo farming loop by one-shotting Fireflies and Comets. Both drop ARC Motion Cores and Crude Explosives: the exact materials used to craft more Launcher Ammo. If you target these enemies deliberately, you can approach self-sufficiency in resources, which is the closest thing to being comfortable that this game permits.
There is no elegant way to put this. The Leaper is a miserable matchup for the Hullcracker. Six to seven direct hits theoretically, but its erratic movement and randomly-positioned legs mean your rounds will frequently connect with the wrong part and do dramatically less damage. If you are specifically hunting Leapers, bring a heavy ammo weapon and pretend this section of the guide does not exist.
Since the Hullcracker offers no self-defense against other players: a limitation that the game enforces with the kind of stubbornness usually reserved for tax law: you need to pair it with something that can handle Raiders. The simplest pairing remains a Burletta as your sidearm. It's cheap, it functions, and if someone tries to ambush you mid-Bastion fight, you have an answer that isn't your axe.
Do not bring the Hullcracker as your only weapon expecting to handle PvP engagements. You will do roughly the damage of making sustained eye contact with an enemy raider. Bring a real secondary. This is not negotiable.
The ARC Raiders beginner weapon guide conversation almost never includes the Hullcracker because the immediate reaction to its price tag and weight is dismissal. That's a mistake. The blueprint is unlocked through guaranteed quest rewards in the Tian Wen line: not from RNG drop tables that will specifically deny you whatever you want most for six consecutive expeditions. It requires no attachments to perform well at Level 1. And unlike the Deadline, Wolfpack, or upgraded Renegade builds, it doesn't demand a stack of resources that newer players simply don't have.
You also unlock the Burletta ARC Raiders sidearm on the same Tian Wen questline: which pairs beautifully with the Hullcracker and costs you nothing extra in terms of time. For a player who has just started or is coming back after an Expedition reset, this combination covers ARC combat, self-defense, and resource efficiency in a way that feels almost like the game is being kind to you. Do not trust that feeling. The game is not being kind. But the loadout does work.
• Fast blueprint farming service
• Secure targeted item delivery
• Guaranteed high-tier recipes
The Hullcracker attachments ARC Raiders selection is limited to Underbarrel and Stock slots. There is no muzzle option, no suppressor, and no magazine mod: which is the game's way of telling you this weapon communicates exclusively through volume. Stock mods improve recoil control and handling, making follow-up shots easier to land on moving targets. Underbarrel mods provide stability improvements.
The recommended approach: use Common or Uncommon rarity attachments without hesitation, as they carry no downsides. Rare and Epic attachments introduce trade-offs: increased wear or handling penalties: which may not be worth the marginal gain on a weapon that already performs well unmodded. Since every attachment you bring topside is an attachment you can lose, calibrate your risk tolerance accordingly.
The Hullcracker can be upgraded from Level I through Level IV. Early levels improve reload speed and handling. Later levels address recoil control, durability, and armor damage efficiency. At Level IV it handles noticeably better in sustained engagements. The catch: upgrades require Advanced Mechanical Components alongside Heavy Gun Parts, which starts to sting the resource pool.
The reasonable answer for most players: run it at Level I until you are farming XP at a rate that justifies the upgrade investment. The Level I gun kills a Bastion in ~10 shots. The Level IV gun kills a Bastion in fewer shots with better reliability. Whether that difference matters enough to spend the materials is a question only your workbench spreadsheet can answer.

• Fast ARC Raiders crafting upgrade
• Maximize crafting efficiency
• Secure, manual service
• Fast ARC Raiders Dam clears
• Guaranteed loot and resources
• Secure professional raid boosting

• Fast Buried City completion
• Guaranteed loot and rewards
• Secure professional raid carry
• Fast blueprint farming service
• Secure targeted item delivery
• Guaranteed high-tier recipes
Everybody dismissed the Hullcracker after the nerf. They were wrong. This guide covers every ARC enemy matchup, crafting costs, blueprint quests.
Everybody dismissed the Hullcracker after the nerf. They were wrong. This guide covers every ARC enemy matchup, crafting costs, blueprint quests.
Everybody dismissed the Hullcracker after the nerf. They were wrong. This guide covers every ARC enemy matchup, crafting costs, blueprint quests.

Everybody dismissed the Hullcracker after the nerf. They were wrong. This guide covers every ARC enemy matchup, crafting costs, blueprint quests.
Everybody dismissed the Hullcracker after the nerf. They were wrong. This guide covers every ARC enemy matchup, crafting costs, blueprint quests.

Everybody dismissed the Hullcracker after the nerf. They were wrong. This guide covers every ARC enemy matchup, crafting costs, blueprint quests.
Everybody dismissed the Hullcracker after the nerf. They were wrong. This guide covers every ARC enemy matchup, crafting costs, blueprint quests.
Everybody dismissed the Hullcracker after the nerf. They were wrong. This guide covers every ARC enemy matchup, crafting costs, blueprint quests.
Everybody dismissed the Hullcracker after the nerf. They were wrong. This guide covers every ARC enemy matchup, crafting costs, blueprint quests.
Everybody dismissed the Hullcracker after the nerf. They were wrong. This guide covers every ARC enemy matchup, crafting costs, blueprint quests.
Everybody dismissed the Hullcracker after the nerf. They were wrong. This guide covers every ARC enemy matchup, crafting costs, blueprint quests.
Everybody dismissed the Hullcracker after the nerf. They were wrong. This guide covers every ARC enemy matchup, crafting costs, blueprint quests.
Everybody dismissed the Hullcracker after the nerf. They were wrong. This guide covers every ARC enemy matchup, crafting costs, blueprint quests.

Everybody dismissed the Hullcracker after the nerf. They were wrong. This guide covers every ARC enemy matchup, crafting costs, blueprint quests.
Everybody dismissed the Hullcracker after the nerf. They were wrong. This guide covers every ARC enemy matchup, crafting costs, blueprint quests.
Everybody dismissed the Hullcracker after the nerf. They were wrong. This guide covers every ARC enemy matchup, crafting costs, blueprint quests.

No. Its rounds only detonate on ARC machines. Against Raiders it does negligible damage. Bring a real secondary weapon.
Complete "The Major's Footlocker" quest in Tian Wen's questline. Both weapon and ammo blueprints are guaranteed rewards.
Around 10 shots aimed at the top-center. Hitting armored plates increases the count. Watch your XP readout per shot.
No. Level 1 with zero attachments performs well against every major ARC enemy in the game. Use Common mods if you have them.
The Leaper, by a wide margin. Its movement and leg hit detection drain ammo fast. Use a heavy ammo weapon instead.

GTA 6, new seasons, major updates — get ready to dominate from day one