


WoW TBC Anniversary Boost
TBC Classic Anniversary Phase 2 Preparation Guide
Phase 2 is here. Tempest Keep: The Eye is open. Four bosses, one legendary mount, and a Kael'thas fight that will test every raid roster. Full guide i
The Eye is one of the two Tier 5 raids released in Phase 2 alongside Serpentshrine Cavern, and together they form the complete Tier 5 token set. The raid has no fixed boss order requirement: with one exception so glaring it barely deserves a footnote. You may freely choose to kill Al'ar, Void Reaver, and High Astromancer Solarian in any order you find most conducive to your raid's collective mental health. Kael'thas himself, naturally, waits until you have demonstrated sufficient competence by dealing with the other three: and then promptly makes you regret every life choice that led you to this moment. TBC Classic Anniversary progression on The Eye stands at the pinnacle of Phase 2 raiding, and the loot it offers remains best-in-slot for the entirety of the tier.
|
Feature |
Details |
|
Raid Size |
25 Players |
|
Difficulty |
Normal (One difficulty. Suffer equally.) |
|
Phase |
TBC Anniversary Phase 2 |
|
Gear Tier |
Tier 5 (ilvl 128-141) |
|
Location |
Netherstorm, Outland |
|
Lockout |
7 Days (Weekly) |
|
Bosses |
4 (Plus your dignity) |
|
Coveted Drop |
Ashes of Al'ar |
|
Note on Boss Order |
Typically cleared: Al'ar → Void Reaver → High Astromancer Solarian → Kael'thas Sunstrider |
The three opening bosses: Al'ar, Void Reaver, and High Astromancer Solarian: can be killed in any sequence. Most guilds kill Void Reaver first because it is the simplest encounter in the building, drops shoulder tokens, and functions primarily as a 10-minute DPS check to confirm your raid is not entirely composed of people who stand in things. Al'ar is typically second. Solarian third. Kael'thas last, as decreed by both encounter design and the laws of narrative inevitability.
P.S. If you need Discount for any of Tempest Keep services... Use the CRINGEBLOG promocode (it works for any 1 offer at our site)
Before your raid of 25 magnificent individuals can even look at the inside of Tempest Keep, every single one of them needs to complete an attunement chain so sprawling, so punishing, and so enthusiastically designed to waste your time that it deserves its own psychological preparedness briefing. The process begins in Shadowmoon Valley and ends with you murdering a 25-man raid boss just for the right to enter a different 25-man raid. Blizzard, demonstrating their signature awareness of irony, eventually removed the key requirement in later patches and replaced it with the title Champion of the Naaru. In TBC Classic Anniversary, the attunement chain is account-bound, meaning you only have to do it once per account: a mercy so small it barely registers, but a mercy nonetheless.
The attunement chain for The Tempest Key begins with completing the Cipher of Damnation quest chain in Shadowmoon Valley. This is the prerequisite without which Khadgar simply will not talk to you. Once that chain is complete, you will receive a letter in the mail from Khadgar inviting you to Shattrath City: because apparently the Prophet of the Naaru communicates through the postal service: and the real suffering begins. The following steps outline exactly what is expected of you before you are deemed worthy of paying Kael'thas a visit.
Heroic Reputation Requirements at a Glance
You will need Honored reputation with Honor Hold / Thrallmar, Cenarion Expedition, Lower City, and The Sha'tar to access the Heroic dungeons required for attunement. Start grinding reputation in Phase 1 if you have not already. Your guild will not wait for you.
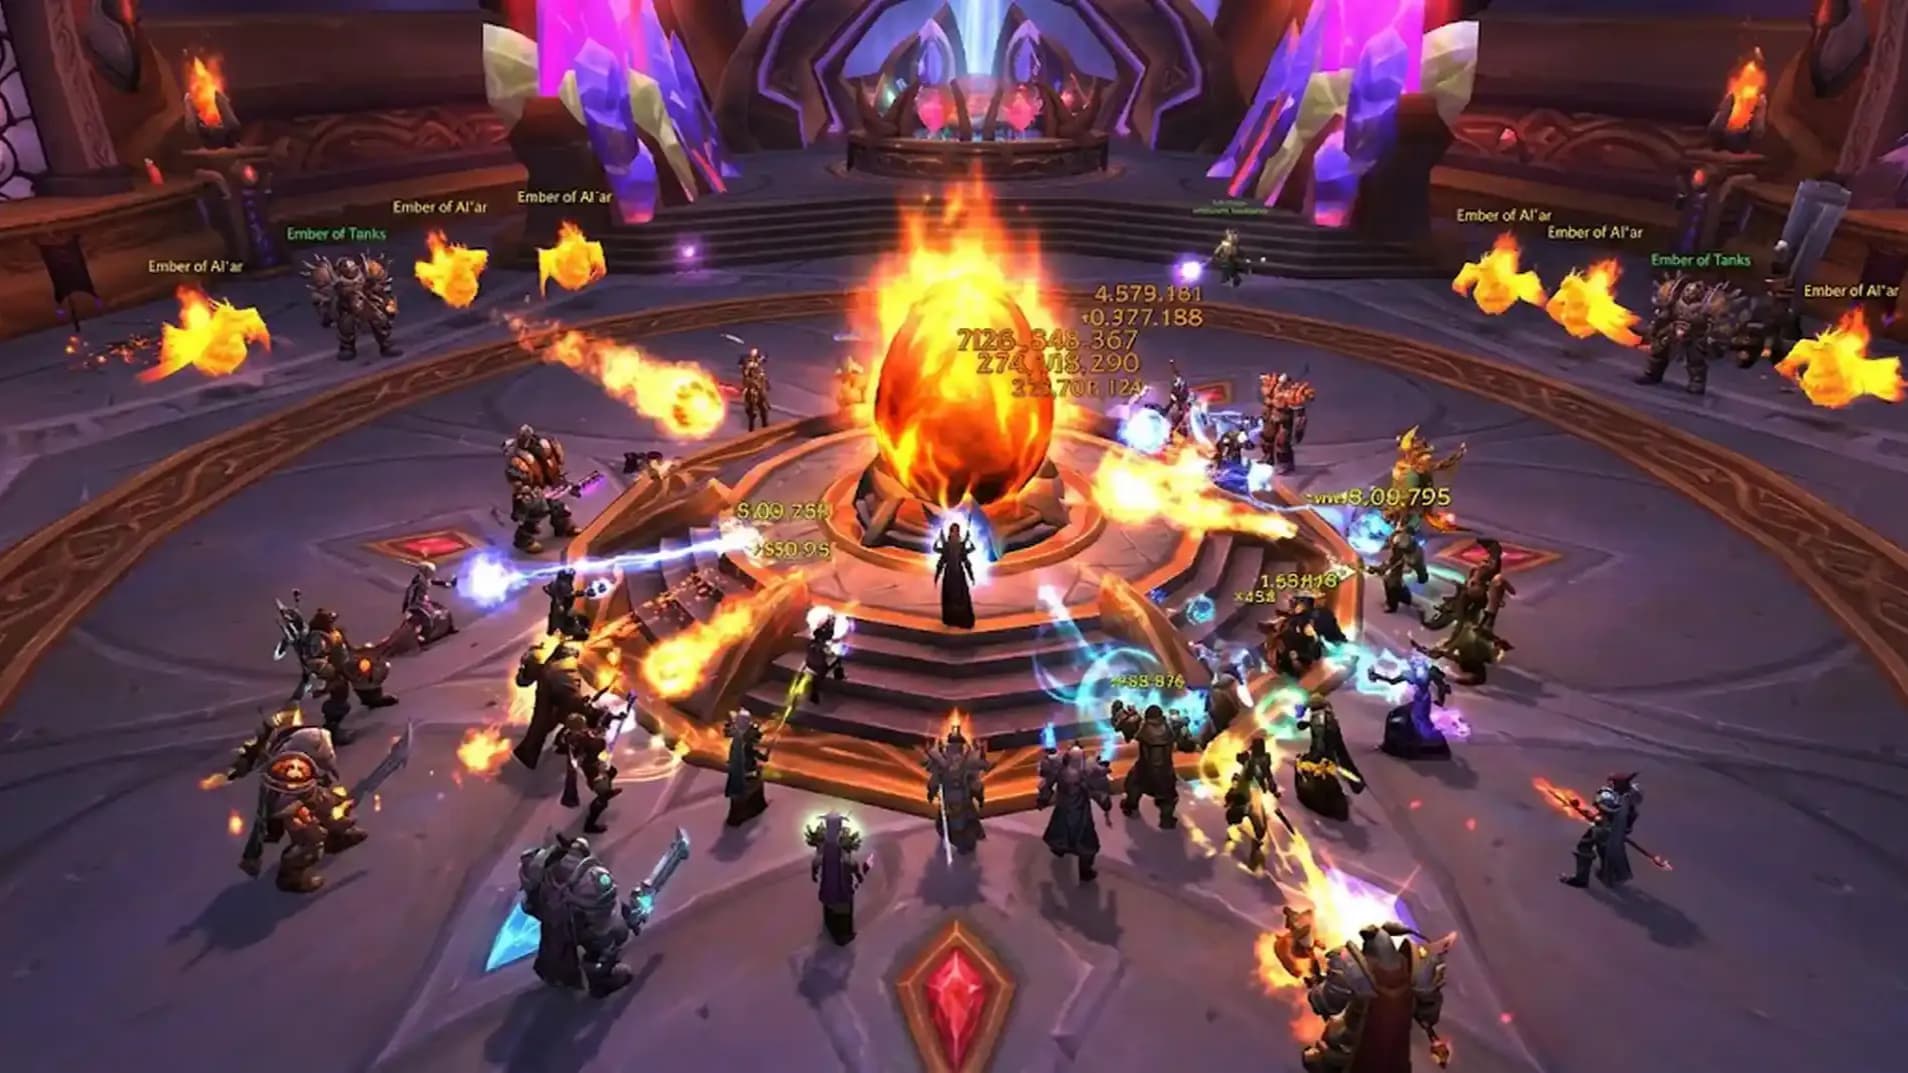
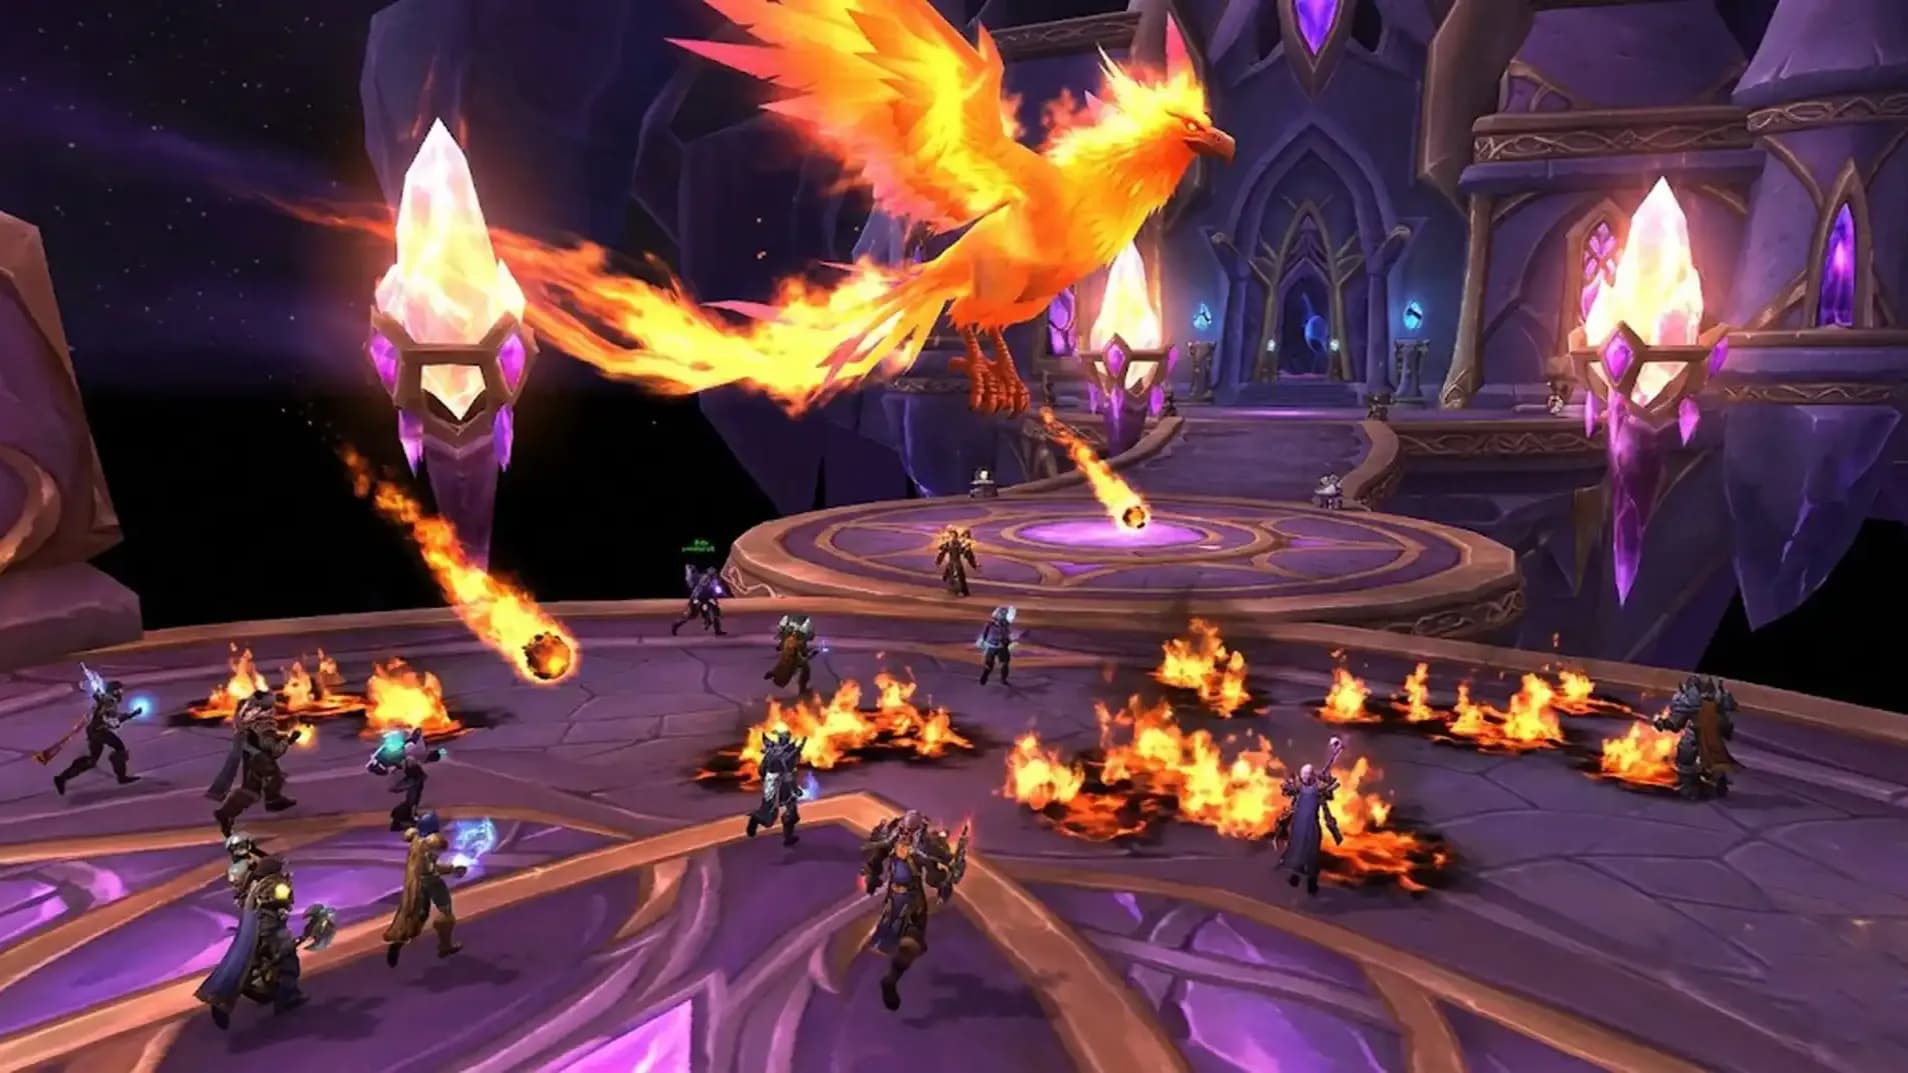
Al'ar is Kael'thas Sunstrider's personal phoenix: a living, flying fire sculpture that constitutes the single most spectacular-looking encounter in Phase 2 and the single most unreliable drop table in TBC Classic Anniversary. The famous Ashes of Al'ar mount drops from Kael'thas, not from Al'ar itself, which is the kind of cruel misdirection that deserves its own Blizzard design credit. Al'ar itself drops a chest token. That is the extent of your gratitude from this creature.
The encounter unfolds across two phases separated by Al'ar's resurrection mechanic. In Phase 1, Al'ar circles the room between five perches arranged around the upper level. The boss cannot be directly tanked; instead, it swoops between platforms and periodically dive-bombs a player for substantial fire damage. In Phase 2, Al'ar lands in the center of the room and the encounter transforms into a conventional positioning nightmare with adds, fire, and an enrage timer that has genuinely ended friendships. Every time Al'ar dies during Phase 1 perch cycles, it resurrects from an egg. This is thematic. It is also exhausting to explain to new raiders at 11:30 PM on a Thursday.
Al'ar flies between five perches on the upper platform in a fixed rotation. Assign dedicated off-tanks to each perch platform ahead of time so that when Al'ar arrives, a tank is ready to pick it up immediately. Failing to taunt Al'ar on arrival causes it to dive onto a random raid member, which will likely kill them, which will likely cause the group to explode in the chat in ways that are professionally inadvisable. Keep ranged DPS and healers on the lower platform. The boss periodically drops meteor bombs on the floor that leave fire patches. Do not stand in the fire patches. This is a recurring theme in this entire raid.
At 35% health, Al'ar lands in the center and transitions to Phase 2. It will immediately begin summoning Ember of Al'ar adds that must be picked up by off-tanks and burned down before they detonate near the raid. Al'ar will also cast its Rebirth mechanic: upon hitting zero health, it will appear to die, spawn a Phoenix Egg, and resurrect after a brief window. Your raid must deal approximately 70,000 damage to the egg within 15 seconds to prevent the resurrection. Failure means a fully-healed Al'ar, a replenished enrage timer starting position, and a raid leader reconsidering their life choices in real time.
|
Ability |
Description |
Response |
|
Dive Bomb |
Swoops on a random raid member, dealing high fire damage in an 8-yard area. |
Spread out. Nobody group-hugs in a fire raid. |
|
Flame Buffet |
Stacking fire damage debuff on the current tank. Requires tank swaps to manage stacks. |
Swap tanks at 5-6 stacks. Have your off-tanks actually pay attention. |
|
Quill Volley (Phase 2) |
Rapid fire AoE hits all raid members. Unavoidable burst damage spike. |
Raid cooldowns here. This is when you find out if your healers are actually watching. |
|
Rebirth / Phoenix Egg |
Al'ar "dies," drops an egg, and resurrects if egg survives 15 seconds. |
Burn the egg with every ranged DPS you have. 70,000 HP in 15 seconds. Go. |
|
Ember of Al'ar |
Small fire adds that spawn in Phase 2, detonate on melee range if not killed. |
Off-tank kites, ranged burns. Do not let these reach the healers. |
Al'ar cannot be taunted in the conventional sense during perch transitions. Every off-tank must be pre-positioned at their designated perch before Al'ar arrives. A missed pickup results in Al'ar targeting a random raid member and dealing damage that is rarely survivable without personal cooldowns. Assign perch coverage before the pull. Enforce it. Repeat yourself as many times as necessary. Then repeat it again.
Void Reaver is a Fel Reaver that Kael'thas has installed as a guardian inside The Eye, presumably because the smaller security options were insufficiently horrifying. The encounter is the most mechanically approachable fight in the entire raid: which is the TBC equivalent of saying it is the most gently lethal thing trying to kill you in this particular building. The raid community's affectionate nickname for Void Reaver is "Loot Reaver," named for its habit of generously distributing shoulder tier tokens and quality gear to anyone capable of maintaining spread positioning for ten consecutive minutes. That is, charitably, a lower bar than it sounds.
The entire fight revolves around two mechanics: Pounding and Arcane Orb. Pounding is a channeled AoE around the boss's feet that deals arcane damage per second to anyone within 18 yards. Arcane Orbs are hurled at random non-tank raid members and explode in a moderate radius. The combination of these two mechanics demands that your ranged players maintain at least 20 yards of spacing between each other at all times while your melee group either eats the Pounding damage or steps out briefly, recovers, and returns. Void Reaver also has a knockback that reduces current threat by a significant flat amount, necessitating a three-tank rotation to keep aggro stable. The boss is not tauntable, which makes that tank rotation a genuine test of situational awareness rather than a button macro.
The 10-minute enrage timer is the invisible third mechanic of this encounter. Void Reaver hits very hard, does not die on its own, and will eventually enter a berserk state that ends the raid with the finality of a punctuation mark. Your raid needs sufficient DPS to kill this boss before it has the opportunity to demonstrate what happens after 10 minutes. The required output is not extreme by Tier 5 standards, but guilds that have not itemized their group will find the clock a persuasive argument for coming to raid with better enchants.
|
Ability |
Damage |
Mechanic |
Response |
|
Pounding |
~1,350-2,250 arcane/sec (3-second channel) |
18-yard AoE around boss. 12-second cooldown. |
Melee heals through it or steps out. Rogues use Cloak of Shadows. |
|
Arcane Orb |
7,000+ arcane with silence |
Targets random raid member, slow-moving projectile. |
20+ yard spread. Run away from orb. Do not run toward melee group. |
|
Knockback |
Moderate physical |
Knocks current tank back, drops ~10-12k threat. |
Three-tank rotation. Next tank picks up immediately. No panic, just rotation. |
|
Enrage (10 min) |
Massive damage increase |
Hard enrage. Wipe. |
Kill the boss before 10 minutes. This is the entire instruction. |
Because Void Reaver is not tauntable, all three tanks need to be positioned behind the boss and ready to immediately take aggro after each Knockback. Misdirects from Hunters dramatically stabilize the threat cycle. Shadow Priests should suppress Vampiric Embrace to avoid healing-based threat interfering with the rotation. The fight rewards preparation more than reflexes.
Blood Elf Mage: Tempest Keep's resident void convert: Phase-swapping addiction enthusiast
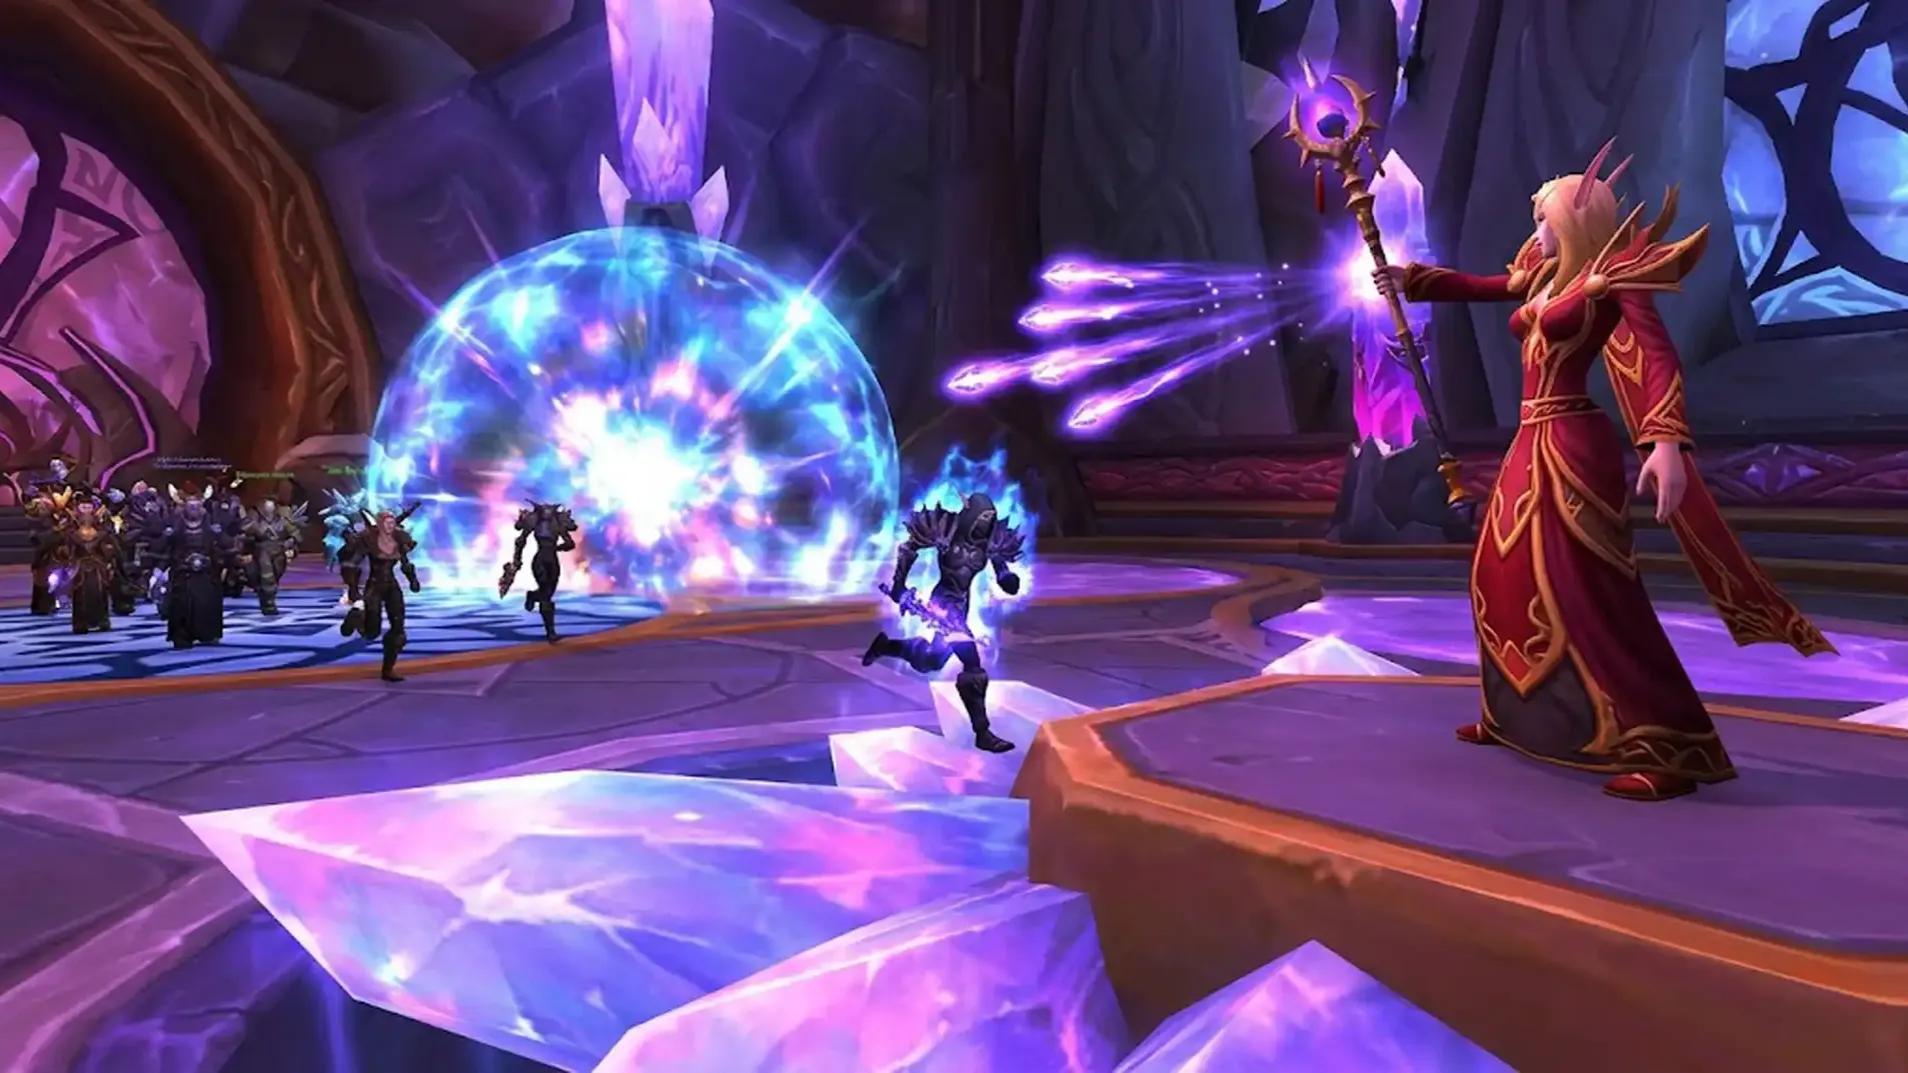
High Astromancer Solarian is a blood elf mage who has made the professionally questionable decision to supplement her arcane studies with a deep personal commitment to the void. The encounter is a three-phase cycle that requires your raid to manage an add phase, a void transformation phase, and the continuous distribution of a proximity bomb debuff that will, if ignored, convert a live raid member into a small explosion. She is considered the most technically demanding of the three pre-Kael'thas bosses in The Eye, primarily because her mechanics punish complacency with spectacular immediacy.
Solarian's primary Phase 1 mechanic is Wrath of the Astromancer: a debuff placed on a random raid member that deals damage to that player and, after a few seconds, explodes in a 10-yard radius dealing arcane damage to all nearby players. The afflicted player must immediately run away from the group and stand alone to absorb the explosion solo. This is, in theory, simple. In practice, it is the single mechanic most responsible for killing otherwise healthy raids on this encounter, because the afflicted player occasionally forgets to run, or runs in the wrong direction, or runs directly through the healers while yelling that it is fine. It is never fine.
The encounter cycles between three phases. Phase 1 has Solarian standing at the center of the room casting Arcane Missiles, Wrath of the Astromancer, and Blinding Light (a disorient on melee). At approximately 20% health, she teleports and spawns a wave of Solarium Agents and Solarium Priests as adds. These must be killed quickly; Priests will attempt to heal each other and Solarian on her return. Once the add wave is defeated, Phase 3 begins: Solarian returns in her Void Form: a tentacled void creature variant: with a full health bar reset, dramatically increased damage output, and the undisguised conviction that your raid has not yet suffered enough. She is not wrong.
|
Phase |
Key Abilities |
Priority |
|
Phase 1 |
Wrath of the Astromancer, Arcane Missiles, Blinding Light |
Designated runner for bomb debuff. Melee positioned to dodge disorient. |
|
Phase 2: Adds |
Solarium Priests (heals), Solarium Agents (DPS adds) |
Priests first, always. Interrupt heals. Kill all adds before Solarian returns. |
|
Phase 3: Void Form |
Arcane Missiles (buffed), Wrath of the Astromancer (continues), Void Bolt |
Full DPS burn. Healers prioritize throughput. Bomb runners still run. Do not stop running. |
Pre-assign a direction for Wrath of the Astromancer runners before the pull. The default is "away from the raid and away from the healers." The afflicted player has approximately 4-5 seconds before the explosion. Announce it in your DBM or BigWigs alerts. Every member of your raid should be watching for the icon on their own frame. One complacent player standing in the raid during detonation can chain-kill three people, which is exactly the kind of achievement that earns nobody any loot.

Lord of the Blood Elves: 6 million HP (deal 15-17 million total): Patron saint of wipes at the 10-minute mark
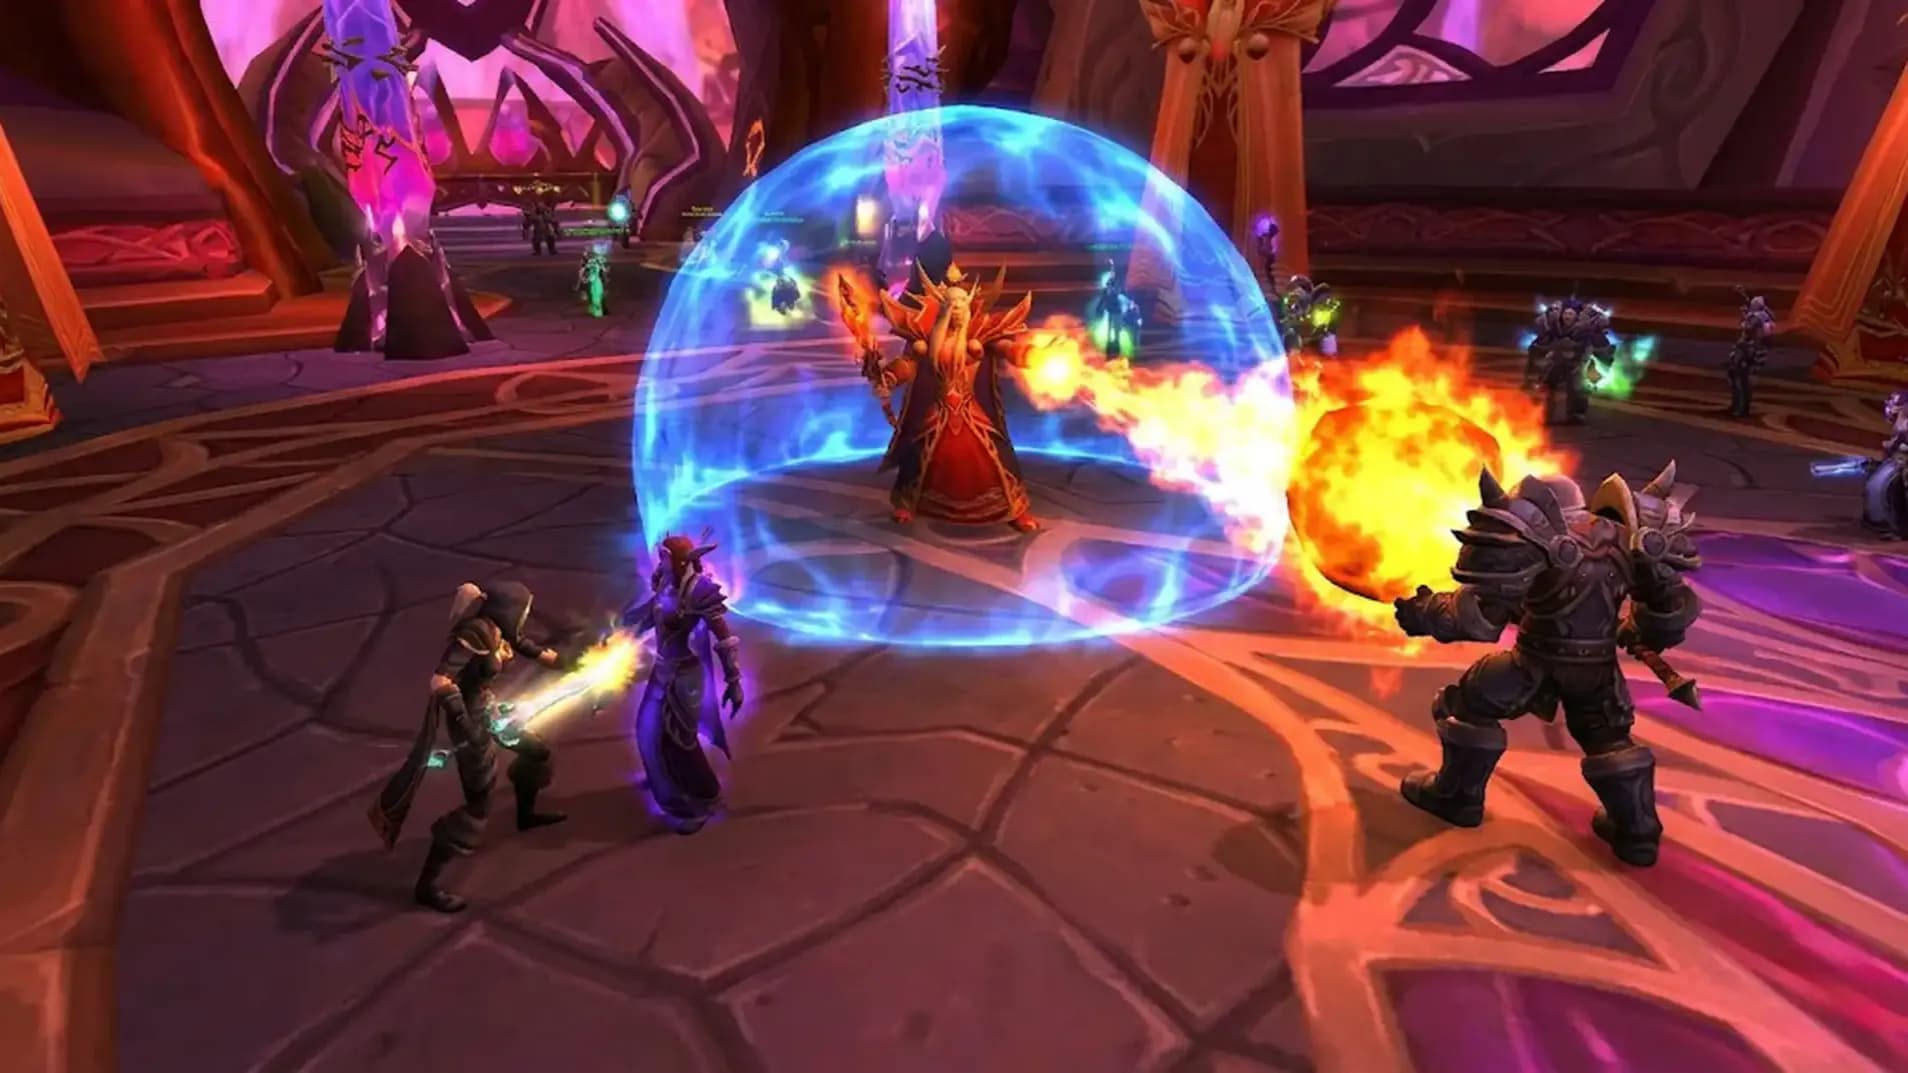
Kael'thas Sunstrider is the final boss of The Eye, the lord of the blood elves, the inheritor of the Sunwell's legacy, and the most mechanically complex encounter your 25-player raid will face in Phase 2 of WoW TBC Classic Anniversary. He has approximately 6 million health points, though in practice your raid will deal somewhere between 15 and 17 million total damage across the encounter because of the add phases and his Shock Barrier. He has five phases, two intermissions, four advisors, seven legendary weapons that you must equip and wield during the fight, and an absolutely limitless supply of dramatic monologue. Many veteran guilds consider this encounter one of the finest fight designs in The Burning Crusade. They also have therapists.
The encounter is structured as a five-act play in which your raid progressively kills Kael'thas's four advisors, fights a set of legendary weapons that have become sentient and combative, then defeats the advisors again at full health after they are resurrected, equips and wields seven legendary weapons simultaneously against Kael'thas personally, defeats the Sun King himself, and then survives a final desperate phase during which Kael'thas hovers in the air and attempts to erase your raid from a position of gravitational irrelevance. This is a long fight. Bring food, bring consumables, and pre-assign every role before the pull, because the amount of in-fight explanation required for first-timers during Phase 3 is a reliable predictor of wipe count.
|
Phase |
Critical Mechanic |
Assignment Required |
|
P1 |
Thaladred Gaze: Kite. Capernian Conflagration: Spread. |
Thaladred kiter assigned pre-pull. Advisor kill locations marked. |
|
P2 |
7 Legendary Weapons: Kill, loot, equip. |
Every weapon pre-assigned. Staff of Disintegration on casters. Infinity Blade on rogues/warriors. |
|
P3 |
All 4 Advisors Full HP: Simultaneously. |
Heroism / Bloodlust. Pre-positioned advisors from P1. This is where guilds die. |
|
P4 |
Mind Control: Infinity Blade proc. Shock Barrier: Dispel immediately. |
Dispel team on Shock Barrier. Infinity Blade carriers use Hamstring / Wing Clip spam. |
|
P5 |
Gravity Lapse: Float, spread, avoid Nether Vapors. |
Maximum spread during lapse. Healers coordinate. Do not touch black clouds. |

Kael'thas stands at the top of the stairs and taunts your raid while his four advisors: Thaladred the Darkener, Master Engineer Telonicus, Grand Astromancer Capernian, and Lord Sanguinar: engage your raid two at a time. Thaladred uses a Gaze ability that fixes aggro on a raid member and walks toward them; the gaze target must kite Thaladred around the room while ranged DPS burns him down. Capernian targets random players with Conflagration, a disorient plus burn. Sanguinar hits the tank very hard and uses Bellowing Roar to fear the raid. Telonicus uses Remote Toy, a bomb ability. Each advisor must be killed in a pre-planned location to manage Phase 3 positioning. Kill them slowly enough to control placement. Kill them too quickly and you will be fighting two simultaneously when the second pair engages.
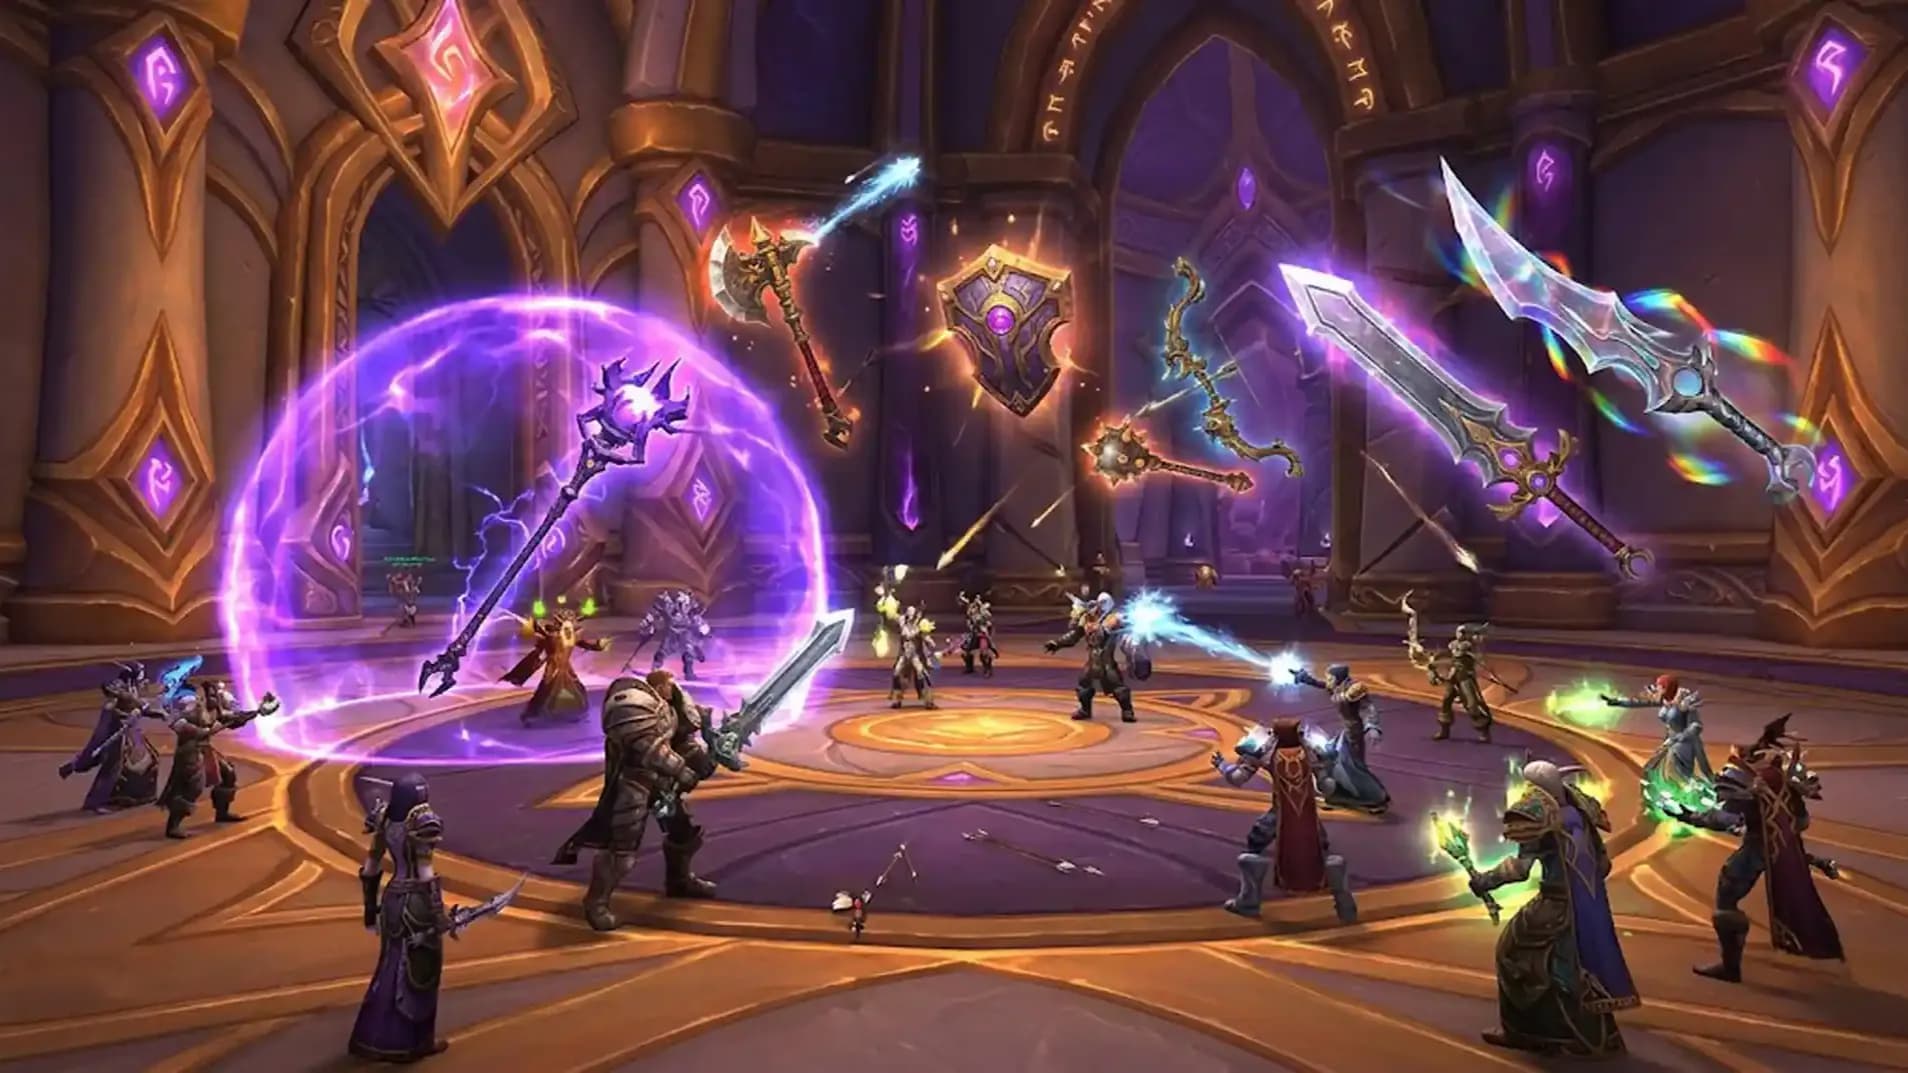
After all four advisors die, Kael'thas unleashes seven powerful legendary weapons. These weapons must be engaged, killed (at reduced HP), and then looted by raid members who will equip them for the remainder of the encounter. The weapons are usable only during this encounter and will vanish on a wipe or reset. The most critical weapon assignment is the Staff of Disintegration, which grants an aura providing immunity to stun, silence, and interrupt effects: essential for dealing with advisors and Kael'thas himself. All caster DPS and Feral Druids should equip this staff and activate the aura. A second critical assignment is the Infinity Blade (main-hand dagger), which enables breaking of Kael'thas's Mind Control via a proc mechanic. Rogues, Warriors, and Hunters make ideal Infinity Blade carriers. Pre-assign every weapon before the pull. Write it down.
All four advisors are resurrected at full health simultaneously. This is the phase that breaks most progression guilds on their first real exposure to this encounter, because the difficulty spike is severe and unambiguous. Your raid must manage all four advisors while dealing with their overlapping abilities, while using the legendary weapons equipped in Phase 2, while staying positioned where the advisors died in Phase 1 for optimal add management. Use Heroism / Bloodlust here with personal DPS cooldowns. Kill the advisors in the same order as Phase 1. Do not deviate. Do not improvise. The difference between a clean Phase 3 and a catastrophic one is almost entirely a function of how well your raid followed positioning instructions in Phase 1.
With his advisors down again, Kael'thas descends from his platform and enters direct combat. He casts Pyroblast as an opening salvo and uses Mind Control to seize 2-3 raid members, directing them to attack their former companions. Infinity Blade carriers use their dagger's proc to break Mind Control on controlled players. Kael'thas also casts Shock Barrier, which must be dispelled before meaningful damage can be dealt to him: hence the inflated total damage required to kill the encounter. Assign your fastest dispellers to Shock Barrier removal. Every second the barrier stays up is wasted DPS. The Nether Beam ability during this phase chains between nearby players, making spread positioning mandatory. Again.
At approximately 50% health, Kael'thas hovers above the room and activates Gravity Lapse, sending all raid members floating into the air. Black cloud Nether Vapors appear throughout the room, each applying a stacking debuff that reduces maximum health by 10% per stack up to 90%. Contact with them is categorically inadvisable. During Gravity Lapse, Nether Beam chains between players who are too close together. Spread maximally, avoid clouds, use movement abilities to control altitude, and keep DPS on Kael'thas. After Gravity Lapse ends, Kael'thas will reactivate it periodically. Each subsequent Gravity Lapse phase cycles until the boss dies. Your raid needs continuous sustained DPS output throughout all of this while keeping healers alive, managing the vapors, and maintaining enough spread that Nether Beam does not cascade into a chain-kill of your back half. This is, to be clear, the easy part compared to Phase 3.
Before engaging Kael'thas, your raid leader must confirm: Thaladred kiter assigned. Advisor kill locations marked. All seven weapon assignments finalized and communicated. Heroism / Bloodlust designated for Phase 3. Dispel team assigned to Shock Barrier. Infinity Blade carriers briefed. Nobody is still asking what the legendary weapons do. This fight does not forgive improvisation, and it has an exceptional memory for unprepared groups.
The Eye contributes two of the five Tier 5 token slots to the complete set: shoulders from Void Reaver and chests from Kael'thas Sunstrider. The remaining three token slots: helm, gloves, and legs: are distributed through Serpentshrine Cavern. This means you will be running both raids weekly for the foreseeable future. Welcome to Phase 2. Your weekends belong to Blizzard now. Shoulder tokens come in three variants corresponding to different class groupings; all are looted from Void Reaver and exchanged at Kelara on Shattrath's Aldor Rise or Veynna Dawnstar on the Scryer's Tier. The chest tokens follow the same system from Kael'thas.
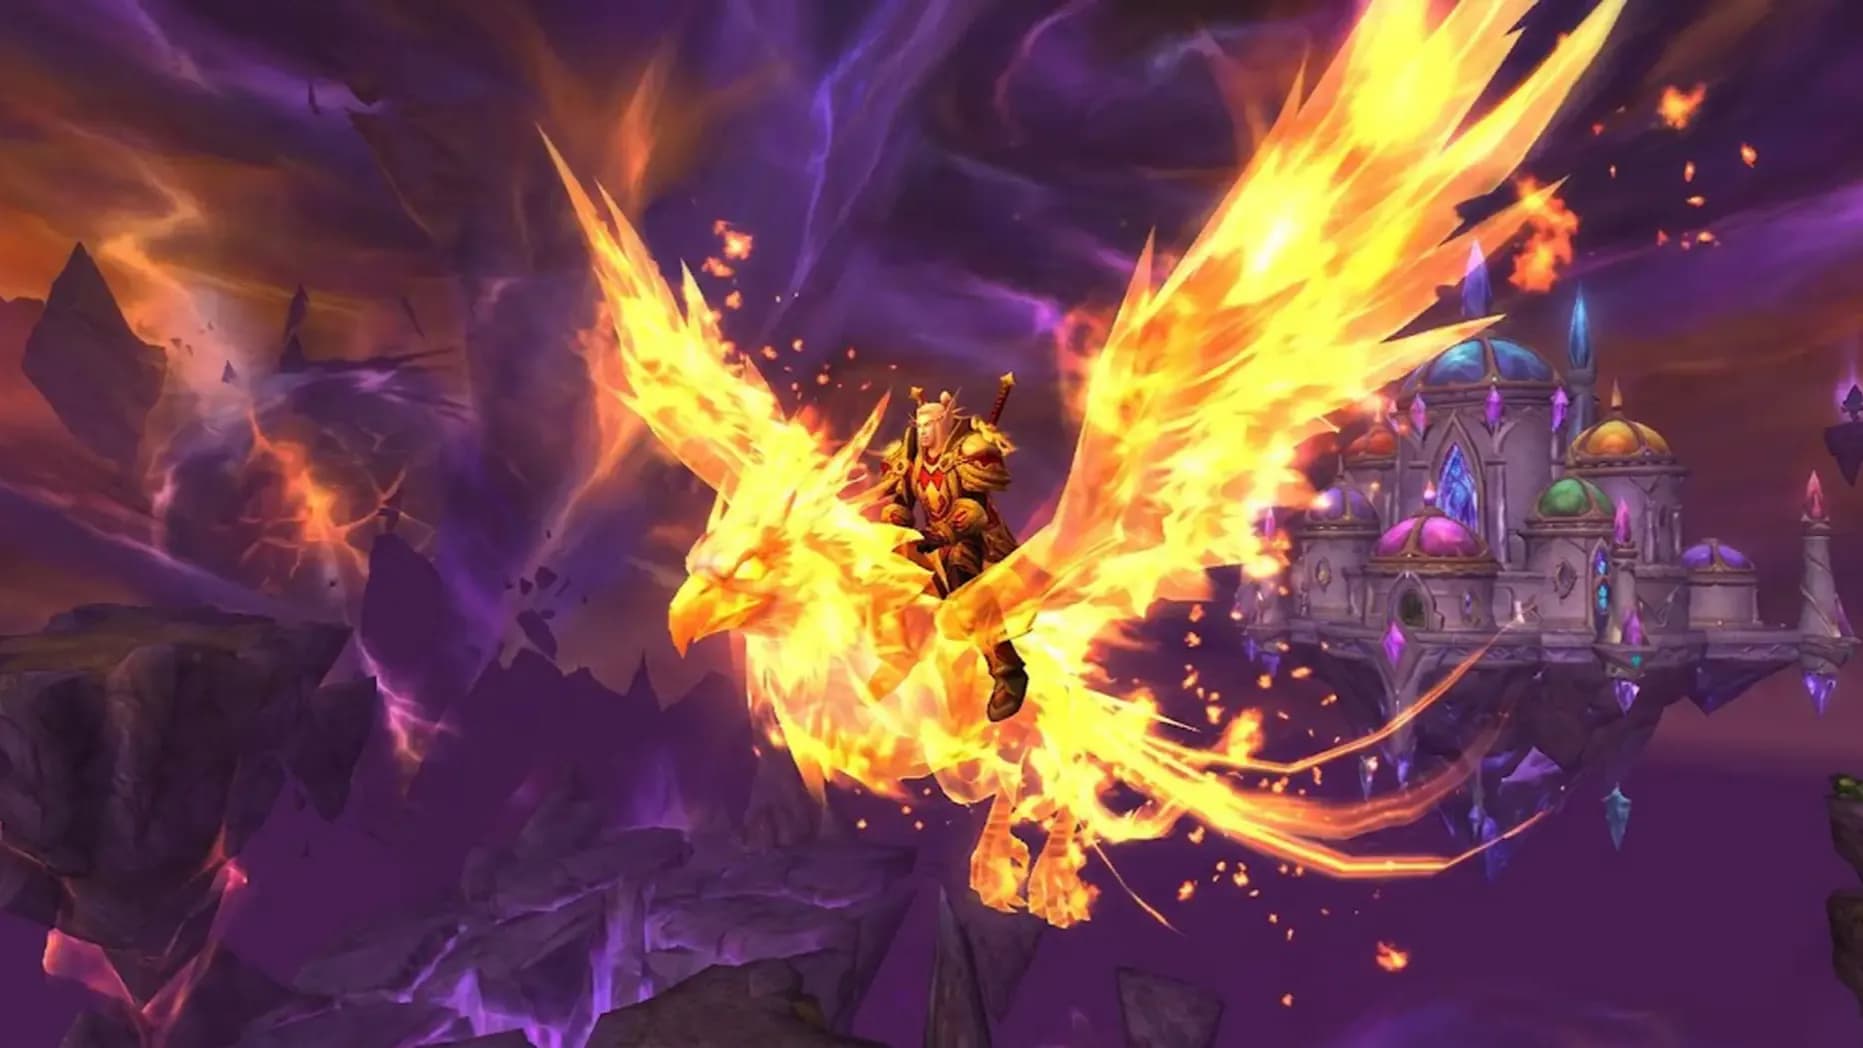
The Ashes of Al'ar is the most famous item in this raid and drops from Kael'thas Sunstrider: not, as the name would suggest, from Al'ar. The drop rate is extremely low, approximately 1-2%. The mount summons an epic phoenix and remains one of the most visually distinctive mounts in TBC Classic Anniversary. You will farm this raid for weeks. Possibly months. The mount will not drop. This is the traditional experience, and The Eye is generous in providing it with perfect consistency.
|
Boss |
Token Type |
Token Name (Shoulder) |
Classes |
|
Shoulder |
Paladin, Rogue, Shaman |
||
|
Shoulder |
Warrior, Priest, Druid |
||
|
Shoulder |
Pauldrons of the Vanquished Hero |
Hunter, Mage, Warlock |
|
|
Chest |
Chestguard of the Vanquished Champion |
Paladin, Rogue, Shaman |
|
|
Chest |
Chestguard of the Vanquished Defender |
Warrior, Priest, Druid |
|
|
Chest |
Chestguard of the Vanquished Hero |
Hunter, Mage, Warlock |
|
|
Mount |
~1-2% drop rate. You will not get this for a long time. Come to terms with that now. |
Bring your Tier 5 shoulder and chest tokens to Kelara on Shattrath's Aldor Rise (if Aldor-aligned) or Veynna Dawnstar on the Scryer's Tier (if Scryer-aligned). These vendors exchange tokens for the corresponding set pieces for your class. Do not accidentally click the PvP gear exchange option, which is also available on the Isle of Quel'Danas at a later phase. Your raid leader will never let you forget it if you do.

Phase 2 is here. Tempest Keep: The Eye is open. Four bosses, one legendary mount, and a Kael'thas fight that will test every raid roster. Full guide i

Phase 2 is here. Tempest Keep: The Eye is open. Four bosses, one legendary mount, and a Kael'thas fight that will test every raid roster. Full guide i

Phase 2 is here. Tempest Keep: The Eye is open. Four bosses, one legendary mount, and a Kael'thas fight that will test every raid roster. Full guide i

Phase 2 is here. Tempest Keep: The Eye is open. Four bosses, one legendary mount, and a Kael'thas fight that will test every raid roster. Full guide i

Phase 2 is here. Tempest Keep: The Eye is open. Four bosses, one legendary mount, and a Kael'thas fight that will test every raid roster. Full guide i

Phase 2 is here. Tempest Keep: The Eye is open. Four bosses, one legendary mount, and a Kael'thas fight that will test every raid roster. Full guide i

Phase 2 is here. Tempest Keep: The Eye is open. Four bosses, one legendary mount, and a Kael'thas fight that will test every raid roster. Full guide i

Phase 2 is here. Tempest Keep: The Eye is open. Four bosses, one legendary mount, and a Kael'thas fight that will test every raid roster. Full guide i

Phase 2 is here. Tempest Keep: The Eye is open. Four bosses, one legendary mount, and a Kael'thas fight that will test every raid roster. Full guide i

The chain is account-bound. Complete it once; all alts on the account gain entry automatically without repeating the quest.
Kill Void Reaver first. Simplest mechanics, shoulder tokens drop, confirms your raid can sustain DPS for ten minutes straight.
Approximately 1-2% from Kael'thas. Farm weekly, expect months of nothing, and eventually receive it or quit the expansion first.
Phase 3, where all four advisors resurrect simultaneously at full health. Most progression guilds stall here without exception.
Exchange tokens at Kelara (Aldor Rise) or Veynna Dawnstar (Scryer's Tier) in Shattrath City for your class-specific set pieces.

GTA 6, new seasons, major updates — get ready to dominate from day one.