Table of content
Windrose Ghost Captain Guide
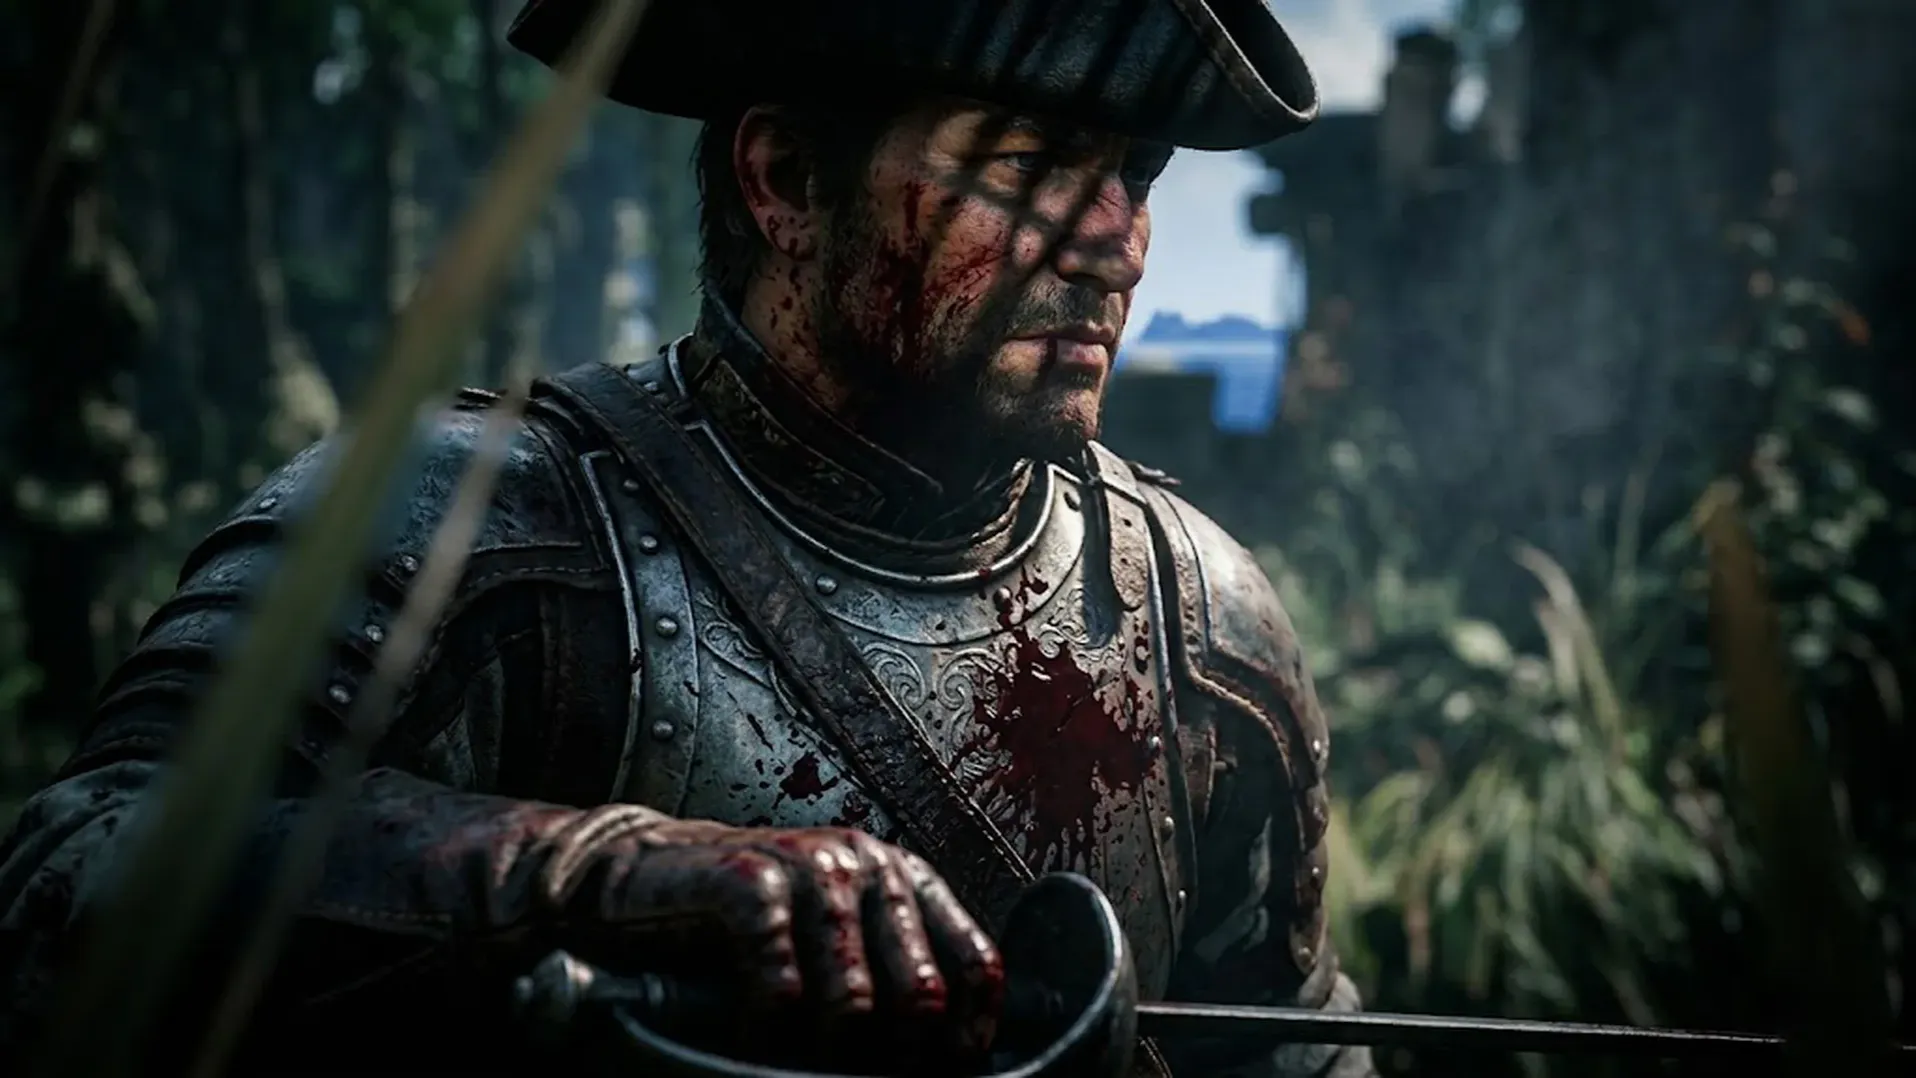
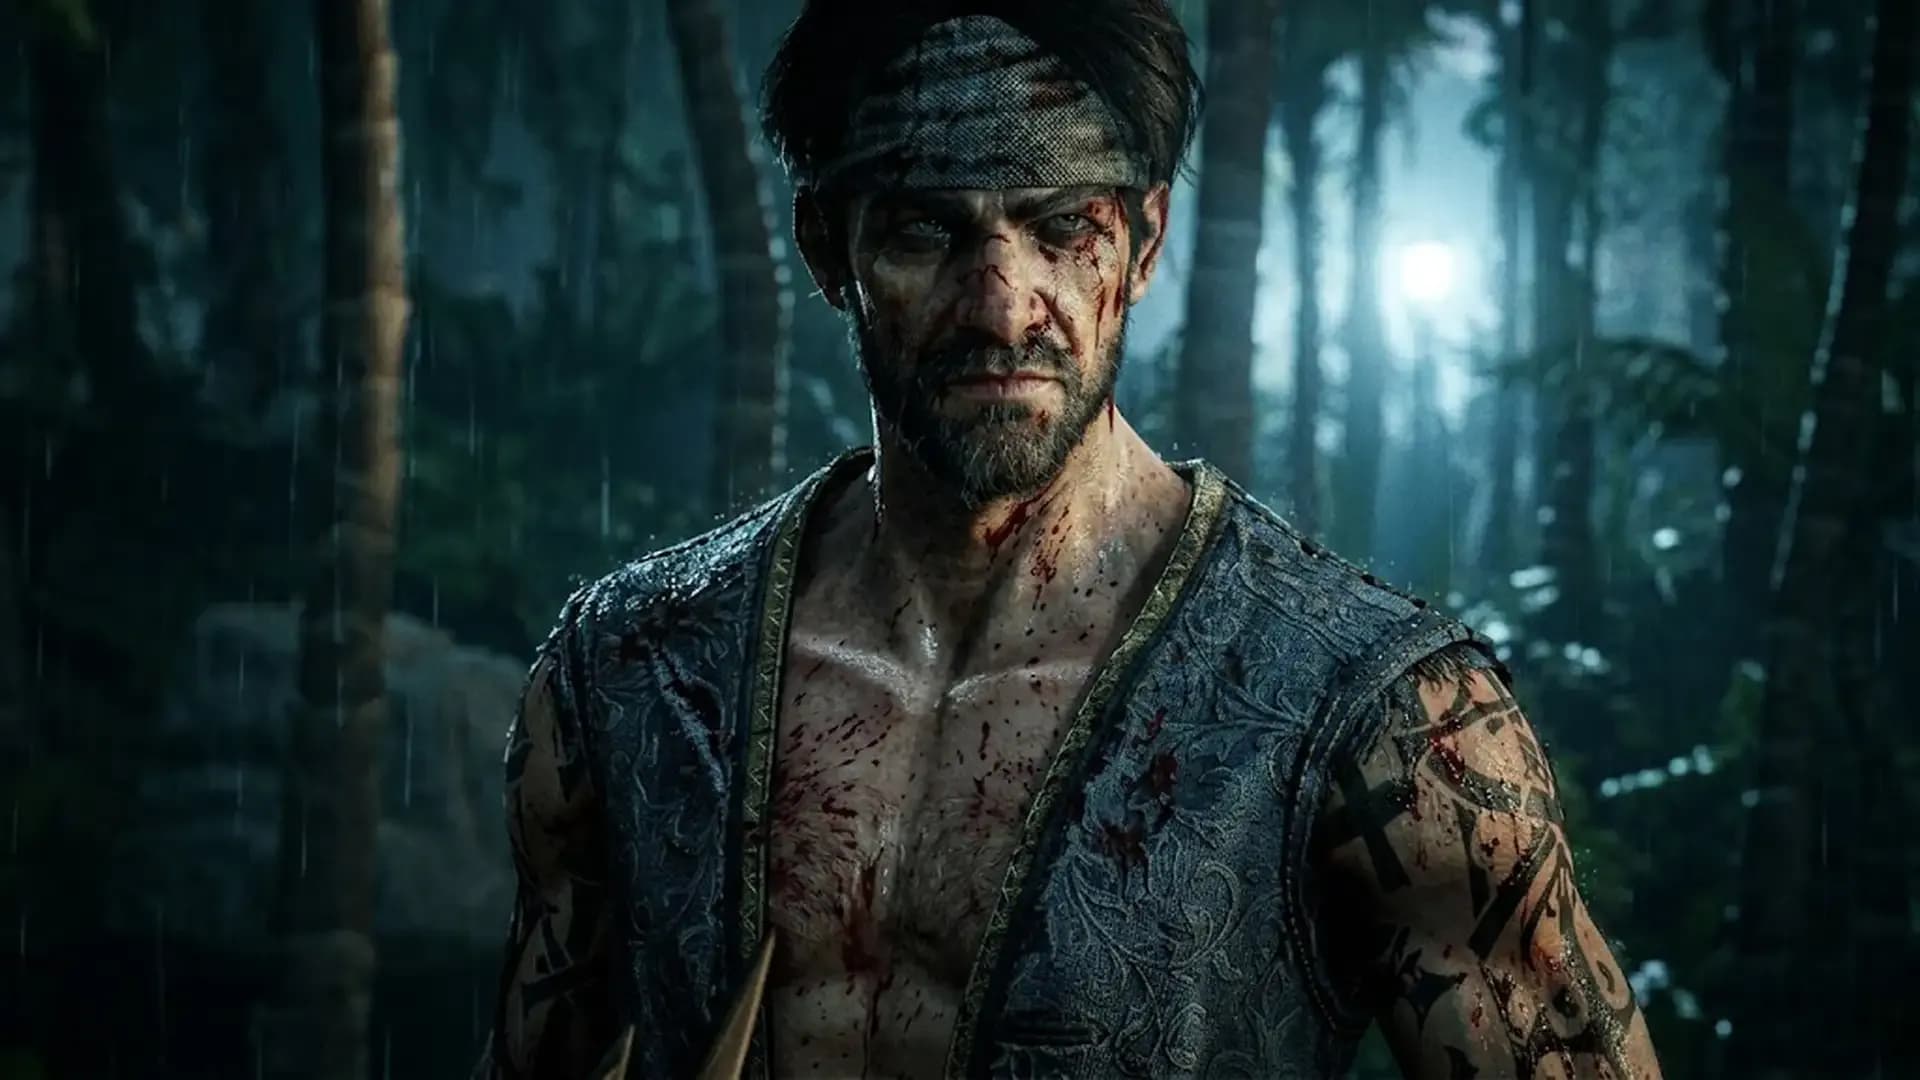
The Ghost Captain is Windrose's opening statement on exactly what kind of game you've gotten yourself into. This undead pirate boss fight isn't a skill check: it's more of a personality test. It's asking whether you're the kind of person who reads guides, prepares food buffs, and sets a respawn tent beforehand, or the kind of person who sprints in with half a stamina bar and twelve portions of Crab Soup when the recommended minimum is fifteen. You already know which one you are.
For players new to the soulslite combat system in Windrose, the Ghost Captain will feel like a dungeon boss with a personal grudge. Stamina management is the entire fight. You cannot bully through this encounter. You will run out of resources, you will miss a dodge, and you will watch your character crumple to a ghost who has been practicing this fight for centuries. Treat every swing like you're paying for it: because you are.
Context Windrose launched into Early Access on April 14, 2026. The Ghost Captain is classified as an Undead Boss and is the first major dungeon boss encounter in the game. Think of it as the developers' way of saying: "We read your Steam reviews, and we do not care."
Where to Find the Ghost Captain
The Ghost Captain is located deep inside one of Windrose's dungeons, which are hand-crafted underground areas scattered across the procedurally generated archipelago. It does not wander outside. It does not come to you. You have to go to it, which, if you've seen this dungeon's hallways filled with Drowned Sailor enemies, is already asking a lot.
Before you even consider engaging, make sure you have a Tent placed near the dungeon entrance or an active Fast Travel Point nearby. The run back from a distant spawn point after your inevitable first death isn't just annoying: it's a morale-destroying experience that will make you reconsider every life decision that led to this moment.
Warning Clear all Drowned Sailors from the dungeon's earlier rooms before entering the boss arena. You want a clean escape route when phase two summons adds and your brain completely short-circuits.
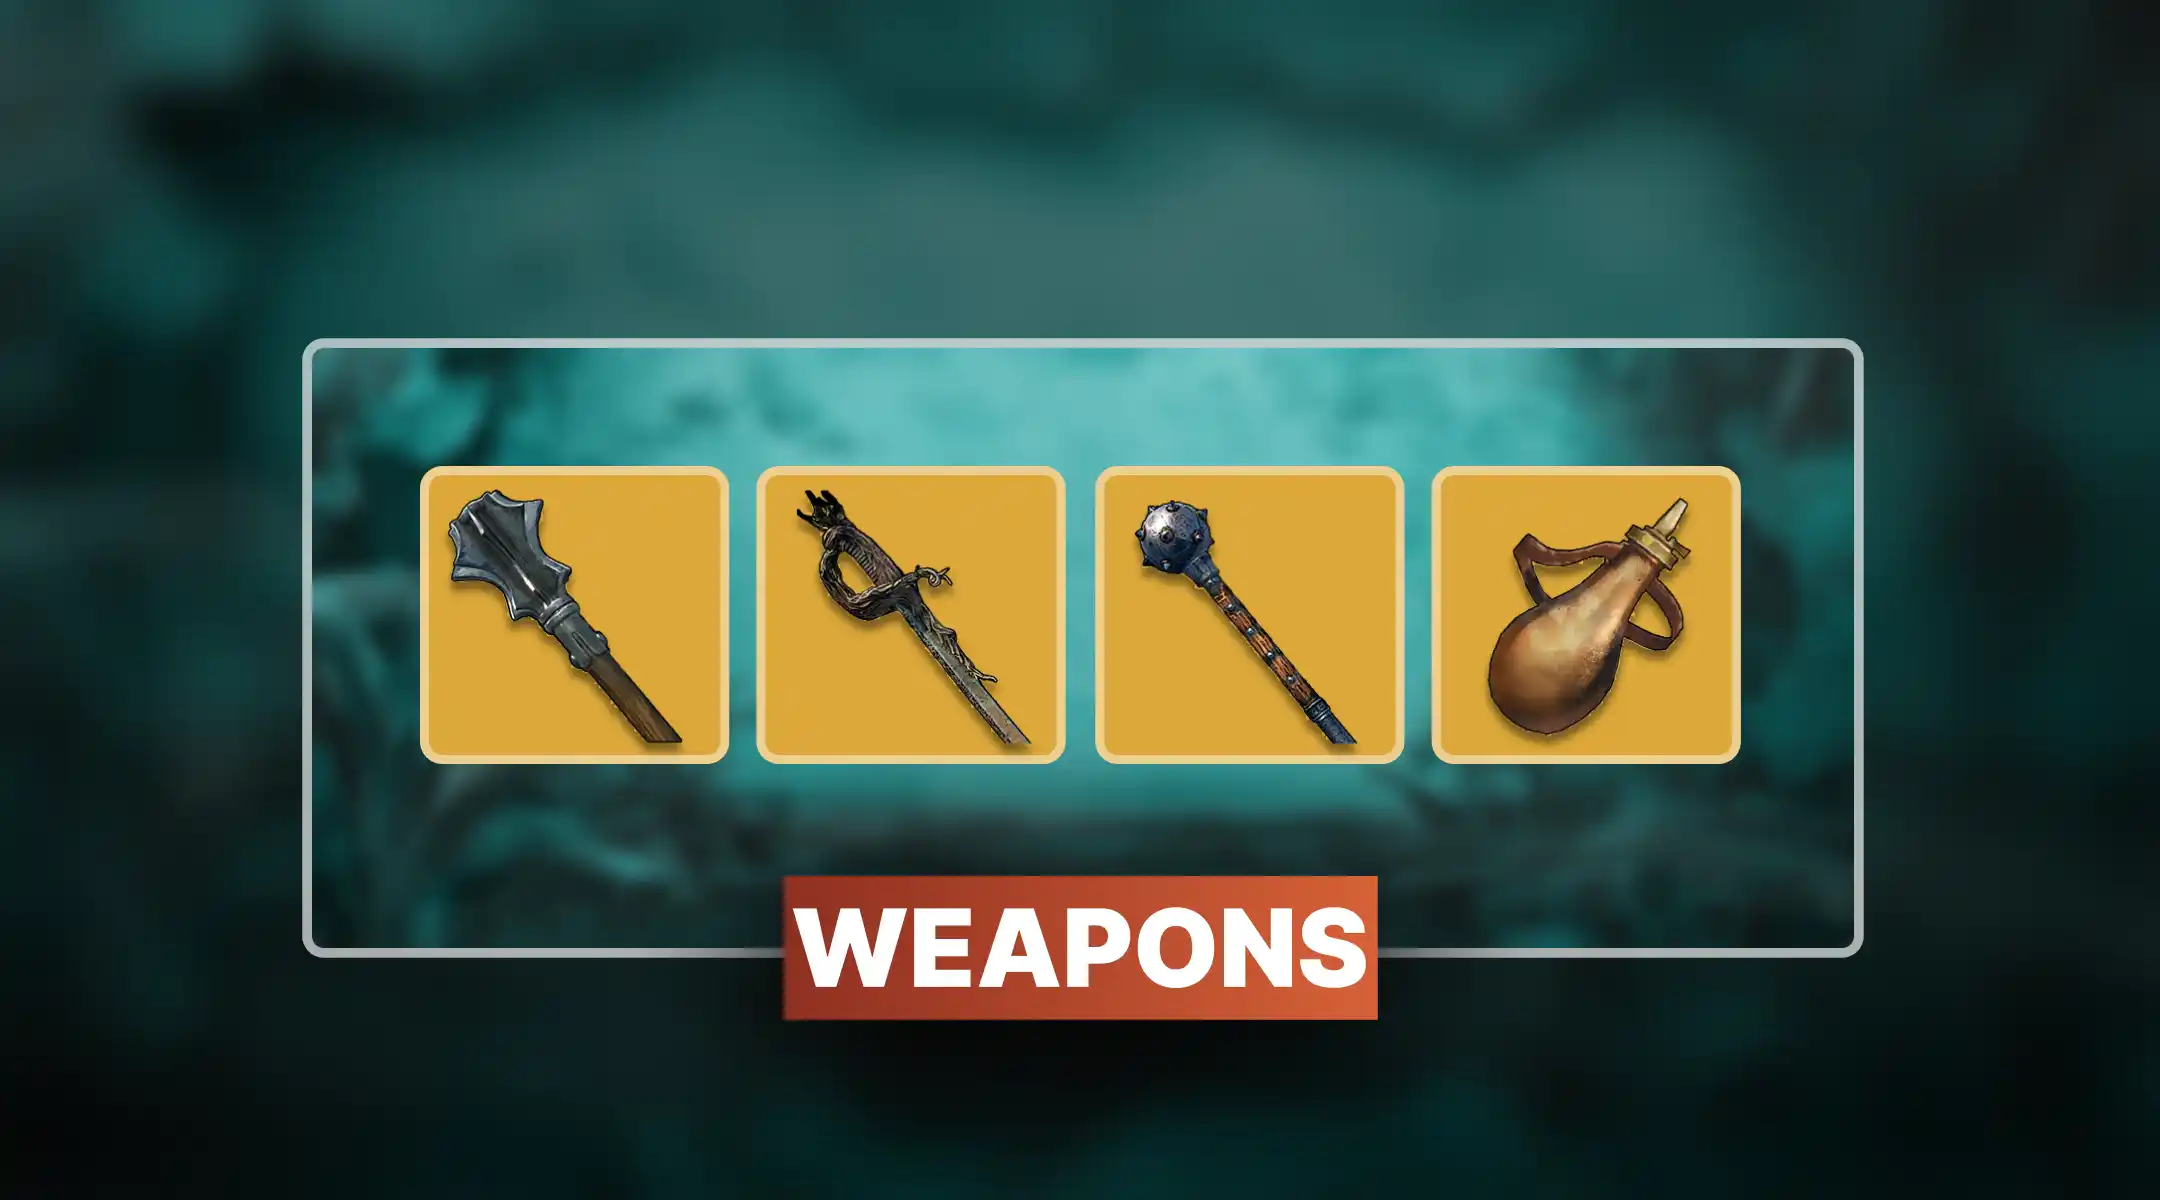
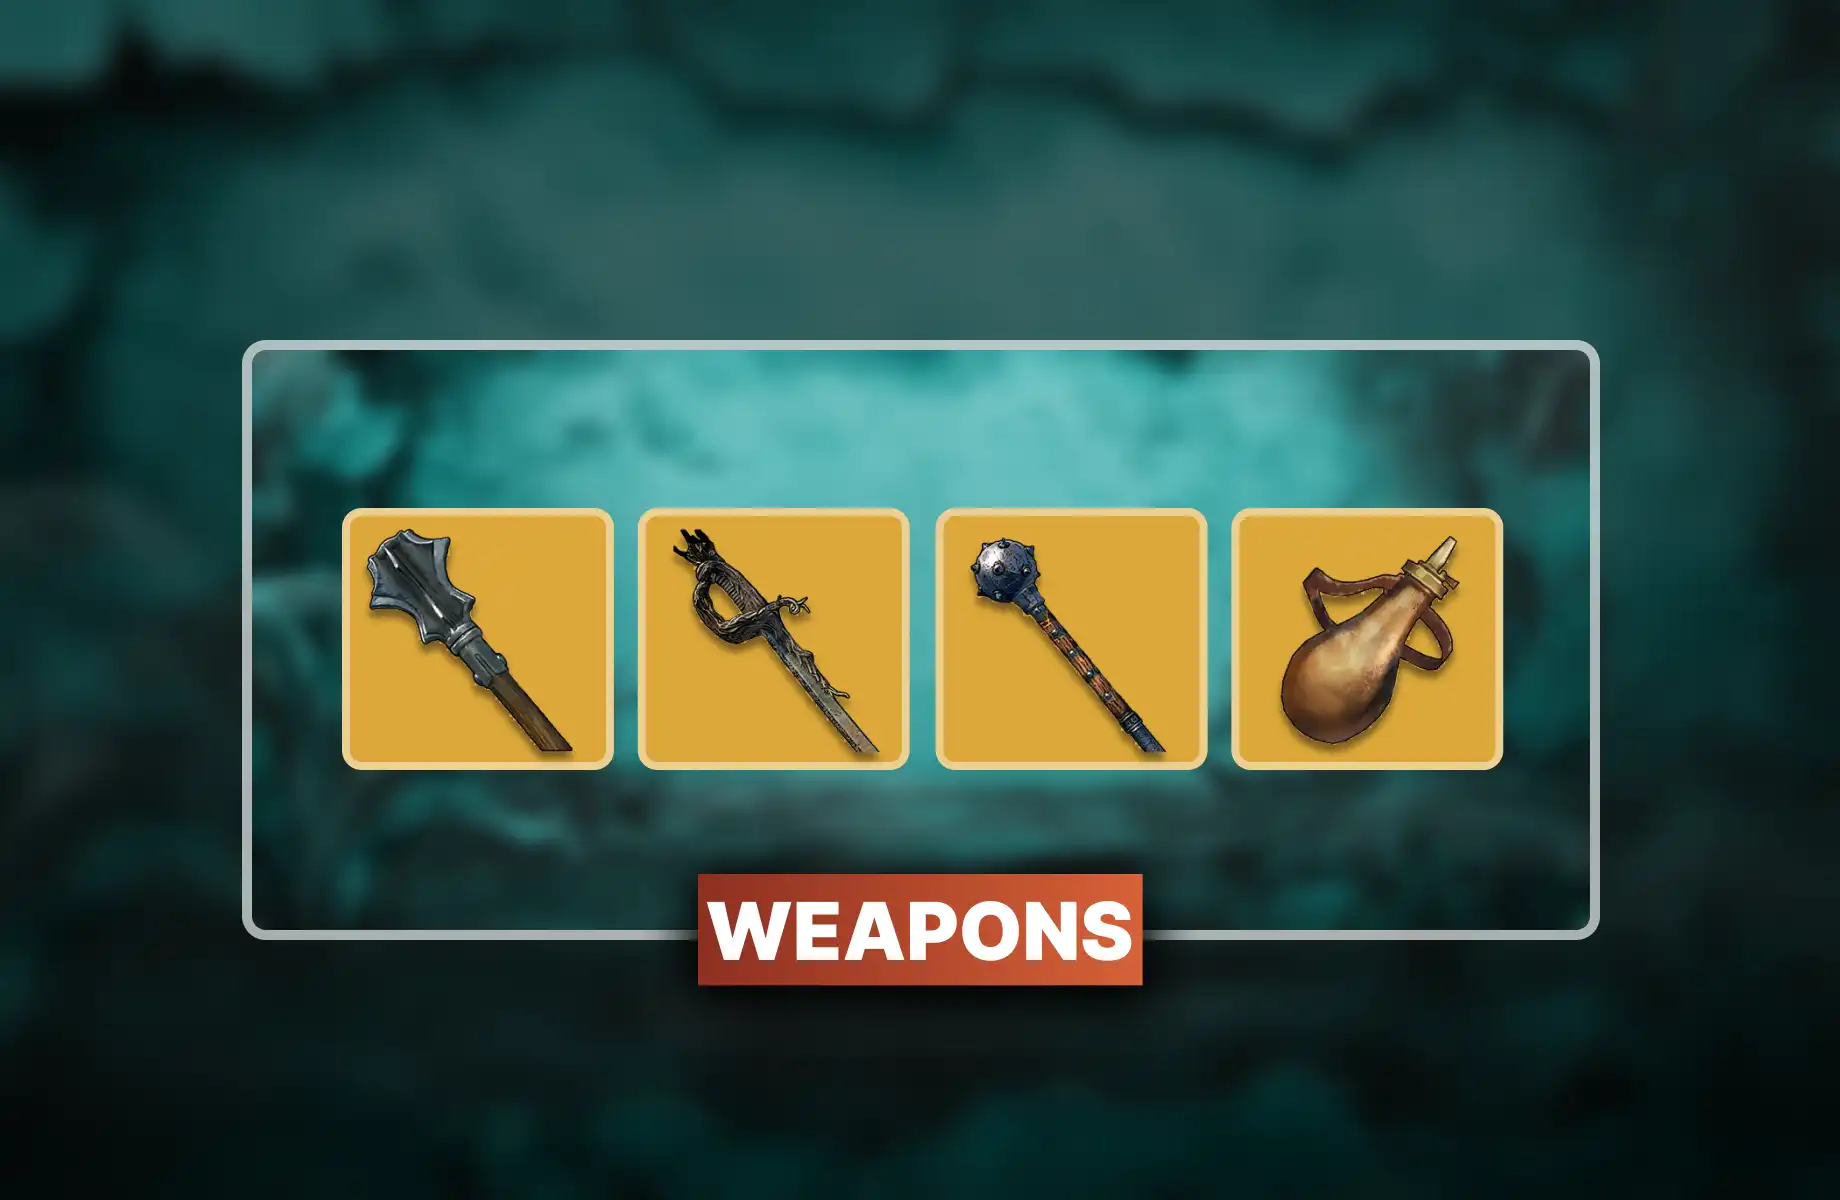
Recommended Preparation
Here is a concept that will transform your Ghost Captain experience: preparation. It turns out that showing up to a Windrose boss fight with the bare minimum of supplies is a wonderful way to see the respawn screen more than the boss arena. Bring 15 to 20 portions of high-quality healing food. Not five. Not ten. Fifteen. To twenty. Write it on your hand if you must.
|
Slot |
Minimum |
Recommended |
Notes |
|
Main Weapon |
Rare-tier (upgraded) |
Saber or Rapier (Agility build) |
Upgrade at the Upgrading Station. Unupgraded Rare is still Rare-shaped disappointment. |
|
Armor |
Full set, any tier |
Set with 2-piece bonus active |
Conquistador's Armor if you're running a Crusher build. The Bulwark passive matters here. |
|
Food |
15 portions minimum |
Crab Soup w/ Diced Tomatoes or Chowder |
Use proactively, not reactively. You are not a hospital patient. Stop waiting until critical. |
|
Ranged Weapon |
Optional |
Musket or Pistol |
Free damage during Phase 2 when the boss creates distance. Gunpowder is scarce: save it for this. |
|
Respawn Point |
Tent near entrance |
Tent near entrance |
Non-negotiable. Place it before you go in. This is not optional wisdom, it is survival literacy. |


Best Builds for the Fight
Windrose's talent system supports several approaches to the Ghost Captain, all of which work if you play them correctly, and none of which work if you don't. The game's soulslite combat design means pattern recognition beats raw damage output every single time. That said, some builds make the pattern recognition easier than others.
Agility / Fencer: The Correct Answer
Fast weapons like the Saber or Rapier are the optimal choice for this encounter. The Ghost Captain fights in short, punishable combo windows, and fast weapons let you land safe hits during those openings without the terrifying commitment of a slow greatsword swing. The Fencer talent Perfect Counter creates guaranteed damage windows after successful dodges, turning the boss's aggression against itself: which is poetic, since the boss is a pirate and pirates appreciate a good double-cross. Deadly Finale for finishing burst when the health bar gets low.
Precision / Marksman: Honorable Mention
If you enjoy dealing damage to things that are not currently near you, the Musket build is a legitimate approach. Several of the Ghost Captain boss mechanics create distance between you and the boss, and during those moments ranged damage is essentially free. Sniper's Focus rewards patience. Bulletstorm rewards the moment you've been patient enough and want it to end. Gunpowder is scarce in the early game, so hoard it from pirate camps specifically for this fight.
Strength / Crusher: For Masochists
Heavy weapons deal enormous damage per hit but give you dramatically fewer windows to use them safely in this Windrose boss fight. The Crusher build is viable, but it requires a higher tolerance for standing in danger while a large sword slowly completes its animation. The Berserk talent: which boosts damage as your health drops: has a dark and perfect synergy with the fact that your health will absolutely be dropping. The Conquistador's Armor Bulwark effect helps considerably. Make peace with the long recovery frames.
Talent Priority: All Builds Regardless of build, invest in at least one Tier 2 talent before entering the dungeon. The Too Angry to Die talent from the Toughguy tree: which lets you survive one killing blow: is borderline mandatory on first attempts. Consider it insurance for the third phase, which will test your patience in ways therapy has not fully prepared you for.
Fight Walkthrough: All Three Phases
The Ghost Captain dungeon boss fight unfolds in three distinct phases, each designed to introduce a new way for you to make a mistake you've never made before. Stamina management is the constant across all phases. Never let your stamina bar hit zero: in Windrose, a depleted stamina bar triggers a "winded" state that strips your ability to dodge or sprint, which is a very elegant way of turning you into something stationary that a ghost is hitting.
I Spectral Strikes 100%: 70% HP
The Ghost Captain opens with sweeping greatsword combos using a ghostly cutlass. These attacks hit in wide arcs and deal high damage, but they are generously telegraphed: watch for the arm pulling back before each swing. The combo pattern is typically three swings followed by a brief pause. That pause is your attack window.
Dodge through the swings, not away from them. Dodging through positions you behind the boss for safe counterattacks. Dodging backward just gives it room to recover. Land one or two hits during each window and resist the urge to land a full combo. Greed is the cause of most Phase 1 deaths, and the irony of dying in the easiest phase of the fight will haunt you.
II Ghostly Barrage
At approximately 70% health, the boss begins adding spectral projectiles to its rotation. These projectiles track your position and explode on contact. Lateral movement is the correct response: moving in wide circles causes projectiles to expire before they reach you. Standing still is how you find out what the explosion radius looks like from the inside.
If you brought a ranged weapon, this is where it earns its inventory slot. The phase naturally creates distance between you and the boss during projectile animations: use that distance to fire. Drowned Sailor adds may appear in this phase; deal with them before they surround you, or accept that the boss fight now also involves being flanked by its subordinates, which is a worse job interview than you'd imagined.
Below 30% health, the Ghost Captain enters its frenzied final state. Attack speed increases, new combo patterns emerge, and a devastating area-of-effect slam attack gets added to the rotation. The AoE slam requires precise dodge timing to avoid: it will not forgive a late input, and neither will the ghost.
Survival first. Damage second. This is not the moment to rush the kill. The number one cause of defeat is impatience when the health bar looks nearly empty. Use Crab Soup with Diced Tomatoes here and pair it with Tracker's Leathers for the healing bonus if you have it. If you have the Too Angry to Die talent, that insurance policy is about to be called in.
Rewards
Defeating the Ghost Captain yields meaningful rewards at every tier of progression. The rare crafting materials are useful. The experience points are significant. But let's be honest: you're here for one thing, and it has two words.
Soul Eater Greatsword
The Soul Eater is among the most powerful weapons in Windrose, and it is the entire reason this dungeon exists in the lore of your personal motivation. Uniquely, it scales with Vitality in addition to Agility, opening up hybrid tank-DPS builds that no other weapon in the current game makes possible. Its life-steal effect drains vitality from enemies on each successful hit, meaning the Soul Eater actively reduces your reliance on those fifteen to twenty portions of healing food you just finished eating. It is the cornerstone of the Survivor build archetype and the reason entire progression paths get restructured. If you don't want it, you are playing a different game.
Common Mistakes (A Chronicle of Poor Decisions)
There is a predictable taxonomy of failure for this fight. Every mistake has been made before, by better players than you, who had the humility to eventually stop making it.
Bringing insufficient food
Five healing portions is a light snack, not a raid supply. Bring fifteen to twenty. Use them before you need them, not after the damage has already been done and your health bar is decorative.
Ignoring phase transition attacks
Every phase change includes an attack. The boss does not politely pause while it shifts into a new mode. Be ready to dodge the moment a health threshold is crossed.
Standing still during Phase 2
The tracking projectiles have one job. They are very good at it. Lateral movement is mandatory: constant, committed lateral movement, not the nervous shuffling of someone who has just noticed there are projectiles.
Getting greedy in Phase 3
A low health bar is not an invitation to commit. It is a trap. The Ghost Captain at 15% health is more dangerous than it was at 80%, and your impatience will prove this to you in a way this text cannot.
No nearby respawn point
The walk of shame from a distant spawn point erodes something in you. Set a Tent before entering the dungeon. This is the easiest step and the most frequently skipped.
Letting stamina hit zero
A winded state in the middle of a boss fight is essentially voluntary death. Stamina management in Windrose isn't a suggestion: it is the entire mechanical contract of the game. Honor it.
Table of content

The Ghost Captain will kill you. Repeatedly. Our full boss guide covers all 3 phases, the best builds, and how to finally claim the Soul Eater greatsw
13 April, 2026

The Ghost Captain will kill you. Repeatedly. Our full boss guide covers all 3 phases, the best builds, and how to finally claim the Soul Eater greatsw
13 April, 2026

The Ghost Captain will kill you. Repeatedly. Our full boss guide covers all 3 phases, the best builds, and how to finally claim the Soul Eater greatsw
13 April, 2026

The Ghost Captain will kill you. Repeatedly. Our full boss guide covers all 3 phases, the best builds, and how to finally claim the Soul Eater greatsw
13 April, 2026

The Ghost Captain will kill you. Repeatedly. Our full boss guide covers all 3 phases, the best builds, and how to finally claim the Soul Eater greatsw
13 April, 2026

The Ghost Captain will kill you. Repeatedly. Our full boss guide covers all 3 phases, the best builds, and how to finally claim the Soul Eater greatsw
13 April, 2026

The Ghost Captain will kill you. Repeatedly. Our full boss guide covers all 3 phases, the best builds, and how to finally claim the Soul Eater greatsw
13 April, 2026

The Ghost Captain will kill you. Repeatedly. Our full boss guide covers all 3 phases, the best builds, and how to finally claim the Soul Eater greatsw
13 April, 2026
Windrose Ghost Captain Guide FAQ
Can I solo the Ghost Captain, or do I need a co-op partner?
You can solo it. Bringing a co-op partner makes Phase 2 add management significantly easier: and significantly less humiliating.
What is the best weapon type for the Ghost Captain boss fight in Windrose?
A fast weapon like a Saber or Rapier. More attack windows, less exposure per swing, fewer regrets.
Is the Soul Eater greatsword guaranteed to drop?
It is the primary reward for defeating the Ghost Captain. Stop asking. Start dodging.
How do I deal with the Drowned Sailor adds in Phase 2?
Kill them immediately before they stack. One add is a distraction. Three adds are a new and worse boss fight.
Why does the Ghost Captain keep killing me in Phase 3 when it's almost dead?
Greed. You attacked when you should have dodged. It happens every time. The ghost does not respect your enthusiasm.