


Arc Raiders Boost
ARC Raiders El Toro Nerf Guide: Update 1.2.0
New guide is live: Deal Damage to Shredders in ARC Raiders Trials. Best loadout, Stella Montis routes, thruster weak spots, Night Raid tips: max your
This week's Trial is refreshingly straightforward: find Shredders, annoy them by shooting their glowing backsides, collect score, feel vaguely accomplished. Whether your ambition peaks at the 4,000-point 3-star threshold or you genuinely enjoy spending your evenings being shrapnel-blasted by robot drones, this guide covers everything you need to walk out ahead: or at least walk out.
Quick Summary This Trial is exclusive to Stella Montis, the only current map with Shredder spawns. Night Raid doubles your score per Shredder. The weak spot is the blue thrusters. The Anvil IV is your best friend. You're welcome.
The scoring for the maximize score Shredders ARC Raiders Trials objective is mercifully simple. Each Shredder you damage is worth a flat 693 points under normal conditions. Stack a 2x Night Raid Event modifier on top of that and the number doubles to a very satisfying 1,386 per unit. The math does itself:
|
Metric |
Value |
|
Base Score / Shredder |
693 |
|
Night Raid 2x Score |
1,386 |
|
3-Star Threshold |
4,000 |
|
Shredders for 3-Star (Base) |
6 |
|
Shredders for 3-Star (2x) |
3 |
To put it bluntly: if you're just here for the easy ARC Raiders fast 3-star rewards Shredders ticket, you need to find and damage a grand total of six of these things under normal conditions: or a measly three during a Night Raid. Given Stella Montis has multiple dedicated spawn zones packed with them, this is less of a "Trial" and more of a light afternoon stroll through a hostile robot facility. Leaderboard hunters, however, will want to chain the entire map and extract only when the session timer forces them to or their hands go numb. Your call.
If you’re reading this, you might be interested in a discount just for you—my blog reader! Use code CRINGEBLOG to get an amazing discount on any offer in our shop.
The Stella Montis Night Raid event ARC Raiders window is the single most important variable in this Trial. Under Night Raid conditions, every Shredder you damage is worth double score: making a run that would have netted 4,000 points suddenly worth 8,000. If you're aiming for leaderboard placement rather than minimum viable effort, do not enter a lobby without Night Raid active. Check the Event Timers on MetaForge or BoostMatch before queuing. Entering without the modifier is technically possible. It's also the kind of decision you'll explain to yourself later while looking at a respectable-but-disappointing score.
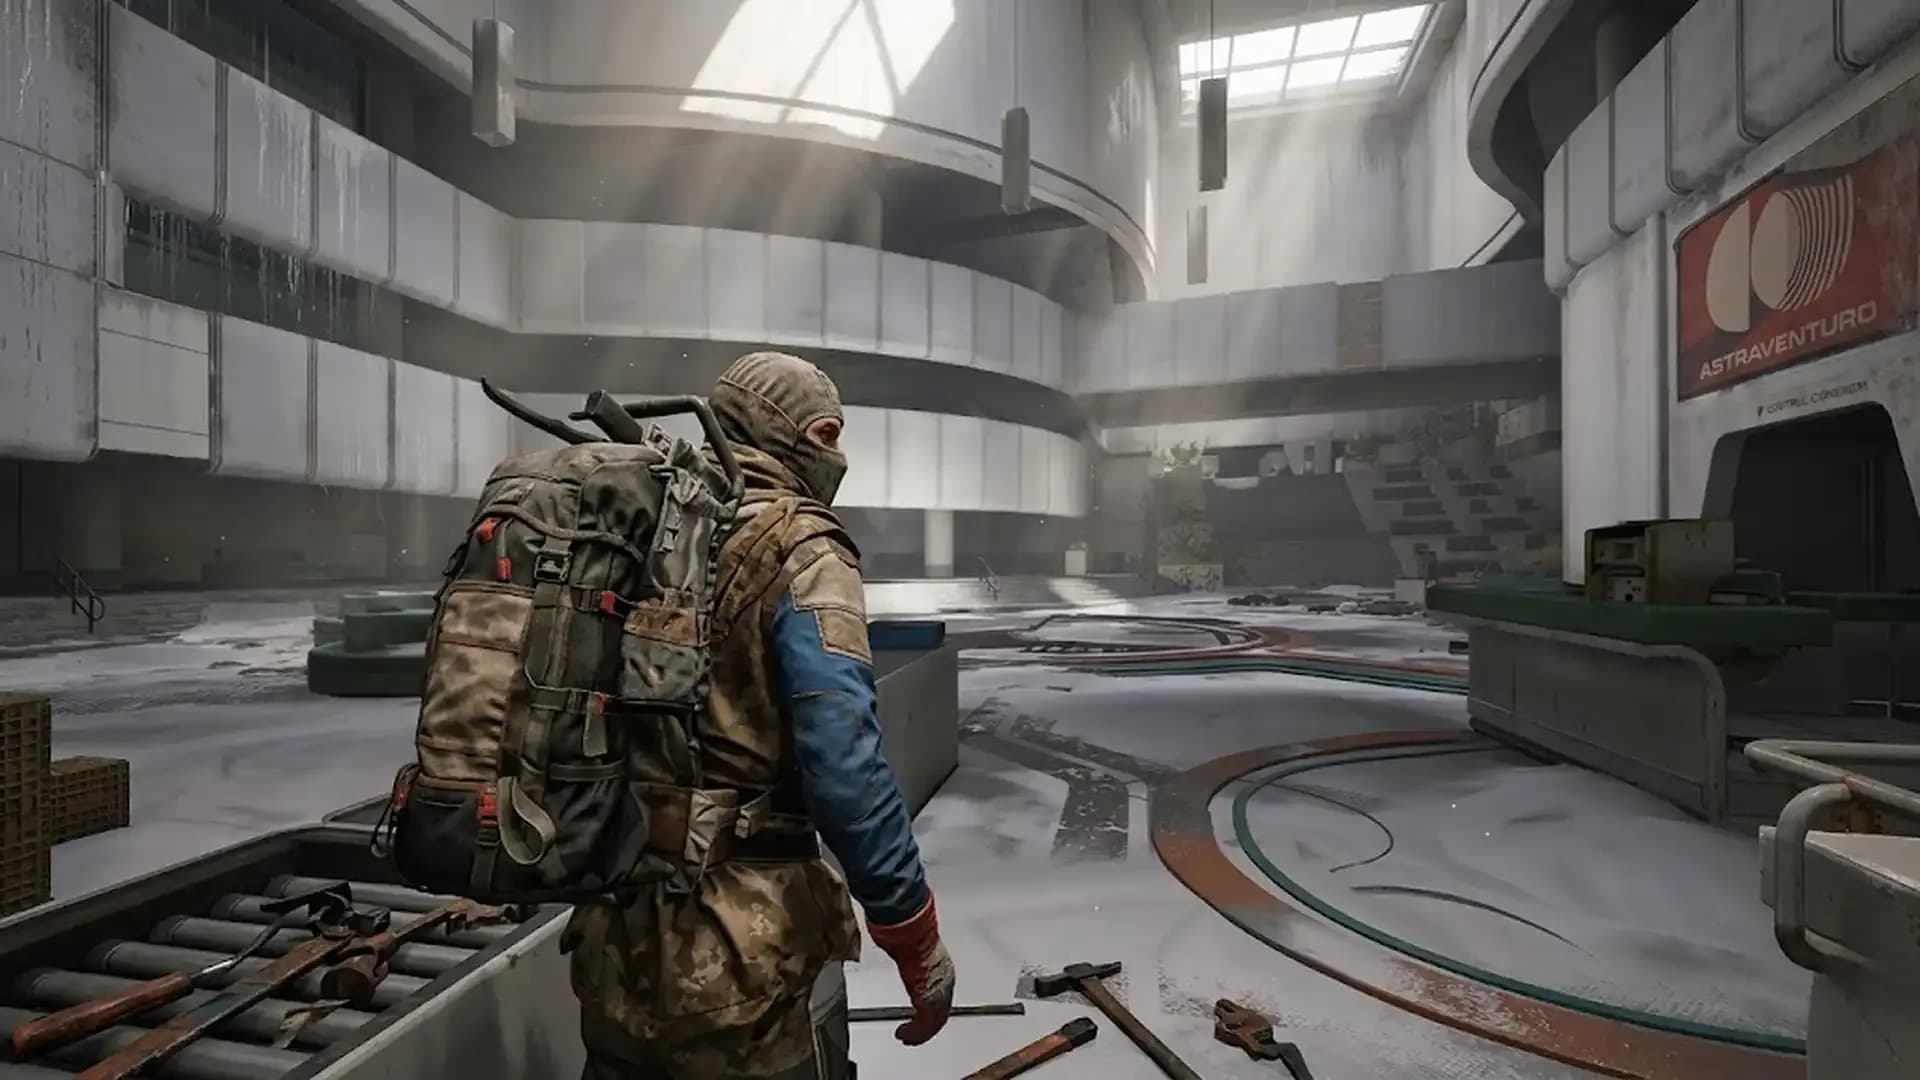
Stella Montis itself is the only map currently hosting ARC Raiders Shredder locations Stella Montis: they don't exist anywhere else. The map is also, by design, one of the most PvP-active environments in the game. Its corridors are tight, its sightlines are punishing, and every other player queuing this Trial has the same spreadsheet you do. Plan accordingly, be diplomatic when possible, and don't be surprised when someone third-parties you mid-fight against a Shredder. That's just Thursday on Stella Montis.
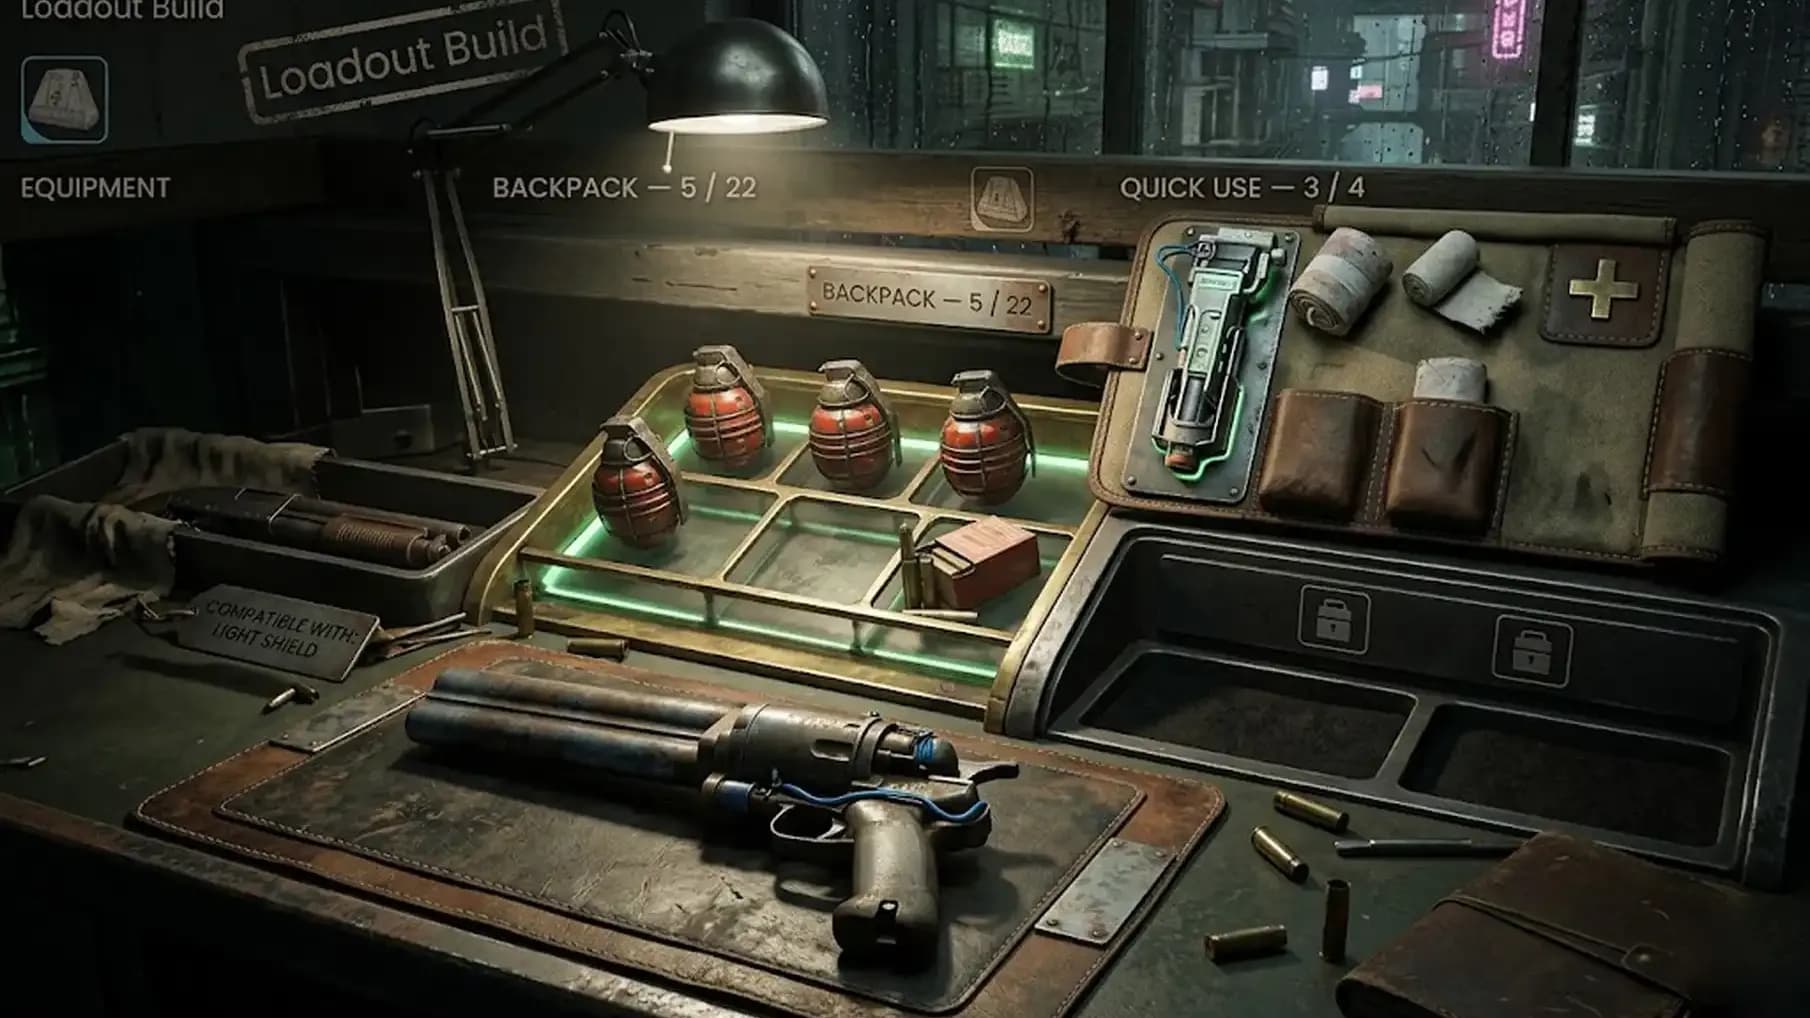
Finding the best loadout for Shredders ARC Raiders is less about raw power and more about sustain. These fights aren't long: they're just punishing when you run out of ammo at the wrong moment or take one shrapnel burst to the face because you forgot to bring bandages. The following setup is tested, efficient, and gives you enough room to handle the Ticks, Fireballs, and opportunistic players that Stella Montis will cheerfully throw at you between Shredder encounters.
|
Item |
Quantity |
Why It's Here |
|
Anvil IV |
1 |
Primary weapon. High fire rate, heavy ammo penetration, makes thrusters cry. |
|
Heavy Ammo |
120+ |
Two magazines per Shredder at minimum. Bring more unless you enjoy scavenging mid-run. |
|
Light Impact Grenades |
15–20 |
Fast, reliable thruster damage. Stack several and a Shredder evaporates embarrassingly quickly. |
|
Light Shield |
1 |
Baseline survivability. You're not tanking, you're skirmishing. |
|
Shield Rechargers |
5–10 |
Because Shredders hit hard and you'll get caught out at least once per run. |
|
Bandages / Herbal Bandages |
5–10 |
When the shield fails, these make sure you keep moving instead of bleeding out in a corner. |
|
Looting MK.2 Augment |
1 |
Particularly useful: keeps the Tick problem manageable while you're busy with Shredders. |
|
Trailblazer Grenades (optional) |
3+ |
Expensive. Highly effective. For players who find restraint overrated. |
|
Hullcracker + Launcher Ammo (optional) |
1 |
Two shots to the thrusters. If you enjoy ending things quickly and spending credits. |
Budget Option A basic Anvil I works if Anvil IV isn't in your budget: the fire rate drop hurts, but the kill is still achievable. Do not under any circumstances replace the Heavy Ammo with Light Ammo. Light Ammo against Shredder armor is roughly as effective as politely asking them to stop.
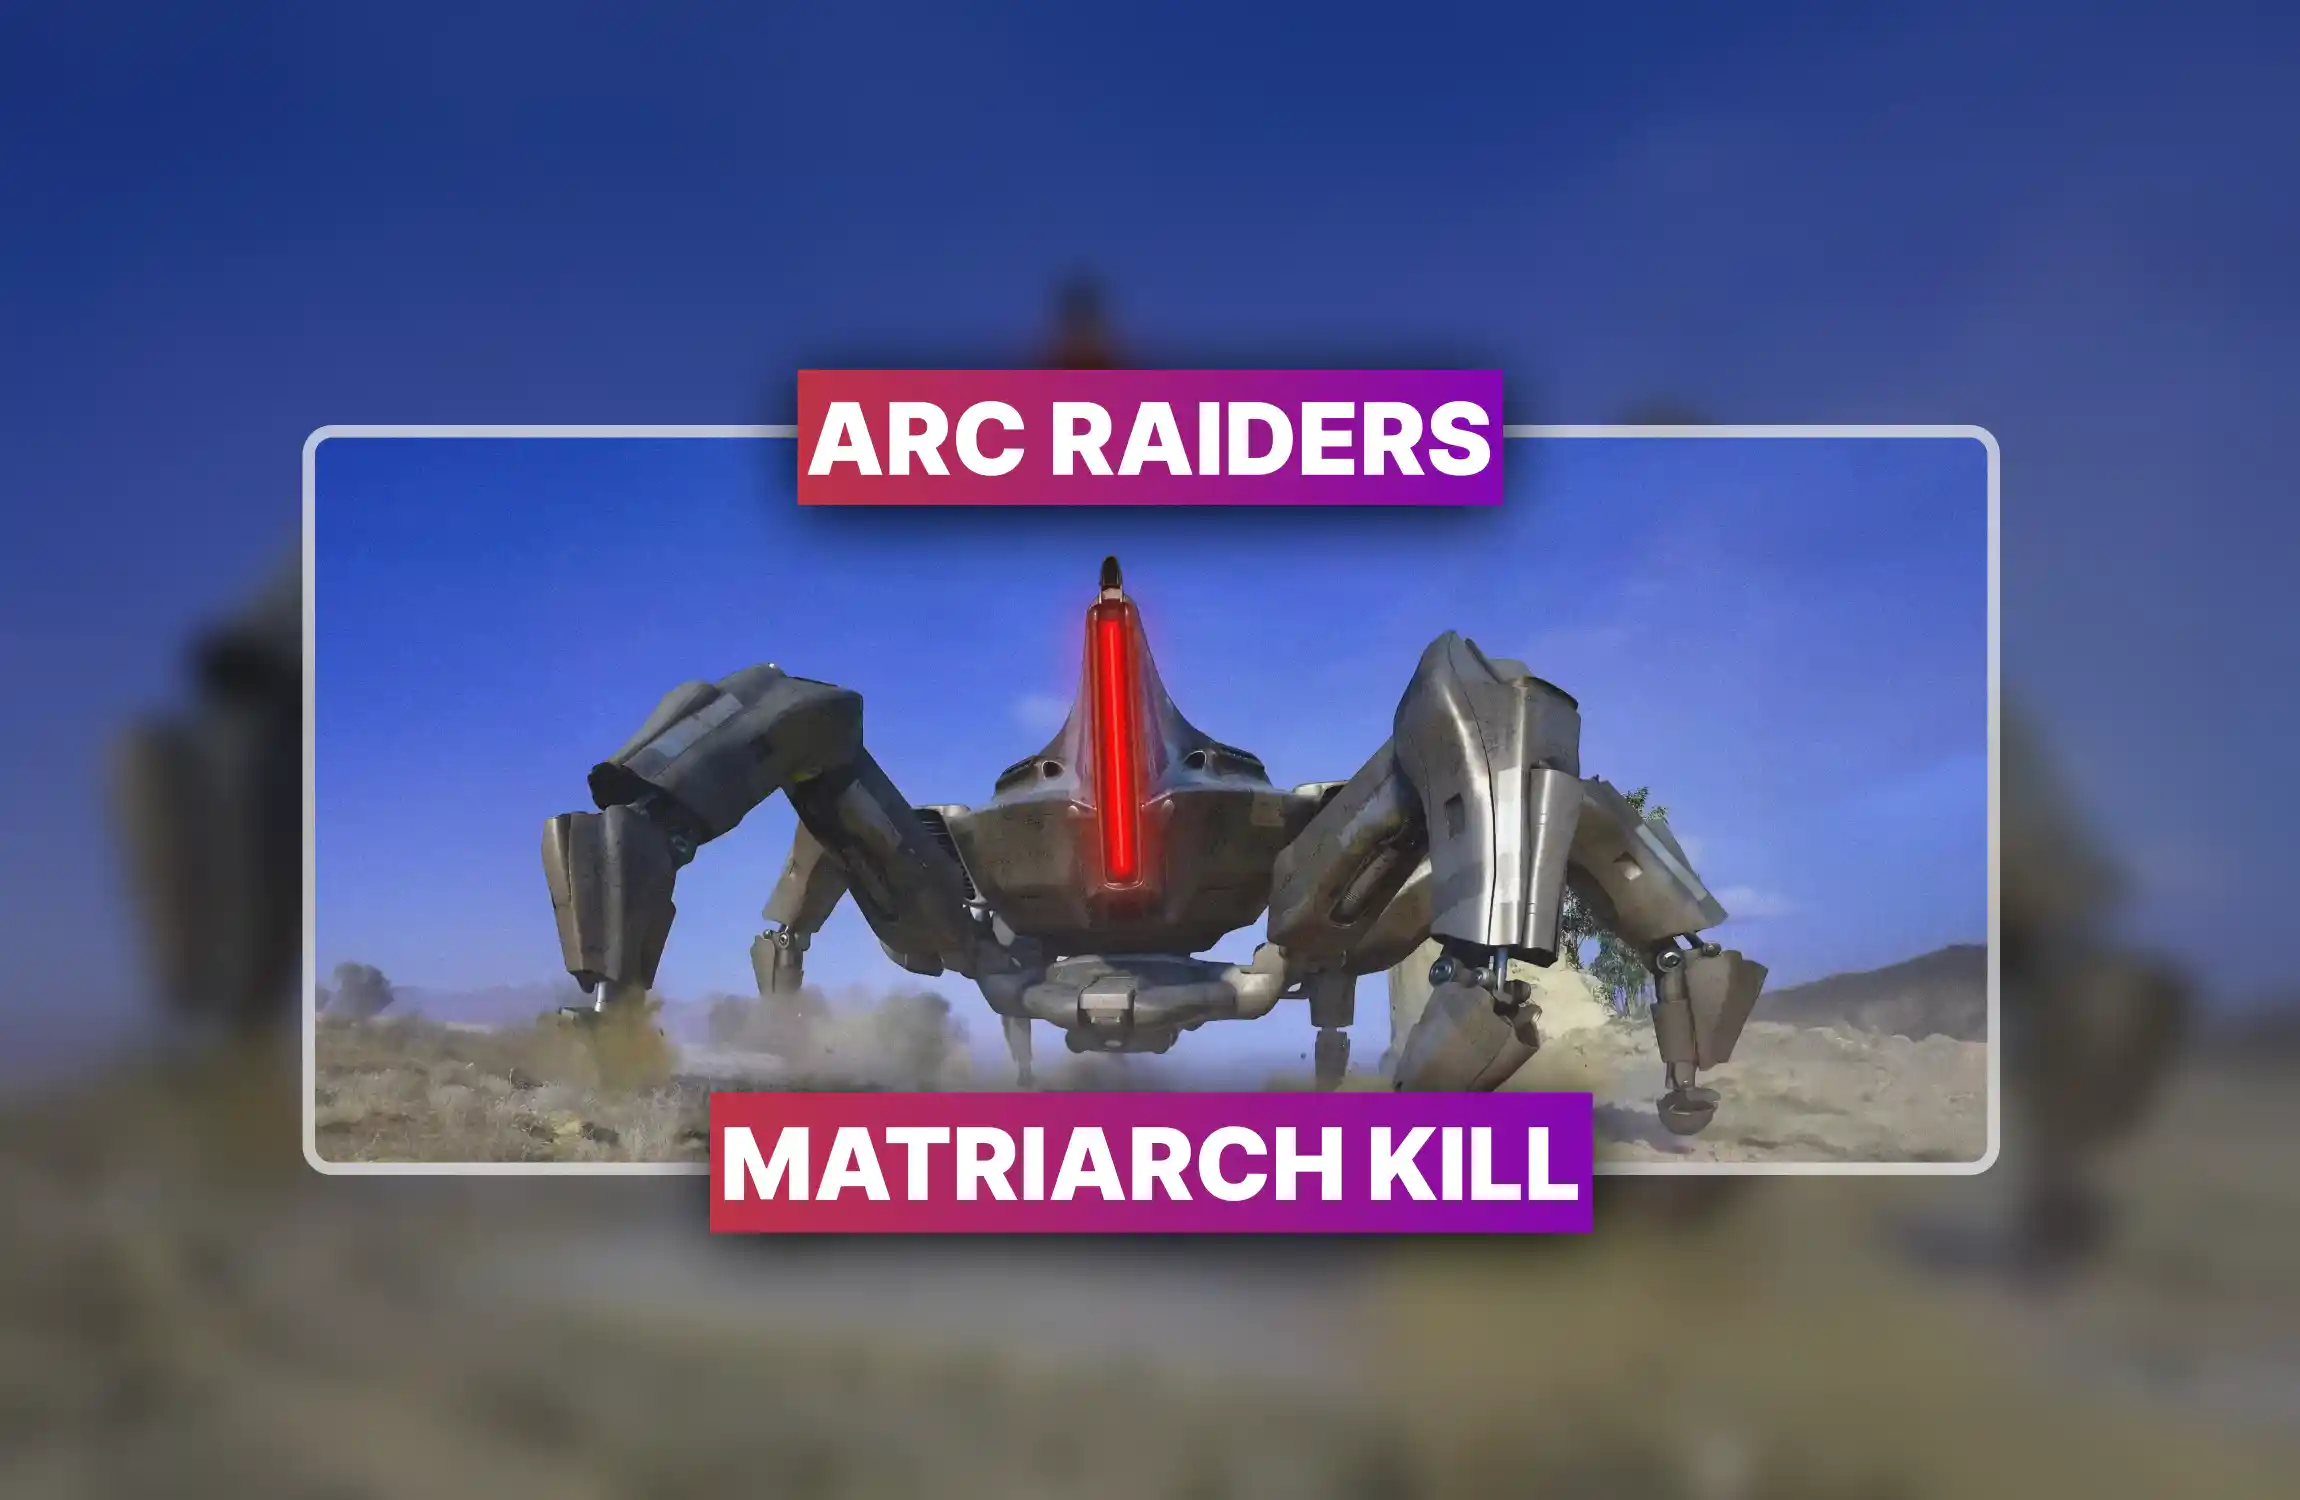
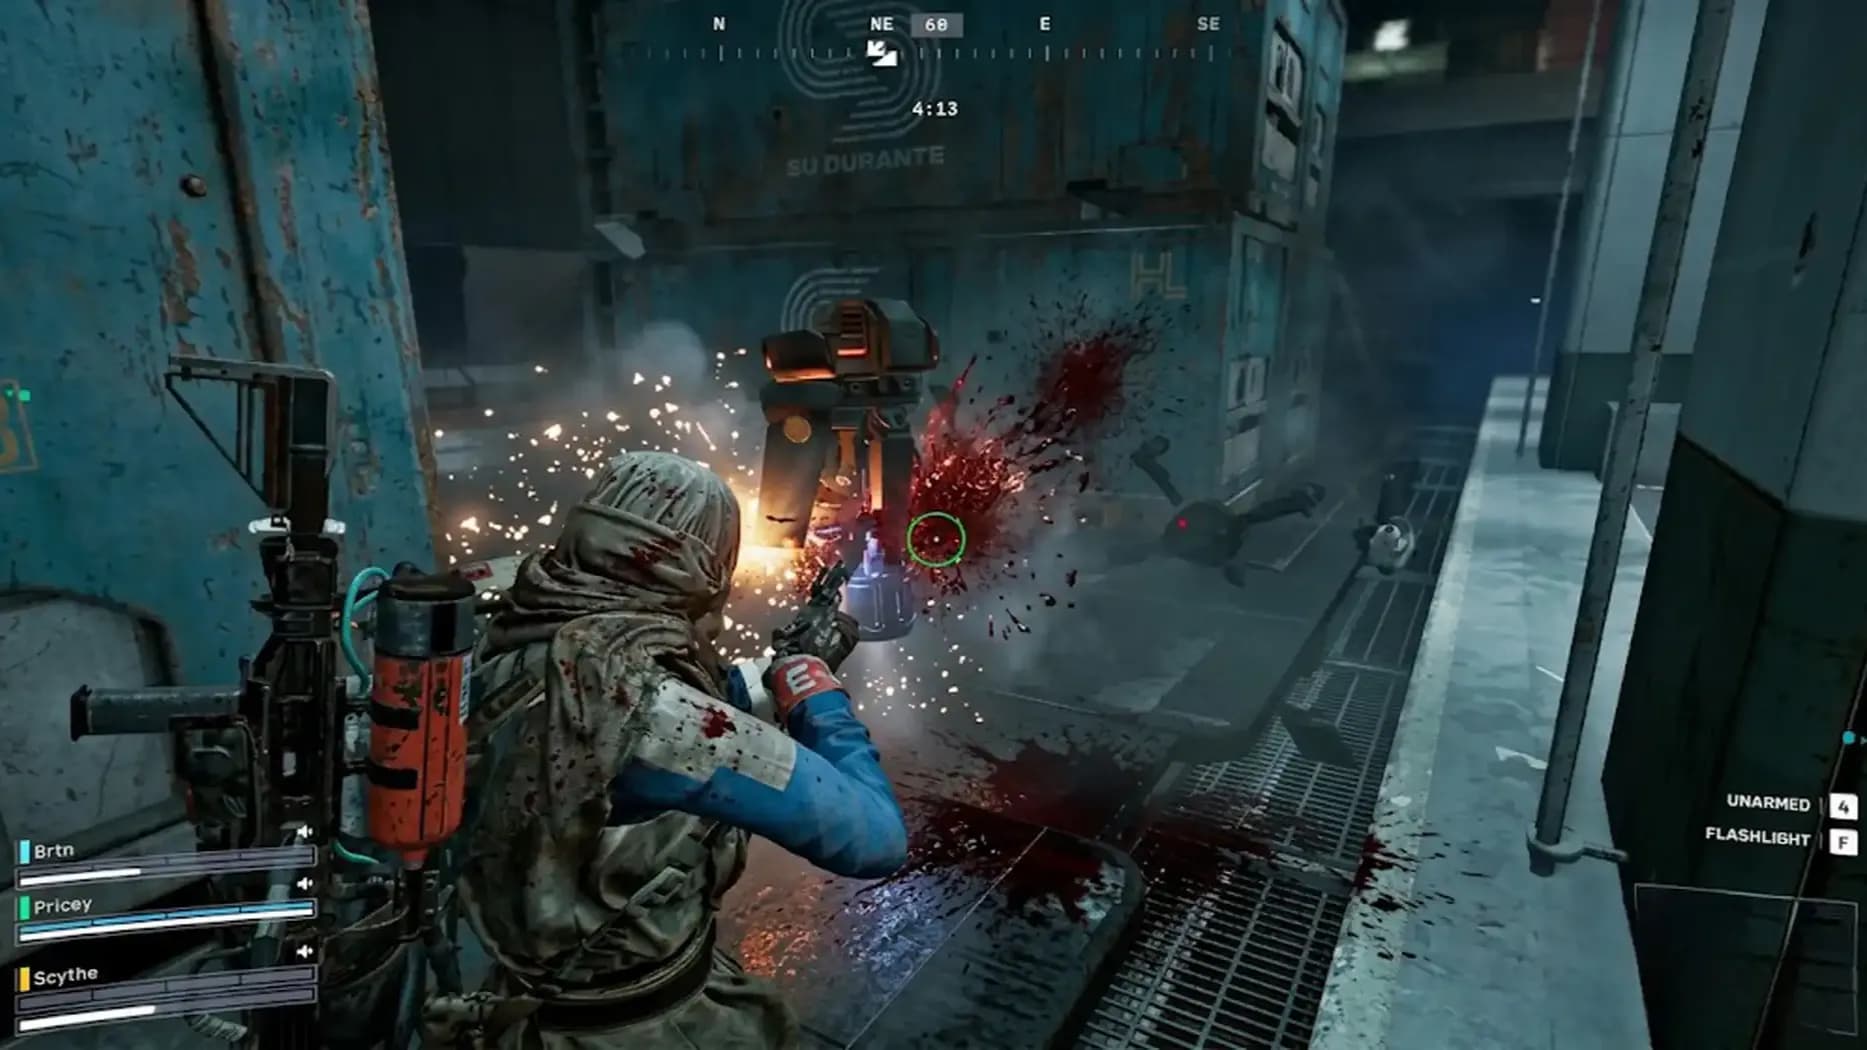
Here is the one piece of information that separates players who survive Shredder encounters from players who die confused and angry: the ARC Raiders Shredder weak spot thrusters: specifically the blue-lit propulsion jets on the underside and sides of the unit. Shooting the body is wasted ammunition. The Shredder is armored heavily on its chassis, and light ammo barely registers. The thrusters, however, are exposed, soft, and very much killable.
To understand how to kill Shredders ARC Raiders properly, the engagement looks like this: bait the Shredder into activating and firing its shrapnel burst, take cover immediately, and the moment the attack animation ends, step out and dump rounds or grenades into the thrusters. The Shredder has a brief recovery window after each attack: that is your entire window. Use it. Miss it and you're eating another burst.
Do NOT Shoot the Head The glowing eye is armored. It is bait. Embark Studios specifically patched the head to remove the ability to cheese it after the Cold Snap update. Aim for the thrusters or accept the consequences.

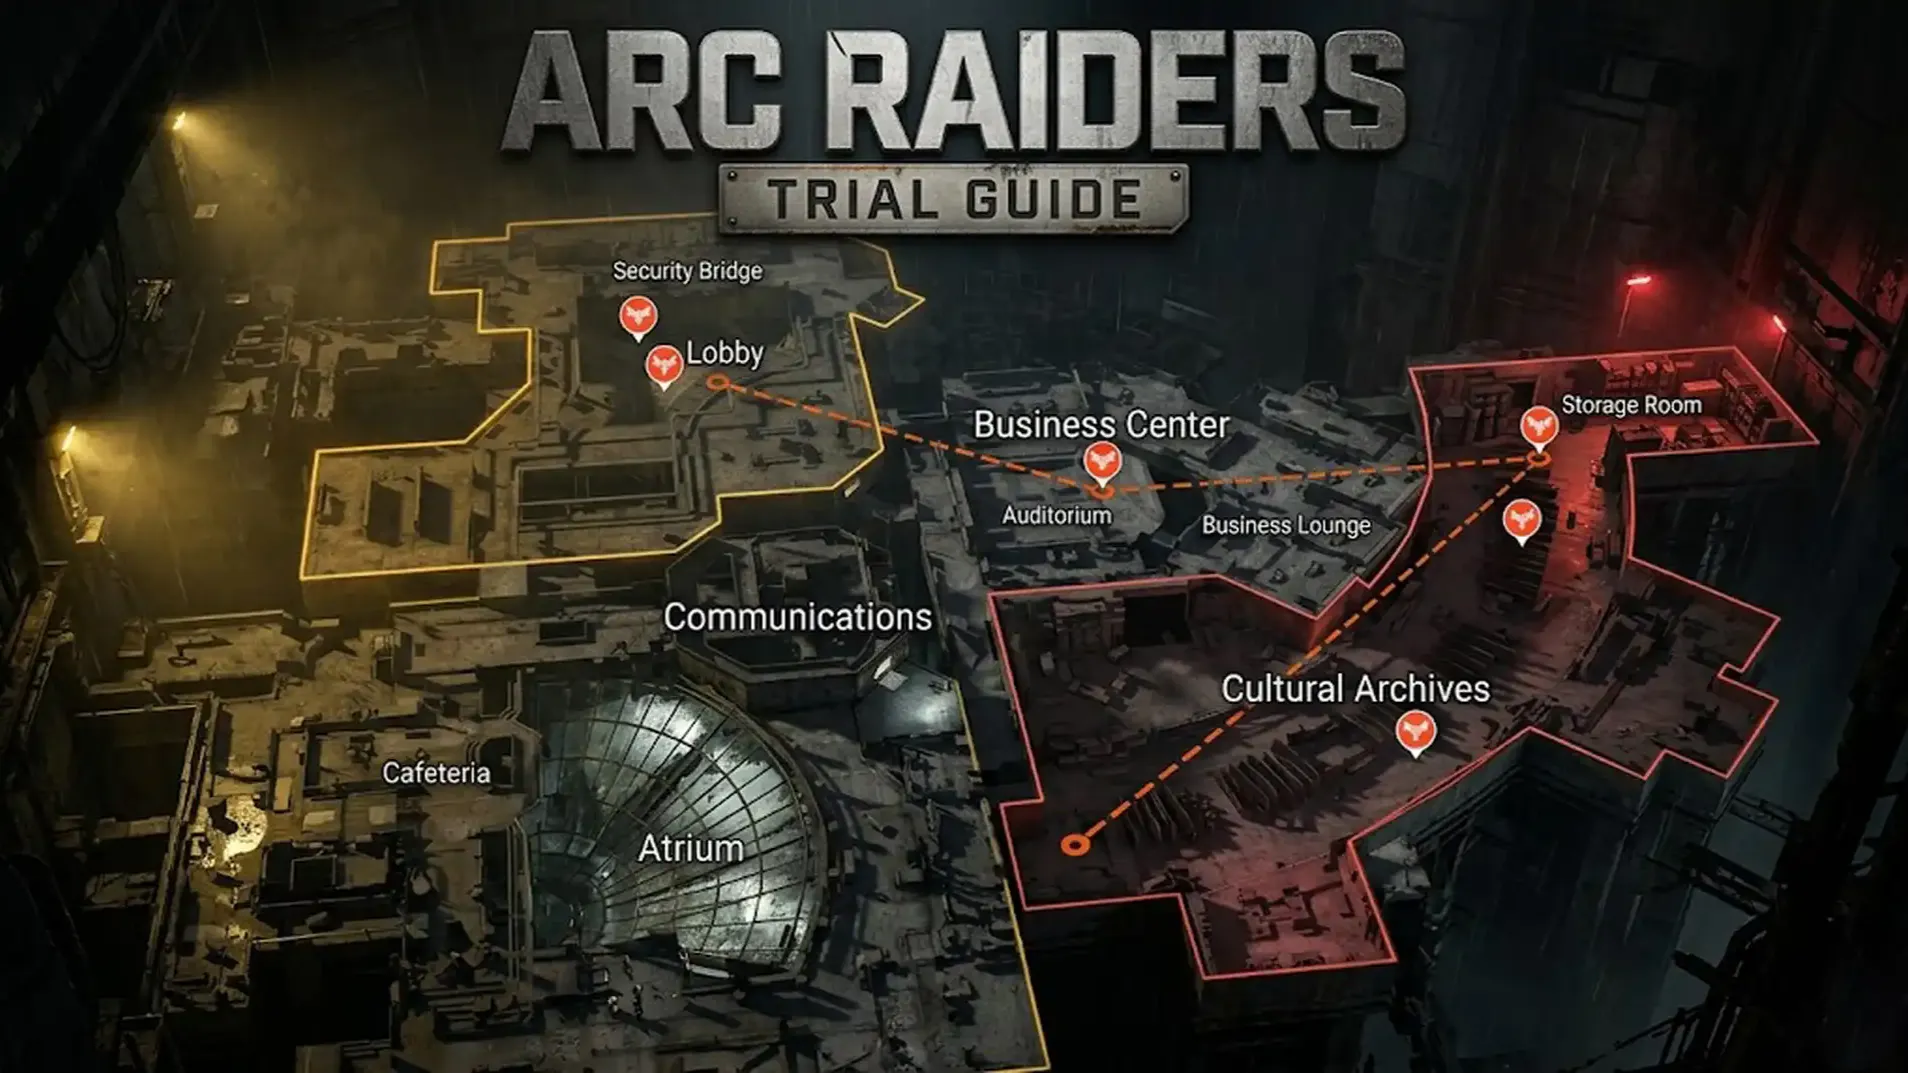
The ARC Raiders solo route Shredders is a clean that covers the four highest-density spawn zones on Stella Montis. Depending on your spawn location, start between Cultural Archives and Lobby, then run the circuit below. The route is designed to circle back on itself so you can repeat it for additional score without retracing dead ends.
Lobby (Ground Floor): two confirmed Shredder spawns. Clear them, then head upstairs to the Business Room for one additional spawn. Use the Business Room Zipline to drop into Cultural Archives.
Cultural Archives: high-value zone with multiple Shredders clustered throughout. Completing this section alone can push you past the 3-star threshold. Watch for Ticks, Fireballs, and Pops running interference. Proceed through to the Seed Vault stairwell.
Seed Vault / Airshaft Extract: one Shredder spawns at the extract. Be aware that this is a player-traffic chokepoint and popular camping spot. Kill the Shredder and move through to Sandbox: do not linger.
Robotic Sandbox A & B: the single most Shredder-dense area on the map. Multiple spawns across the lower level and control room. Sweep both floors. This is where solo runs either accelerate into genuine leaderboard territory or collapse under the weight of Ticks and bad angles.
Lobby Metro: one Shredder spawn. Take the Zipline from Metro directly back up to Lobby. Congratulations, you're back at step one. Repeat until satisfied or extract.
Medical Research is a worthwhile detour if you have the time: it can host two to three Shredders: but it's not on the critical path. Lower Loading Bay and Seed Vault Airshaft have smaller spawns worth grabbing if you're pushing score rather than farming the 3-star minimum. As a solo on Stella Montis, the standard rule applies: make friends where possible, shoot first where necessary, and do not stand still in the open while a Shredder is charging up its attack.
The ARC Raiders Trio map split Stella Montis Shredders strategy is exactly what it sounds like: divide the map between three players, cover more ground simultaneously, and bank score at a rate that makes the 3-star threshold feel like a minor administrative task rather than an actual challenge. The recommended split is as follows:
|
Player |
Assigned Zones |
Expected Shredders |
|
Player 1 |
Medical Research, Loading Bay, Assembly |
4–5 (Medical can have 2–3 alone) |
|
Player 2 |
Lobby Metro, Robotic Sandbox A & B, Seed Vault Airshaft |
5–7 across the dense Sandbox area |
|
Player 3 |
Cultural Archives, Business Center, Lobby |
5–7 with Archives doing the heavy lifting |
Once any player clears their zone, rotate to support whoever is still working through a high-value area rather than wandering aimlessly. The shared party score means every Shredder damaged by any teammate contributes. This is not a race within your team: it's a race against every other team in the lobby. Split efficiently, stay in communication, and reconvene before extraction rather than trickling out individually and handing the remaining Shredders to whoever was patient enough to wait.

• Fast ARC Raiders crafting upgrade
• Maximize crafting efficiency
• Secure, manual service

• Fast ARC Raiders Dam clears
• Guaranteed loot and resources
• Secure professional raid boosting

• Fast Buried City completion
• Guaranteed loot and rewards
• Secure professional raid carry
• Fast blueprint farming service
• Secure targeted item delivery
• Guaranteed high-tier recipes
• Fast Harvester puzzle completion
• Guaranteed loot and rewards
• Secure boosting by professionals
• Level 40 unlocked
• Rare blueprints gained
• 300,000 coins earned
New guide is live: Deal Damage to Shredders in ARC Raiders Trials. Best loadout, Stella Montis routes, thruster weak spots, Night Raid tips: max your

New guide is live: Deal Damage to Shredders in ARC Raiders Trials. Best loadout, Stella Montis routes, thruster weak spots, Night Raid tips: max your

New guide is live: Deal Damage to Shredders in ARC Raiders Trials. Best loadout, Stella Montis routes, thruster weak spots, Night Raid tips: max your

New guide is live: Deal Damage to Shredders in ARC Raiders Trials. Best loadout, Stella Montis routes, thruster weak spots, Night Raid tips: max your

New guide is live: Deal Damage to Shredders in ARC Raiders Trials. Best loadout, Stella Montis routes, thruster weak spots, Night Raid tips: max your

New guide is live: Deal Damage to Shredders in ARC Raiders Trials. Best loadout, Stella Montis routes, thruster weak spots, Night Raid tips: max your

New guide is live: Deal Damage to Shredders in ARC Raiders Trials. Best loadout, Stella Montis routes, thruster weak spots, Night Raid tips: max your

New guide is live: Deal Damage to Shredders in ARC Raiders Trials. Best loadout, Stella Montis routes, thruster weak spots, Night Raid tips: max your

Shredders spawn exclusively on Stella Montis, the only current map hosting them. Primary locations include the Lobby, Cultural Archives, Robotic Sandbox A and B, Lobby Metro, and Seed Vault Airshaft. Medical Research, Loading Bay, and Assembly offer additional smaller spawns worth grabbing on extended runs.
The blue thruster units: located on the underside and sides of the Shredder: are the confirmed weak spots. Hitting thrusters staggers the unit, reduces durability faster, and opens follow-up damage windows. Shooting the armored body or the glowing eye deals noticeably reduced damage and wastes your time.
Six Shredders at base score (693 each) clears the 4,000-point 3-star threshold. During a Night Raid 2x Event, only three Shredders are required. If the Night Raid is active, get your three and extract. The math favors efficiency over heroics.
The Anvil IV is the primary recommendation: high fire rate, heavy ammo penetration, and reliable thruster damage over approximately two magazines per Shredder. The Hullcracker is the faster kill at two thruster shots but significantly more expensive. Light Impact Grenades paired with the Anvil accelerate the process considerably.
The Trial is fully viable solo using the Lobby-Archives-Sandbox. A trio accelerates score via map splitting across Medical Research, Sandbox, and Cultural Archives simultaneously, but solo players hitting Night Raid lobbies with the right loadout can comfortably push well past the 3-star threshold without assistance.

GTA 6, new seasons, major updates — get ready to dominate from day one.