
Path of Exile 2 Boosting
The Forge Plan For 0.4.0 Path Of Exile 2 Crafting Guide 0.4.0
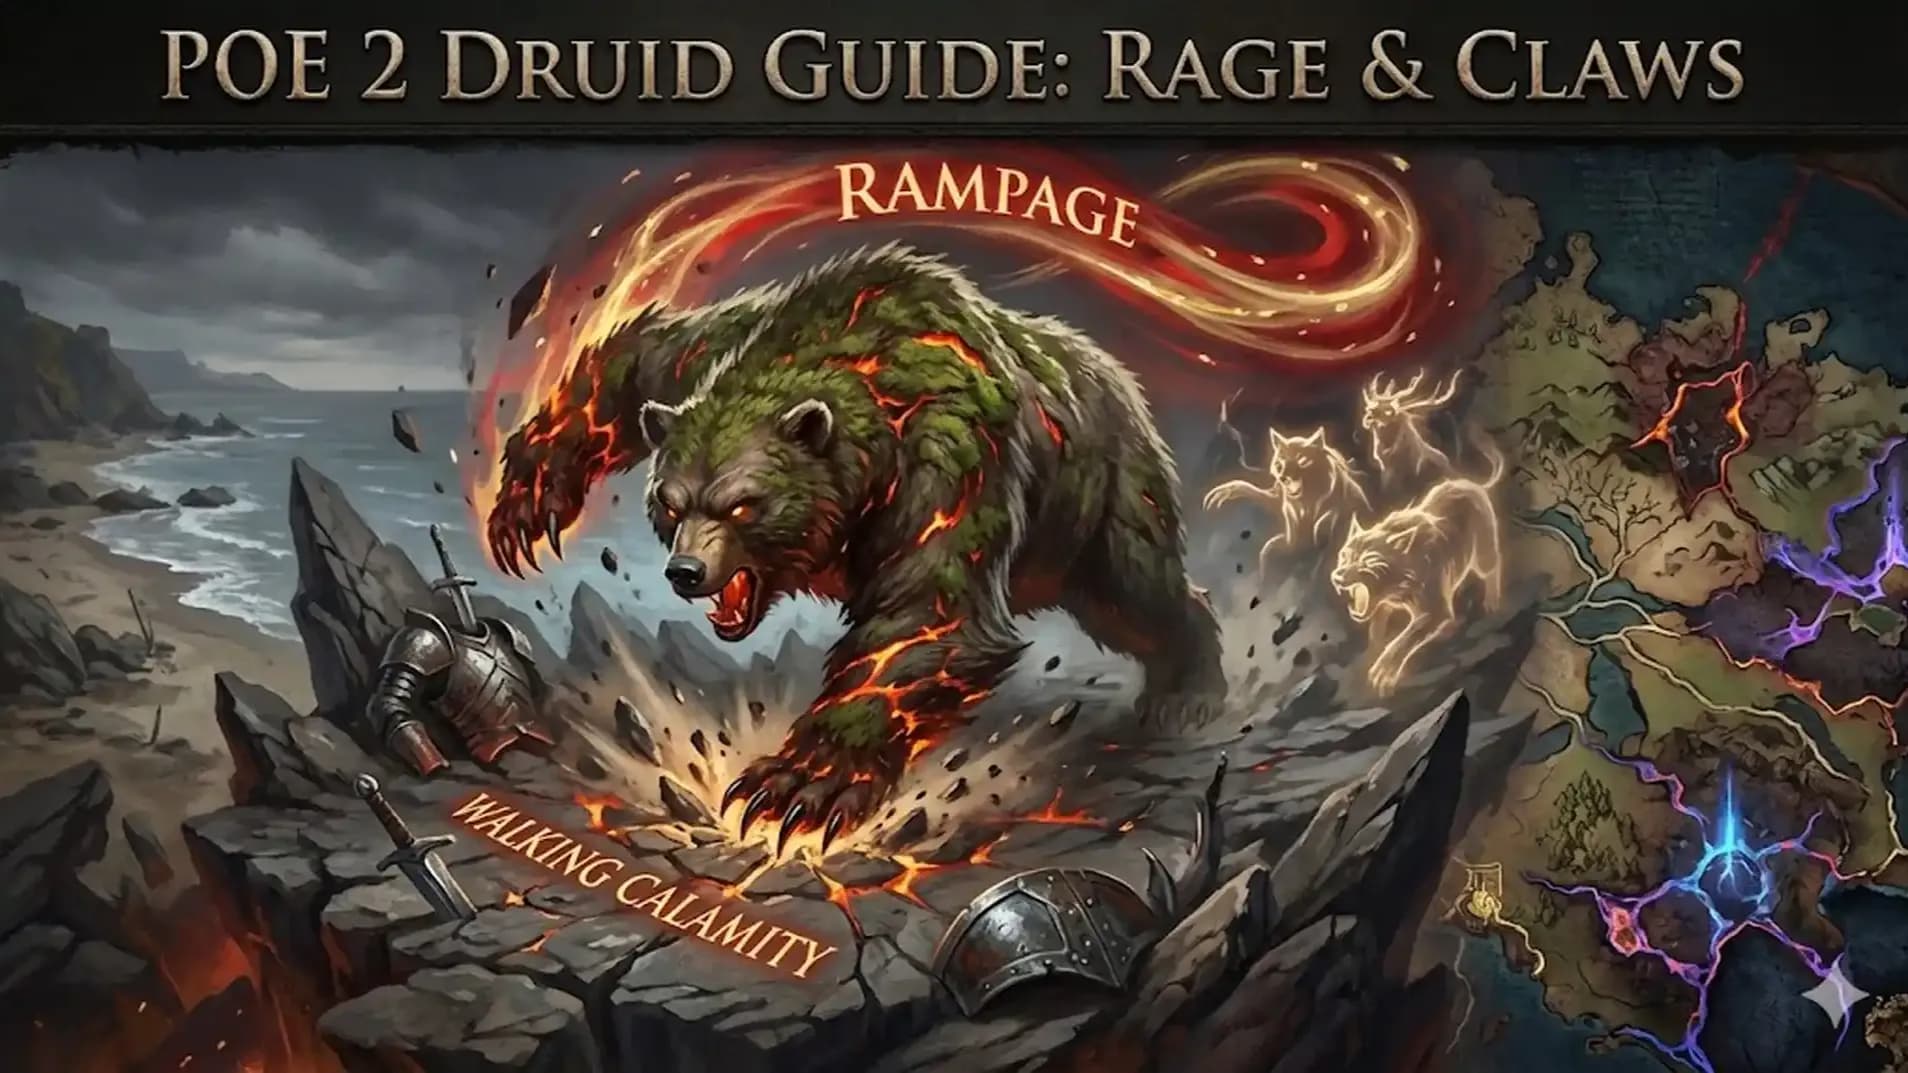
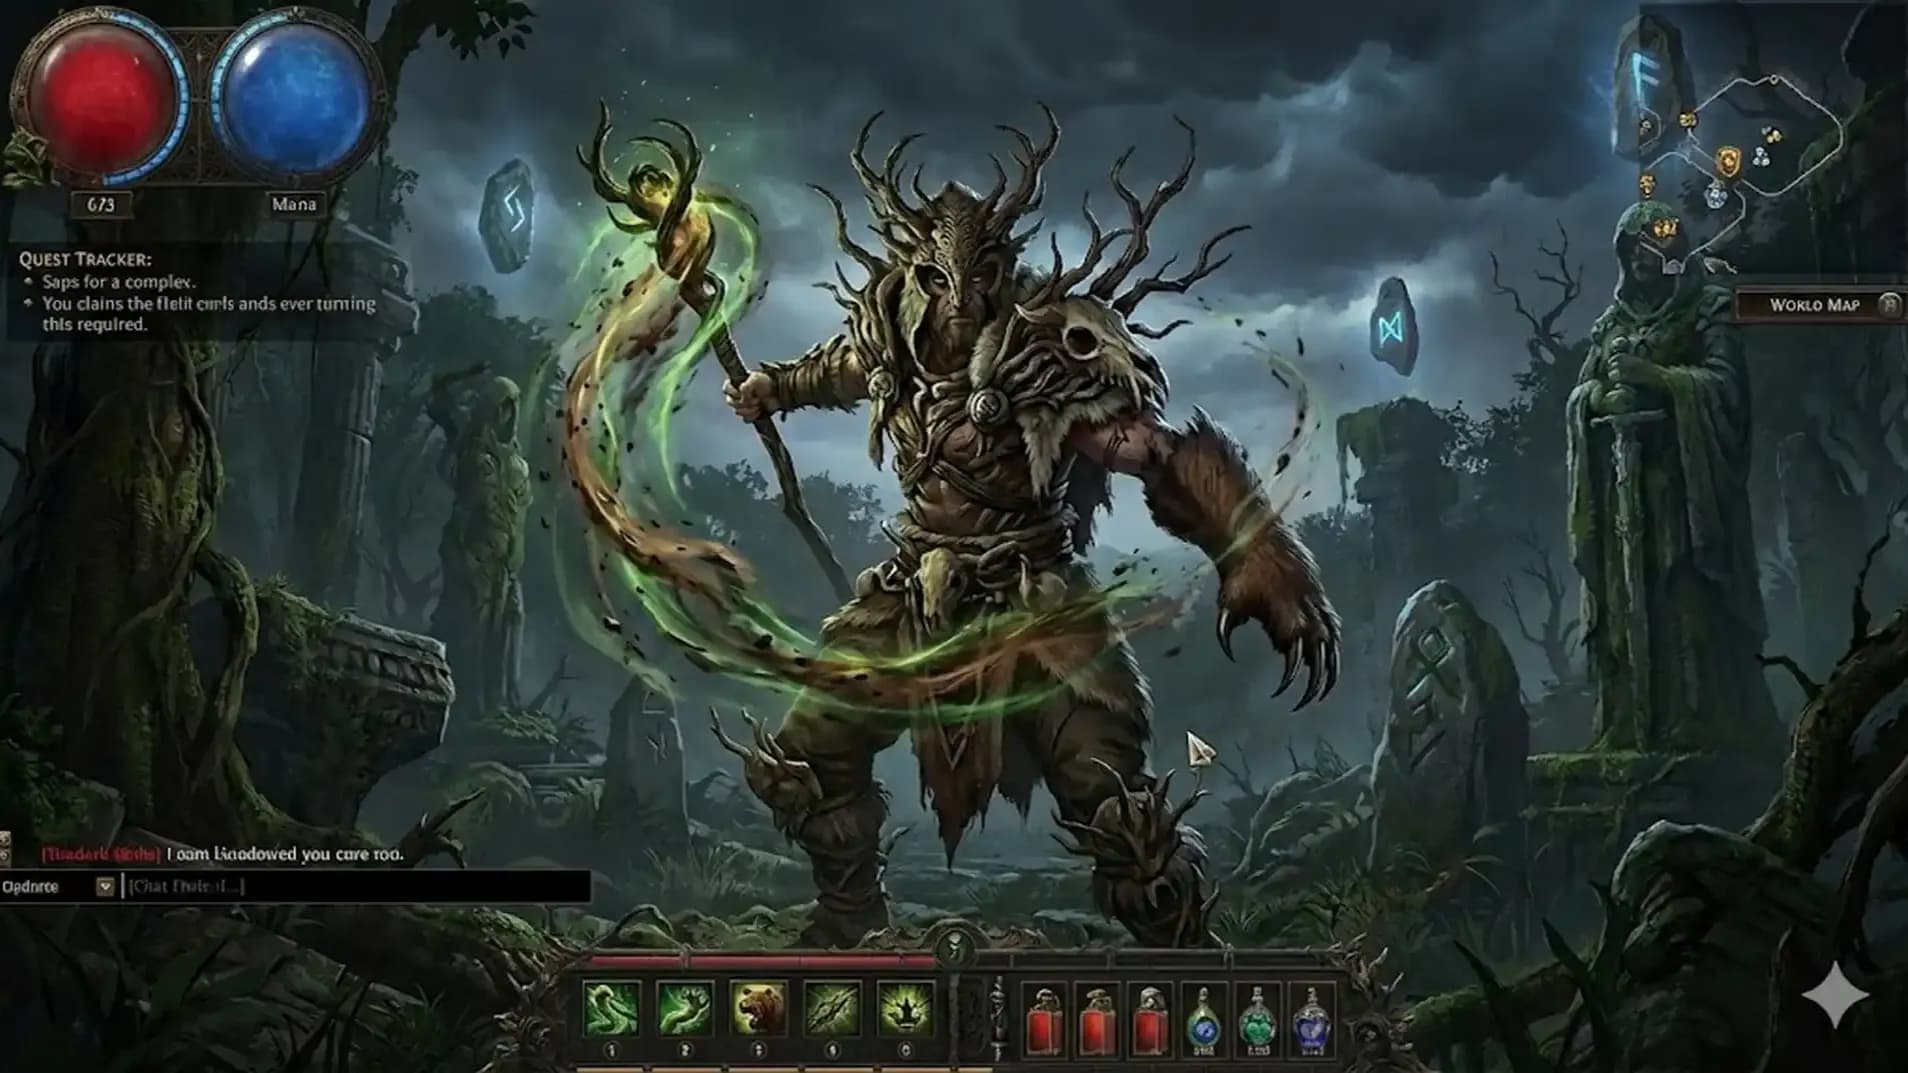
PoE 2 patch 0.4 Bear Druid guide explains Rage control, slam gameplay, Armour focus, Rampage clear, and Walking Calamity burst from acts into maps.
Wraeclast opens in patch 0.4, and the Druid steps forward with claws on stone and Rage under the skin. Bear form turns the body into a weapon, Armour turns hits into noise, and slams answer packs and bosses with the same brutal rhythm. The PoE 2 druid guide below follows a Bear Druid walking from the first acts into maps, learning how Rage breathes, how Rampage pulls the body forward, and how Walking Calamity decides when enemies fall.
If you’re reading this, you might be interested in a discount just for you—my blog reader! Use code CRINGEBLOG to get an amazing discount on Path of Exile 2 currency boost offer in our shop.
PoE 2 Bear Druid build you swap into Bear form, stack Armour, then build Rage and spend it on big slams.Clear feels quick because Rampage Bear Druid pushes you through packs, and boss damage can spike with Walking Calamity Bear Druid plus Berserk.The weak points are Rage control in early game, plus ongoing changes because tree and skill data for 0.4 is still getting confirmed.For a safe start, the plan is to begin with Shaman, then review Oracle later when Rage is solved.
| Feature | What it is | Why it matters | When you use it |
|---|---|---|---|
| Build type | Bear Druid league starter 0.4 with form swap | Smooth early progress with simple goals | Campaign and first maps |
| Core resource | Bear Druid rage mechanics | Rage is your damage fuel and your speed fuel | Always, from Act 1 |
| Main clear tool | Rampage charge and slam loop | Clears packs while moving | Zones and maps |
| Main slam spender | Furious Slam Bear Druid | Big AoE hit, also helps set Jagged Ground | Packs, rares, bosses |
| Big burst mode | Walking Calamity ultimate | High damage window, also helps Rage flow | Boss phases and tough rares |
| Early Rage builder | Maul, then swap to Fury of the Mountain at level 14 | Stable Rage generation for your slam loop | Campaign leveling |
| Early boss combo | Volcano setup plus slam spam | Volcano procs harder during slam play | Act bosses and elites |
| Utility damage layer | Shockwave Totem support | Extra pressure while you slam | Boss fights |
| Mobility add-on | Pounce from Wolf kit | Movement tool during early acts | Before Rampage feels stable |
| Clear support ring | Polcirkeln ring synergy | Enables cold clear plan with Herald | Early maps and mid game |
| Clear aura plan | Herald of Ice with cold focus | Pack clear with low gear stress | Early and mid game |
| Late clear option | Herald of Ash plus Ignite Proliferation | Fire spread plan around Walking Calamity | Later maps and endgame tests |
| Ascendancy start | Bear Druid Shaman ascendancy | Rage regeneration keeps Rampage uptime | League start and early game |
| Key Shaman nodes | Furious Wellspring and Druidic Champion | Rage regen, plus spell scaling for Volcano | Early ascendancy picks |
| Alternative later | Oracle swap idea | Late scaling may change after full data | Late endgame review |
| Weapon base | Bear Druid weapon talisman as 2H | Weapon drives most of your damage | Replace often during leveling |
| Tree direction | PoE 2 Druid passive tree 0.4 path to 2H nodes | Supports slam damage and Armour plan | Acts, then mapping |
| Core defenses | Bear Druid armor stacking with high base rares | Tank feel while you stay in melee | Campaign and maps |
| Gear priority | +level to melee skills on gloves and amulet | Big damage gain with simple crafting | Mid acts onward |
| Jewelry stats | Flat physical, resists, leech, mana regen | Damage plus sustain for long fights | Early to endgame |
| Rage shortcut unique | Ngamahu’s Chosen for instant max Rage | Lets you start fights at full power | When you can get it |
| Berserk note | Boss-only use, leech covers life loss | Strong burst with a clear safety rule | Bosses and rares |
| Endgame heading | Bear Druid endgame setup revolves around Rage loop | Totem, Rage build, burst, then Rampage | Maps and bosses |
Druid gameplay is built around instant form swaps, long spells that stay active, and a Rage loop that you control on purpose.This PoE 2 Bear Druid build uses Bear form as the main body – you build Rage with a generator, then you spend Rage on big slams, while a talisman keeps your weapon damage relevant and your movement skill online.The plan is simple – keep Rage flowing, keep Rampage rolling, then press your boss buttons when the window is ready, and let Shaman nodes support that loop with Rage regeneration and extra max Rage because of Path of Exile 2 Mirror of Kalandra boost.
| Skill | Form | Type | What it does | Main use | Cost / resource | Links you use here |
|---|---|---|---|---|---|---|
| Maul | Bear | Attack | Basic bear hit that builds Rage | Early leveling, filler hits | Generates Rage | Fire Attunement or Cold Attunement |
| Fury of the Mountain | Bear | Attack | Main Rage generator after early levels | Rage setup for slams | Generates Rage | Rage I – Upheaval I – Rapid Attacks I |
| Furious Slam | Bear | Slam | Big AoE slam that spends Rage for power | Clear support, boss trigger | Spends Rage | Rage I option for low-input play |
| Rampage | Bear | Movement slam | Run forward and slam while it lasts | Map clear, movement, pack wipe | Spends Rage over time | Momentum – Heft |
| Ferocious Roar | Bear | Warcry meta | Sets up armor break, holds a warcry gem | Burst setup, boss prep | Rage interaction is part of kit | Warcry gem socketed inside |
| Walking Calamity | Bear | Ultimate | Fire storm style buff that boosts Rage loop | Boss phases, big packs | High Rage requirement | Momentum – Fire Attunement – Elemental Armament II |
| Volcano | Human | Spell | Persistent volcano that erupts from slams | Boss core, early carry | Mana or Spirit rules apply | Used with slam triggers |
| Shockwave Totem | Human | Totem | Totem damage plus utility | Boss help, extra pressure | Charge or Spirit rules apply | Slot into boss chain |
| Pounce | Wolf | Mobility attack | Leap and reposition tool | Campaign speed, engage tool | Uses its own cost | Rapid Attacks I – Marked For Death |
| Berserk | Any | Buff | Rage scaling damage buff with life drain | Boss button, rare packs | Uses Rage scaling | Needs life leech on ring |
| Time of Need | Any | Utility | Sustain tool for campaign fights | Campaign safety, bosses | Spirit cost | Flexible slot |
| Attrition | Any | Buff | Long-fight damage tool with cull | Boss option | Spirit cost around 30 | Flexible slot |
| Herald of Ice | Any | Herald | Cold clear support with Polcirkeln | Campaign clear, early maps | Reservation | With Cold Attunement later |
| Herald of Ash | Any | Herald | Fire clear plan for late version | Late clear plan | Reservation | Ignite Proliferation |
| Ignite Proliferation | Any | Support | Spreads ignites for clear | Fire clear support | Support socket | With Herald of Ash |
| Momentum | Any | Support | Movement plus slam scaling | Rampage, Calamity links | Support socket | Rampage, Walking Calamity |
| Heft | Any | Support | Heavy hit scaling | Rampage link | Support socket | Rampage |
| Fire Attunement | Any | Support | Fire focus conversion or add | Calamity link, early weapons | Support socket | Maul, Walking Calamity |
| Cold Attunement | Any | Support | Cold focus for clear | Herald of Ice plan | Support socket | Maul or Rampage |
| Elemental Armament II | Any | Support | Elemental scaling support | Walking Calamity link | Support socket | Walking Calamity |
| Fist of War II | Any | Support | Big slam multiplier | Test slot | Support socket | Walking Calamity or slam |
| Aftershock II | Any | Support | Aftershock slam support | Test slot | Support socket | Rampage or slam |
| Heavy Swing | Any | Support | Attack speed scaling | Test slot | Support socket | Rampage |
| Rage I | Any | Support | Adds Rage interaction | Low-input play | Support socket | Furious Slam |
| Rage II | Any | Support | Stronger Rage interaction | Rage engine support | Support socket | Maul in Shaman phase |
| Rapid Attacks I | Any | Support | Attack speed support | Mobility and generator links | Support socket | Fury of the Mountain, Pounce |
| Upheaval I | Any | Support | Slam scaling support | Generator link | Support socket | Fury of the Mountain |
| Marked For Death | Any | Support | Mark for target focus | Leveling link | Support socket | Pounce |
| Druidic Champion | Shaman | Ascendancy node | Rage scales spell damage | Volcano phases stronger | Passive | Works with Volcano |
| Furious Wellspring | Shaman | Ascendancy node | Rage regen engine plus max Rage | Keeps Rampage uptime stable | Passive | Core Shaman pick |
| Wisdom of the Maji | Shaman | Ascendancy node | Rune and idol bonus engine | Scaling and utility | Passive | Gear synergy |
| Bringer of the Apocalypse | Shaman | Ascendancy node | Grants Apocalypse skill | Optional burst layer | Passive | Build choice |
| Apocalypse | Shaman | Granted skill | Element rain trigger skill | Optional damage layer | Trigger rules | Build choice |
Gear for this Shape Shifting Bear Druid is simple – damage comes from your Bear Druid weapon talisman, and safety comes from big Armour bases, so your whole setup follows that plan for a Bear Druid league starter 0.4.Your talisman wants high physical damage, because slams scale hard from weapon, and you replace it often during PoE 2 Druid league start to keep your hits sharp.Armour pieces want high base Armour to support Bear Druid armor stacking, then you fill life and resist, and you add +levels on key slots so your Bear skills scale.Jewelry fixes damage plus sustain, so you can keep Bear Druid rage mechanics stable for Rampage Bear Druid clear and for boss windows with Walking Calamity Bear Druid.
| Slot | Recommended gear type | Key stats to hunt | Notes for this setup |
|---|---|---|---|
| Weapon (Talisman) | Rare 2H Talisman | High physical DPS, attack speed | Talismans are the 0.4.0 shapeshift weapon and grant the form basic attack when equipped. |
| Helmet | Rare Armour helm | Armour, life | Constricting Command can fit later for Surrounded tech and lowers the enemy count needed. |
| Body Armour | Rare high-Armour chest | Armour, life | Take the highest Armour base you can wear, then add resists. |
| Gloves | Rare Armour gloves | +Level of Melee Skills, attack speed | This slot is a core damage scaler for the PoE 2 Bear Druid build. |
| Boots | Rare Armour boots | Movement speed, resists | Move speed keeps clear smooth before Rampage uptime feels constant. |
| Belt | Rare belt | Life, resists | Add sustain stats here if fights feel rough. |
| Ring 1 | Polcirkeln | Cold synergy stats from the item | This ring supports early clear setups and cold scaling. |
| Ring 2 | Rare ring | Flat physical to attacks, life leech | Add mana regeneration here if resource feels tight. |
| Amulet | Rare amulet | +Level of Melee Skills, life | Priority slot for skill scaling and comfort. |
| Charms | Utility charm set | Defensive charm stats | Ngamahu’s Chosen works as a Ruby Charm option for max-Rage moments. |
| Runes / Idols | Match build needs | Armour, damage utility | Shaman rune and idol value rises with the ascendancy plan, so keep upgrades flowing. |
Skill gems are your main actions, and support gems change how those actions work in a fight.In Bear Druid league starter 0.4 you build Rage with one skill, then spend Rage with a slam for clear or for bosses.This Shape Shifting Bear Druid also uses a human spell for setup, plus a wolf jump for Path of Exile 2 Divine Orb boost.
| Skill gem | Form | What it does | When to use | Key supports | Notes |
|---|---|---|---|---|---|
| Maul | Bear | Basic attack and Rage builder | Early acts | Rage I, Rapid Attacks I | Needs a talisman and gives Rage on hit. |
| Fury of the Mountain | Bear | Main Rage generator for the loop | After level 14 | Rage I, Upheaval I, Rapid Attacks I | Press to fill Rage, then dump Rage with slam skills. |
| Furious Slam | Bear | Big slam for packs and rares | Acts and maps | Aftershock II, Fist of War II, Rage I | Main Rage spend that fits the slam combo plan. |
| Rampage | Bear | Run forward and slam while moving | Main clear tool | Momentum, Heft, Cold Attunement | Consumes Rage while active, so uptime matters. |
| Ferocious Roar | Bear | Warcry tool that empowers slams | Boss prep | Warcry gem, Duration support | Use before a slam window to boost impact. |
| Walking Calamity | Bear | Burst buff with meteor rain | Bossing | Momentum, Fire Attunement, Elemental Armament II | Builds Glory at max Rage, then rains meteors and adds Rage regen. |
| Volcano | Human | Setup spell for boss damage | Acts and bosses | Duration support, Area support | Drop it, then slam nearby for extra eruptions. |
| Shockwave Totem | Human | Extra hits while you fight | Bossing | Faster Casting support, Duration support | Place before Rage dump for steady pressure. |
| Pounce | Wolf | Leap movement and mark utility | Early travel | Rapid Attacks I, Marked For Death | Use for fast movement, then return to Bear skills. |
| Herald of Ice | Aura | Clear help with cold pops | Early maps | Cold Attunement, ailment support | Fits the Polcirkeln early clear plan. |
| Herald of Ash | Aura | Fire clear option | Later maps | Ignite Proliferation, fire support | Matches Walking Calamity fire scaling. |
| Berserk | Buff | Rage spend for burst damage | Bossing | Sustain support, Duration support | Use on bosses and rares with leech on gear. |
| Time of Need | Buff | Safety button for campaign | Acts | Duration or cost supports | Use when fights feel risky and sustain is needed. |
| Attrition | Buff | Long fight damage tool | Bossing | Duration or cost supports | Option when Berserk feels hard to sustain. |
PoE 2 Bear Druid build guide | Rotation is a simple Rage loop, where you fill Rage with one main skill, then you spend Rage to clear packs or to burst bosses. This Shape Shifting Bear Druid uses a weapon talisman to stay in bear form, and the Bear Druid Shaman ascendancy helps your Bear Druid rage mechanics feel stable during Bear Druid league starter 0.4. In maps you lean into the Bear Druid Rampage build for speed, and you keep Furious Slam Bear Druid ready as a clean Rage dump. In the Bear Druid endgame setup you add Walking Calamity Bear Druid plus Berserk for boss windows, while Volcano stays your early boss setup tool.
| Goal | Rotation | Notes |
|---|---|---|
| Clear packs and move clean | Move – Pounce | Build Rage – Maul, then Fury of the Mountain after level 14 | Spend Rage – Furious Slam | This is the early loop for Bear Druid build 0.4, and it stays comfortable through acts. |
| Safe damage with simple buttons | Open – Pounce | Setup – Volcano twice | Damage – Furious Slam spam | Rage also boosts Volcano after Druidic Champion, so the combo scales into later acts. |
| Kill while running | Build Rage – Fury of the Mountain | Clear – Rampage | Clean up – Furious Slam | Keep Rampage active and refill Rage between packs so the run keeps its flow. |
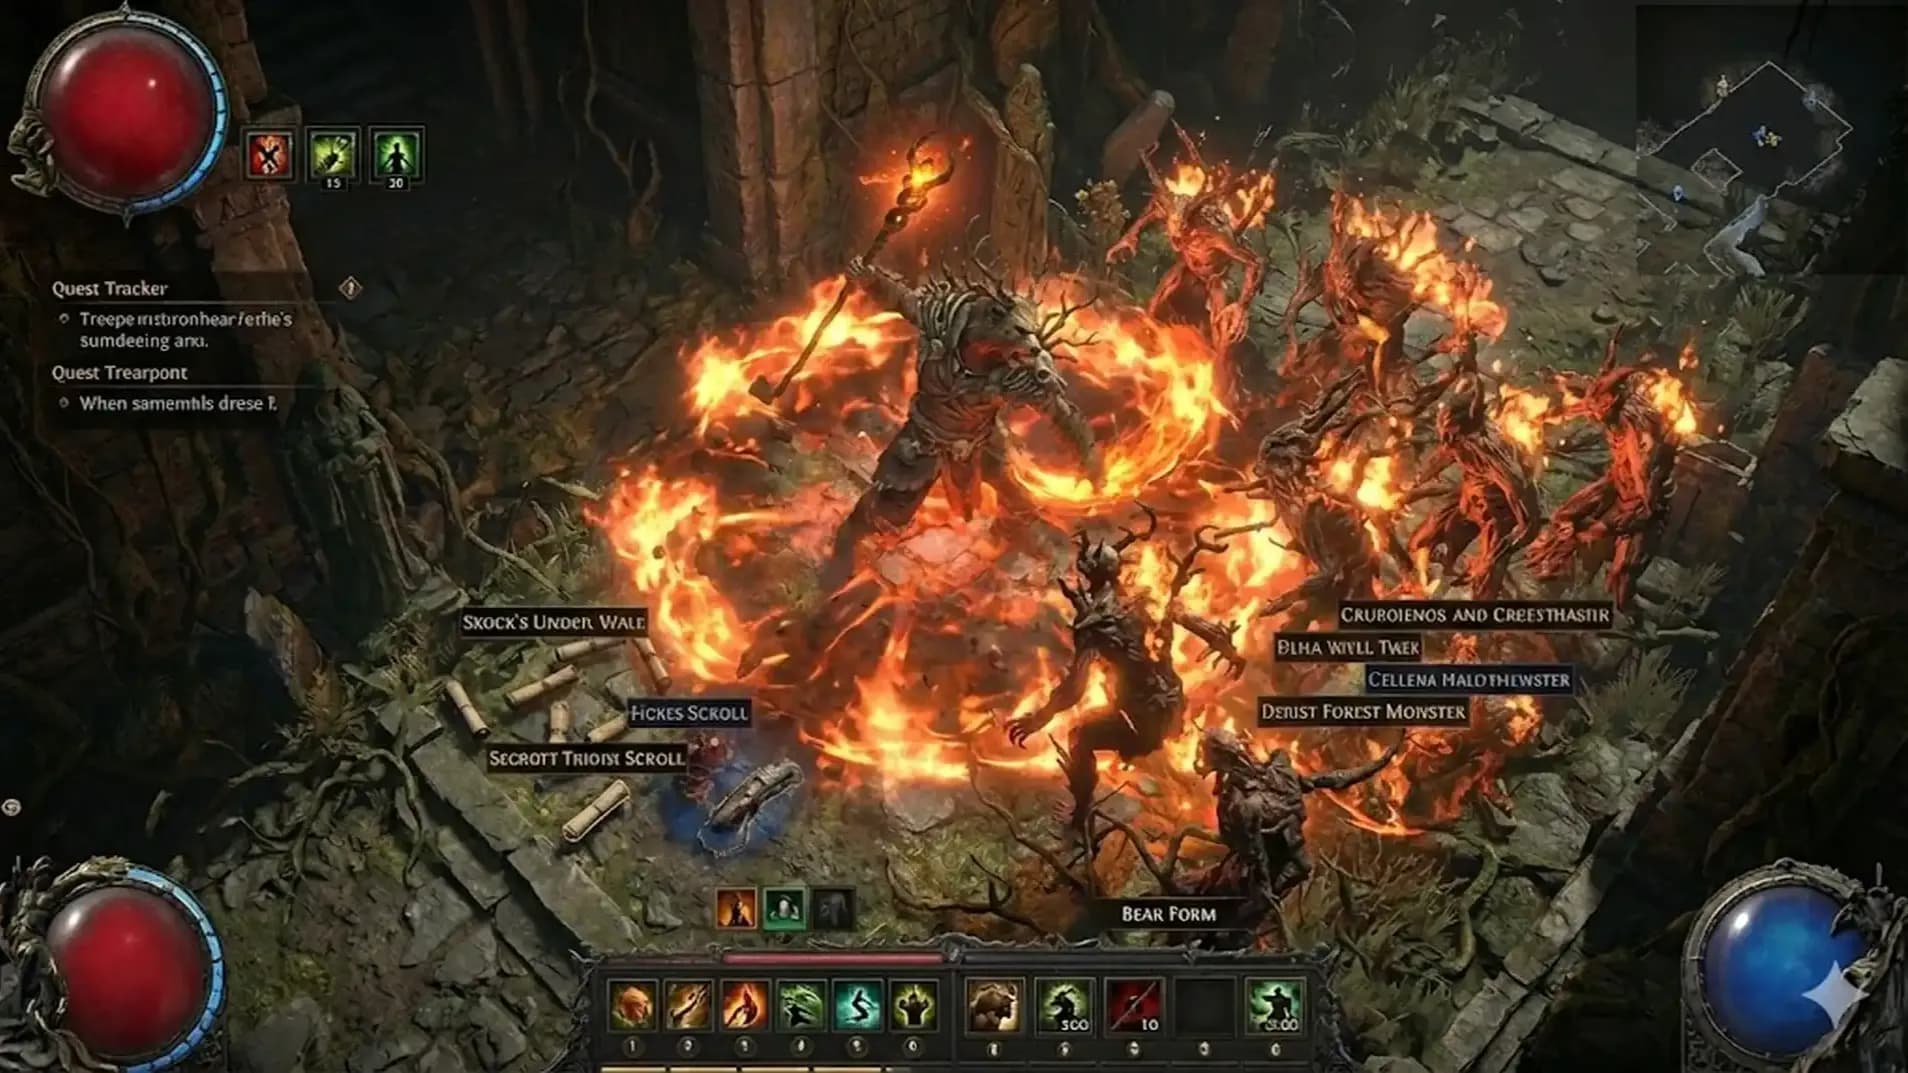
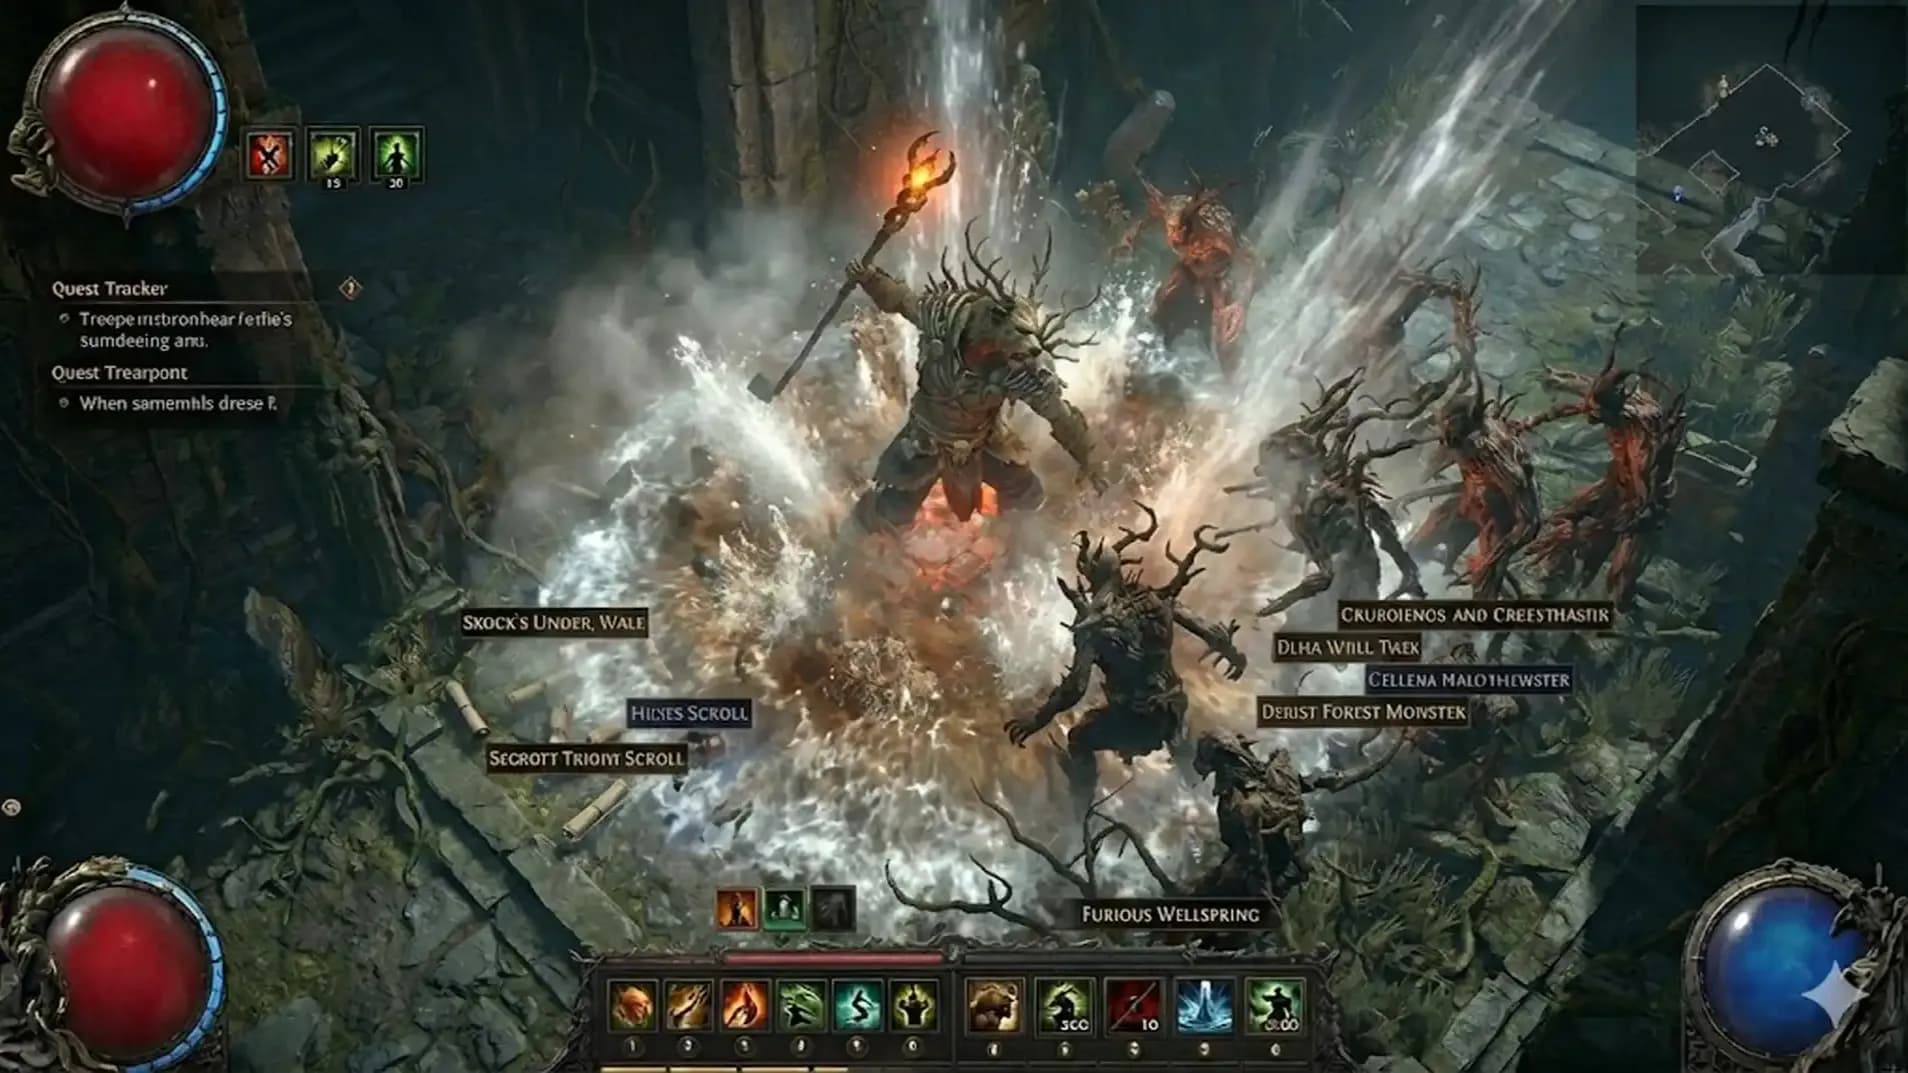
| One big damage window | Drop – Shockwave Totem | Build Rage – Fury of the Mountain | Burst – Walking Calamity | Tag ground – Furious Slam | Finish – Rampage | This is the main boss flow tied to the Walking Calamity setup in the guide. |
| Stay alive in long fights | Keep hits – stay close and keep slamming | Sustain – Time of Need when needed | Armour does the heavy work, while steady hits keep life leech active. |
| Push damage on rares and bosses | Burst – Berserk | Stop – turn it off while moving between packs | Life loss gets covered by life leech on rings, so use Berserk in short windows. |
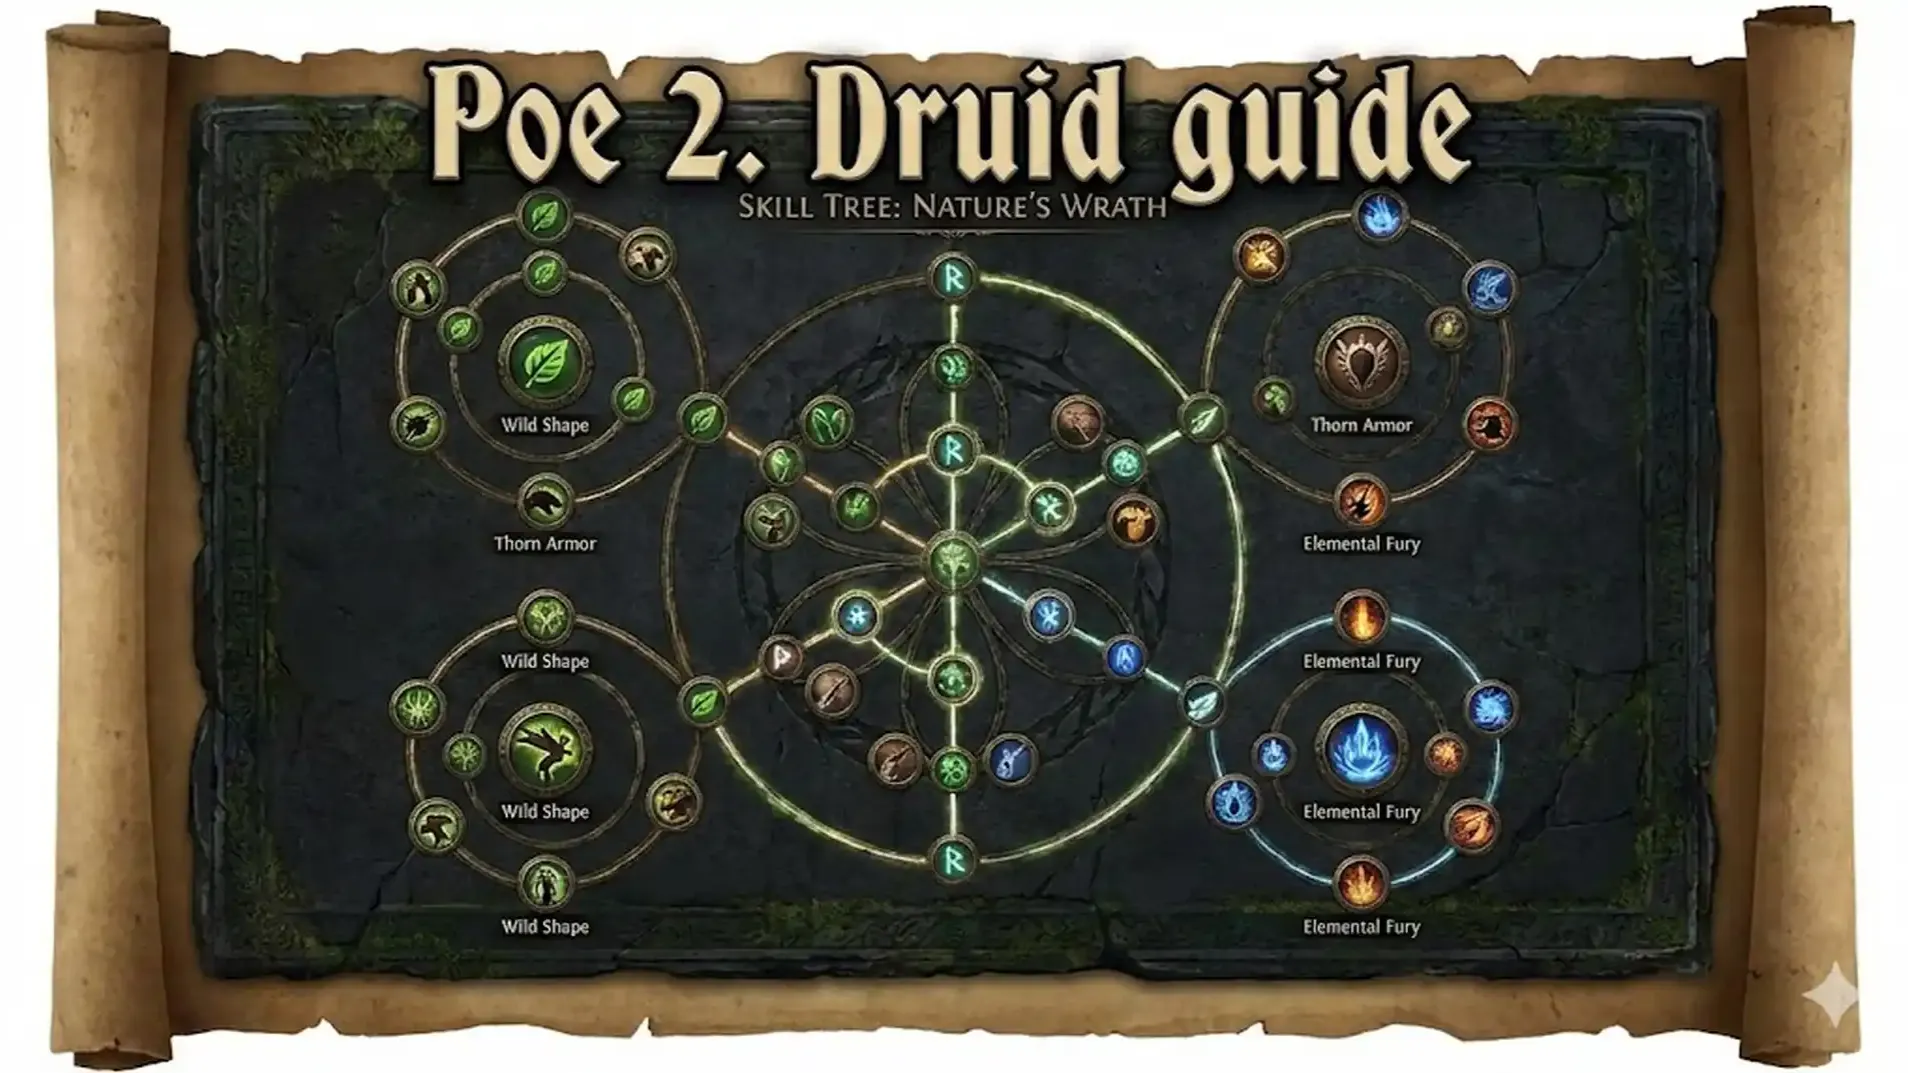
In this section, the Ascendancy choice sets your Rage flow and your damage window, so it shapes the whole playstyle for this Bear Druid league starter 0.4. For early progression, the Bear Druid Shaman ascendancy fits the plan because it gives steady Rage regeneration for long Rampage uptime, and it also adds useful passives like spell scaling from Rage plus tank stats. Oracle can work later for planned burst and extra passive options, once your Rage loop feels stable and your endgame gear starts to carry Path of Exile 2 pre-order boost.
| Ascendancy | What it gives for Bear plan | Key nodes to take first | When it fits | What it changes in fights |
|---|---|---|---|---|
| Bear Druid Shaman ascendancy | Rage regeneration, higher max Rage, spell scaling from Rage, rune and idol bonuses |
1 – Druidic Champion 2 – Furious Wellspring 3 – Wisdom of the Magi 4 – Reactive Growth |
League start, campaign, early maps | Rampage stays active longer, Walking Calamity appears more often, Volcano setups gain value from Rage based spell scaling |
| Oracle | Vision based burst windows, copy damage moments, extra passive options | Fateful Vision first, then Converging Paths, then Unseen Path | Later swap plan with burst focus | Boss phases feel scripted and damage spikes depend on timing with vision tools |
| Third Ascendancy | Future option | Future option | Later patch cycle | Later patch cycle |
The core loop in Shape Shifting Bear Druid starts in human form, then you swap into Bear to hit and build power. Your swap key is the Bear Druid weapon talisman, since the talisman attack triggers the form change right away. The engine of the build is Bear Druid rage mechanics, because Rage decides how long you can stay in your main skills. For clear, Rampage Bear Druid lets you move through packs while slamming, then you reset and repeat. For bosses, Walking Calamity Bear Druid is your big spend window after you stack Rage.
| Phase | Form | Button plan | Main goal | What to watch |
|---|---|---|---|---|
| Setup | Human | Cast Volcano | Start damage zone | Keep it near the pack |
| Enter form | Bear | Use Maul | Start Rage gain | Stay close for hits |
| Build | Bear | Fury of the Mountain | Fill Rage bar | Use supports for Rage |
| Clear loop | Bear | Use Rampage | Kill packs while moving | Stop when Rage feels low |
| Boss window | Bear | Walking Calamity then Furious Slam | Big burst on target | Add Shockwave Totem before |
| Travel tool | Wolf | Use Pounce | Map movement | Swap back when fight starts |

The Bear Druid in patch 0.4 walks a clear road through Wraeclast, built on Rage control, heavy slams, and steady Armour that holds the line in close combat. From early acts to maps, the loop stays readable – build Rage, move with Rampage, then break enemies during Walking Calamity windows – while Shaman support keeps the engine alive and flexible as balance settles. With simple gear goals, strong talisman scaling, and room to grow into endgame choices, the PoE 2 Bear Druid build guide closes as a solid league start path for players who want weight, rhythm, and control Path of Exile 2 boost.

PoE 2 patch 0.4 Bear Druid guide explains Rage control, slam gameplay, Armour focus, Rampage clear, and Walking Calamity burst from acts into maps.

The goal is a simple Rage loop for campaign and maps, where Bear form builds Rage, then spends Rage on slams, and Armour bases keep you stable in close fights.
Bear form gives direct melee skills with clear timing, and the setup stays focused on Rage plus weapon damage, so the path from early acts into maps stays clean.
Rage is the fuel for speed and damage, so the playstyle revolves around filling Rage with a generator skill, then dumping Rage into Rampage or a slam window.
Rampage turns movement into damage, so you run through packs while slamming, then you refill Rage between pulls, and the map flow stays smooth once Rage uptime feels stable.
Furious Slam is the main Rage dump, and it gives a wide hit that fits packs plus rares, so it becomes the clean button for ending a Rage build phase.
Maul works as the first Rage builder, then Fury of the Mountain becomes the main generator after level 14, and the loop shifts into a steady build and spend rhythm.
Swap after level 14, then press Fury of the Mountain to fill Rage, and keep Maul as a filler button when spacing makes the main generator feel slow.
Volcano stays active and gains value when you slam near it, so you drop it early in the fight, then you stay in Bear form and keep the slam loop going.
Shockwave Totem adds steady pressure during the slam window, so you place it before burst, then you keep slamming while it works beside you.
Walking Calamity is the burst window used on boss phases and tough rares, and it also helps the Rage loop feel smoother during the moment when you commit to damage.
Berserk fits bosses and rares, used in short windows with life leech on rings, so the life drain stays controlled while the Rage scaling damage spike does its job.
Shaman is the start for league progression, because Rage regeneration and max Rage support keep Rampage uptime stable, and spell scaling from Rage helps Volcano stay relevant.
Take Druidic Champion, then Furious Wellspring for the core engine. Later, add Wisdom of the Maji, then Reactive Growth for scaling and comfort.
Oracle becomes a later review choice after the Rage loop feels stable in maps, and after gear starts to carry damage, so burst timing tools gain real value.
A rare two hand talisman drives most damage, and you replace it often while leveling, so weapon upgrades stay a main power source through acts and early mapping.
High physical damage and attack speed matter most, because slam scaling leans on weapon output, and smoother attack speed helps the Rage build phase feel consistent.
Armour stacking from high base rares forms the defense core, then life and resist finish the layer, so melee play stays comfortable during packs and long boss fights.
Gloves and amulet with plus level to melee skills give strong scaling, and the change feels immediate once the gems gain levels, so mid acts become smoother.
Flat physical to attacks and life leech support damage plus sustain, then mana regeneration can help long fights, so you keep slamming without losing the loop.
Polcirkeln supports a cold clear setup with Herald of Ice, so pack kills pop clean with low gear stress, and early maps feel smooth with simple aura support.
Herald of Ash fits a later fire clear plan, paired with Ignite Proliferation, and it lines up with Walking Calamity moments where fire scaling and spread feel natural.
Build Rage with Fury of the Mountain, then use Rampage for clear, and use Furious Slam for cleanup when Rage is high enough to spend.
Place Shockwave Totem, then build Rage, then trigger Walking Calamity, and slam with Furious Slam while the window lasts, with Volcano active near the fight.
Early acts can feel rough when Rage generation feels thin, so weapon upgrades matter, and the Maul into Fury swap helps the loop settle into a steady rhythm.
Ngamahu’s Chosen is a shortcut for instant max Rage in fights, so you start a boss at full power, then spend Rage into burst while the window stays open.

GTA 6, new seasons, major updates — get ready to dominate from day one