
Path of Exile 2 Boosting
PoE 2 Invoker Best Build Guide
PoE 2 0.5 is here. Don't finish the campaign half-naked. Our full checklist covers 24 skill points, 100 spirit, resistances, and every hidden reward w
The PoE 2 campaign hands you 24 passive skill points, 100 spirit, capped elemental resistances, and a free unique item. All of it permanent. Most players skip half of it and then cry about being squishy in the endgame. Shocking.
This is a Path of Exile 2 campaign checklist: not a love letter to game design. Every table contains only what's worth your time. The rest is filler GGG expects you to run through anyway. Patch 0.5 (Return of the Ancients) streamlined Acts 1–3 so the excuse "it takes too long" no longer applies. Congratulations, you are out of excuses.
One clarification on priority: PoE 2 spirit farming should come first for aura-heavy and minion builds. A single passive skill point early can open a keystone that multiplies everything else: more valuable than any rare weapon you'll find at level 40. Act order does not change; reward priority does.
+4 Skill Points +30 Spirit +10% Cold Res +20 Max Life
Act 1 is the tutorial nobody asked for. The permanent rewards are modest: cold resistance, a lump of life, your first spirit chunk: but missing the skill points here means you start Act 2 already behind. Everything below is mandatory unless it says optional.
The Gembloom Skull from The King In The Mist grants +30 Spirit AND creates an Uncut Spirit Gem L4. Consume it. Do not sell it. Do not stare at it.
|
Zone |
Condition |
Reward |
|
Clearfell |
Kill Beira of the Rotten Pack |
+10% Cold Resistance |
|
Hunting Grounds |
Kill Cowbell |
+2 Skill Points |
|
Freythorn |
Kill The King In The Mist |
+30 Spirit |
|
Ogham Farmlands |
Find Una's Lute & deliver it |
+2 Skill Points |
|
Ogham Village |
Find Smithing Tools & deliver |
Salvaging Bench Unlock |
|
Ogham Manor |
Kill Candlemass, The Living Rite |
+20 Maximum Life |
+4 Skill Points +10% Lightning Res +1 Charm Slot (Swappable)
Act 2 is where the PoE 2 charm slot unlock lives, tucked behind a relic delivery quest that requires you to pick up an item from snakes and another from hyenas. Not simultaneously. Separately. In different zones. Classic design.
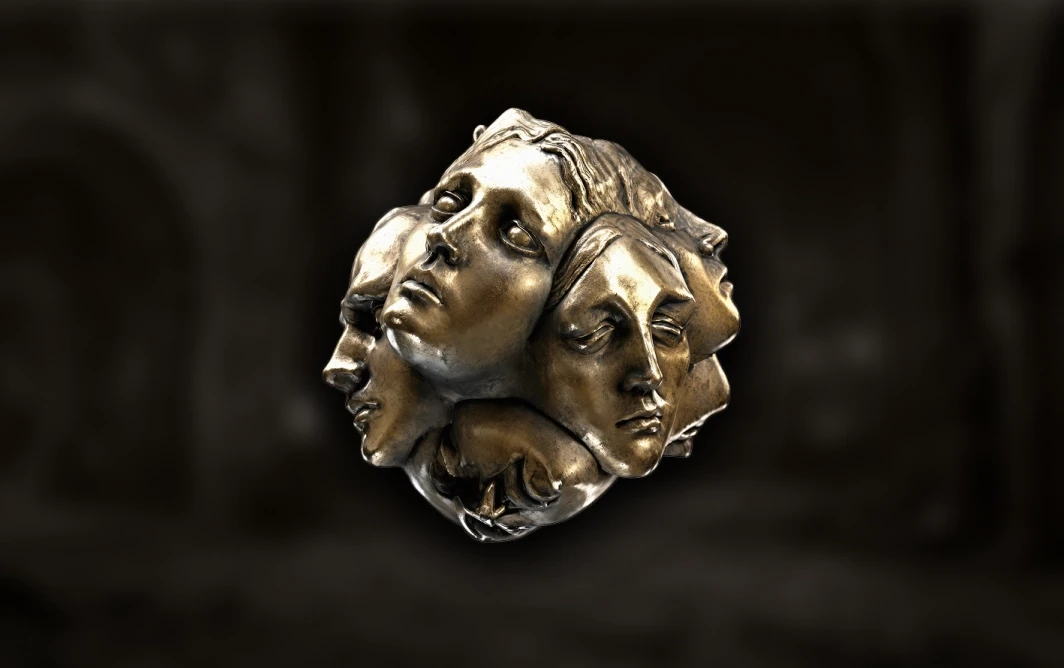
The relic mechanic: collect the Kabal Clan Relic (dropped by hyenas in Keth) and the Sun Clan Relic (dropped by snakes in Bone Pits). Deliver both to the Valley of the Titans altar. The charm slot bonus: 30% Charm Charges gained or extended Charm Effect Duration: is swappable at any time. Pick whichever your build wants right now.
The Sisters of Garukhan Shrine in Spires of Deshar awards +10% Lightning Resistance. You do not need to kill anything. Just run to it and interact. Yes, really.



|
Zone |
Condition |
Reward |
|
Keth |
Kill Kabala, Constrictor Queen |
+2 Skill Points |
|
Valley of the Titans |
Deliver both relics to altar |
+1 Charm Slot (choice, swappable) |
|
Deshar |
Find corpse with Final Letter & deliver to Shambrin |
+2 Skill Points |
|
Spires of Deshar |
Interact with Sisters of Garukhan Shrine |
+10% Lightning Resistance |
|
Zone |
Condition |
Reward |
|
Traitor's Passage |
Find and loot the Bellchest |
Uncut Skill Gem L6 |
|
Traitor's Passage |
Kill Balbala |
Level 22 Barya |
|
Buried Shrines |
Loot elemental shrine chest |
Elemental Ring + matching Rune (Ruby/Topaz/Sapphire) |
|
Valley of the Titans |
Clear zone: guaranteed Abyss spawn |
EXP + Rare Loot |
|
Deshar |
Kill the Watchful Twins |
Level 28 Barya + Rare Loot |
+4 Skill Points +30 Spirit +10% Fire Res Utility Choice (Permanent) Reforging Bench
Act 3 contains the most impactful permanent choice in the entire campaign: a stat from Venom Crypts that cannot be changed. The three options are +25% Stun Threshold, +30% Elemental Ailment Threshold, or +25% Mana Regeneration. Your build determines this. Mana Regen is good for casters. Ailment Threshold keeps you standing longer against anything with a status effect. Stun Threshold is relevant versus hard-hitting single targets. Pick wrong and live with it.
Spirit farming note: Ignagduk the Bog Witch in Azak Bog hands over another +30 Spirit. This brings your running total to 60. You will hit 100 in Interlude 2. The Azak Bog Flame Ritual is also the best XP spot in the game until level 34: kill the rares, reset at checkpoint, repeat until you stop dying to everything.
|
Zone |
Condition |
Reward |
|
Jungle Ruins |
Kill Mighty Silverfist |
+2 Skill Points |
|
Azak Bog |
Kill Ignagduk, The Bog Witch |
+30 Spirit + Uncut Spirit Gem |
|
Venom Crypts |
Find corpse, pick up Venom Vial, deliver to Servi |
PERMANENT CHOICE: 25% Stun Threshold / 30% Ailment Threshold / 25% Mana Regen |
|
Jinquani's Machinarium |
Kill Blackjaw, The Remnant |
+10% Fire Resistance |
|
Molten Vault |
Kill Mektul, talk to Oswald in camp |
Reforging Bench Unlock |
|
Aggorat / Utzaal |
Get Sacrificial Heart drop, offer at altar |
+2 Skill Points |
Blackjaw requires a Lesser Soul Core to unlock the area. Do not spend 20 minutes wondering where the door went.
|
Zone |
Condition |
Reward |
|
Sandswept Marsh |
Kill Rootridge |
Uncut Skill Gem L9 |
|
Sandswept Marsh |
Find and loot Orok Campfire |
Lesser Jeweller's Orb |
|
Jungle Ruins |
Find hidden camp with Trader |
High-quality gear + Rare Gloves + guaranteed beast spawns |
|
Infested Barrens |
Find hidden camp with Trader |
High-quality gear + Rare Boots + guaranteed beast spawns |
+4 Skill Points +5% Max Mana Attribute or Resist Choice Flask Recovery Choice
Act 4 delivers the Halls of the Dead trials: three separate encounters that each grant a choice between +5 to an attribute or +5% to a matching elemental resistance. These are permanent and non-swappable. Pick the one your build needs. Str/Fire Res for melee. Int/Cold Res for casters. Dex/Lightning Res for everything that moves fast and hits faster.
The Abandoned Prison is a separate swappable choice: +30% Mana Recovery or +30% Life Recovery from flasks. Change it whenever your flask setup changes. There is no penalty.
One that costs nothing: find the Silent Hall in Eye of Hinekora and press interact. +5% Maximum Mana, permanent, zero combat required. The most effortless stat upgrade in the game. The quest log even calls it "Pay Your Respects." Act accordingly.
|
Zone |
Condition |
Reward |
|
Journey's End |
Kill Omniphobia, Fear Manifest (complete Dark Mists first) |
+2 Skill Points |
|
Eye of Hinekora: The Silent Hall |
Interact (no combat) |
+5% Maximum Mana |
|
Halls of the Dead |
Complete all 3 Trials |
PERMANENT CHOICE per trial: +5 Dex or +5 Lightning / +5 Int or +5 Cold / +5 Str or +5 Fire |
|
Trail of the Ancestors |
Kill Yama The White |
+2 Skill Points |
|
Abandoned Prison |
Find Goddess of Justice |
SWAPPABLE: +30% Mana or +30% Life Recovery from Flasks |
|
Zone |
Condition |
Reward |
|
Isle of Kin |
Loot outer wall interactable |
Lesser Jeweller's Orb |
|
Isle of Kin |
Kill Blind Beast |
Greater Rune |
|
Isle of Kin: Volcanic Warrens |
Kill Fire or Lightning Golem (last kill determines drop) |
Weighted Topaz or Ruby Ring: nearly guaranteed upgrade |
|
Whakapanu Island: Singing Caverns |
Find Beckoning Clam for pearl, exchange in town |
All-Resistance Amulet |
|
Arastas |
Find and interact with 2 Bells |
Bell 1: 3 Exalts / Bell 2: 3 Regals |
1 The Stolen Barya
(Hardest. Gets worse at higher level.)
2 Doryani's Contingency
(+40 Spirit. Do this early if you need it.)
3 The Curse of Holten
(Easiest. Nothing special. Just finish it.)
After completing all three, return to The Hooded One in Kingsmarch. This grants the final +2 Skill Points, bringing the total to 24. If your count is off, retrace each act for any missed boss. The map marks permanent-buff bosses with a skull icon bearing a small plus sign. Hard to miss if you are paying attention.
+2 Skill Points +5% Max Life 7 Boons Choice (Swappable)
The Seven Pillars in Qimah: also known as Orbala's 7 Boons: is the most elaborate swappable mechanic in the campaign. The pillars sit near a niche along the outer edge of the map, easily missed when rushing. The bonuses: +5 All Attributes, +5% All Elemental Resistances, +12% Cooldown Recovery Rate, +3% Movement Speed, +20% Presence Area of Effect, +15% Global Defences. The seventh option gives +5% EXP gain but inverts all other bonuses and cuts attributes by 5. Avoid the EXP option unless you enjoy suffering for marginal gains. You can return to swap at any time.
|
Zone |
Condition |
Reward |
|
The Khari Crossing |
Kill Akthi and Anundr, speak to Risu |
+2 Skill Points |
|
Khari Crossing: Skullmaw Stairway |
Use Molten One's Gift at Molten Shrine |
+5% Maximum Life |
|
Qimah: Seven Pillars |
Interact with any of the 7 pillars |
SWAPPABLE: Choose one boon (see above) |
+2 Skill Points +40 Spirit (Total: 100)Free Unique Item
This is the interlude that completes your PoE 2 spirit farming quota. Lythara, The Wayward Spear drops the final +40 Spirit, bringing the campaign total to 100. Elder Madox in Kriar Peaks hands you a free unique item of your choice: one choice, permanent. Look up which uniques are on offer before you commit. Treat it seriously. Abominable Yeti in Howling Caves closes out the skill points here.
|
Zone |
Condition |
Reward |
|
Kriar Village |
Kill Lythara, The Wayward Spear |
+40 Spirit |
|
Howling Caves |
Kill The Abominable Yeti |
+2 Skill Points |
|
Kriar Peaks |
Talk to Elder Madox |
Free Unique Item (one-time pick) |
+2 Skill Points
The shortest interlude with the least interesting rewards. Kill Oswin, The Dread Warden. Collect skill points. The merchant in Holten trades Greater Runes for gold: worth a stop if you need specific runes for PoE 2 Verisium Runeforging, the new crafting layer introduced in patch 0.5. Otherwise, keep moving.
|
Zone |
Condition |
Reward |
|
Wolvenhold |
Kill Oswin, The Dread Warden |
+2 Skill Points |
|
Holten |
Interact with Soul of the Ferryman |
Greater Runes for Gold (tradeable) |

PoE 2 0.5 is here. Don't finish the campaign half-naked. Our full checklist covers 24 skill points, 100 spirit, resistances, and every hidden reward w
PoE 2 0.5 is here. Don't finish the campaign half-naked. Our full checklist covers 24 skill points, 100 spirit, resistances, and every hidden reward w

PoE 2 0.5 is here. Don't finish the campaign half-naked. Our full checklist covers 24 skill points, 100 spirit, resistances, and every hidden reward w

Yes. All zones remain accessible. Return anytime. No excuses.
+5% All Resistances for survival. +12% Cooldown Recovery for skill-spammers. Skip the EXP boon entirely.
Acts 1–3 were streamlined, monster density cut in Interludes, navigation cues improved. Verisium Runeforging added via new NPC Farrow.
Check the map for skull-plus icons. Most likely Omniphobia, Yama, or the Sacrificial Heart in Utzaal.
Yes. Research the available items before accepting. The choice is permanent and level-relevant.

GTA 6, new seasons, major updates — get ready to dominate from day one